

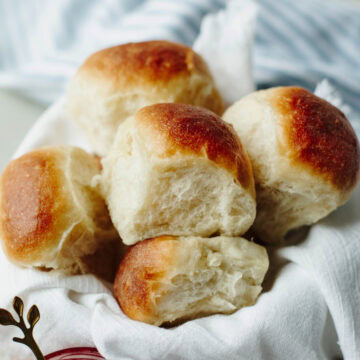
These Buttery Bread Machine Rolls are soft, fluffy, and easy to make using the dough cycle on your bread machine. These homemade bread machine dinner rolls have a buttery, golden brown top and taste similar to the famous Texas Roadhouse rolls!
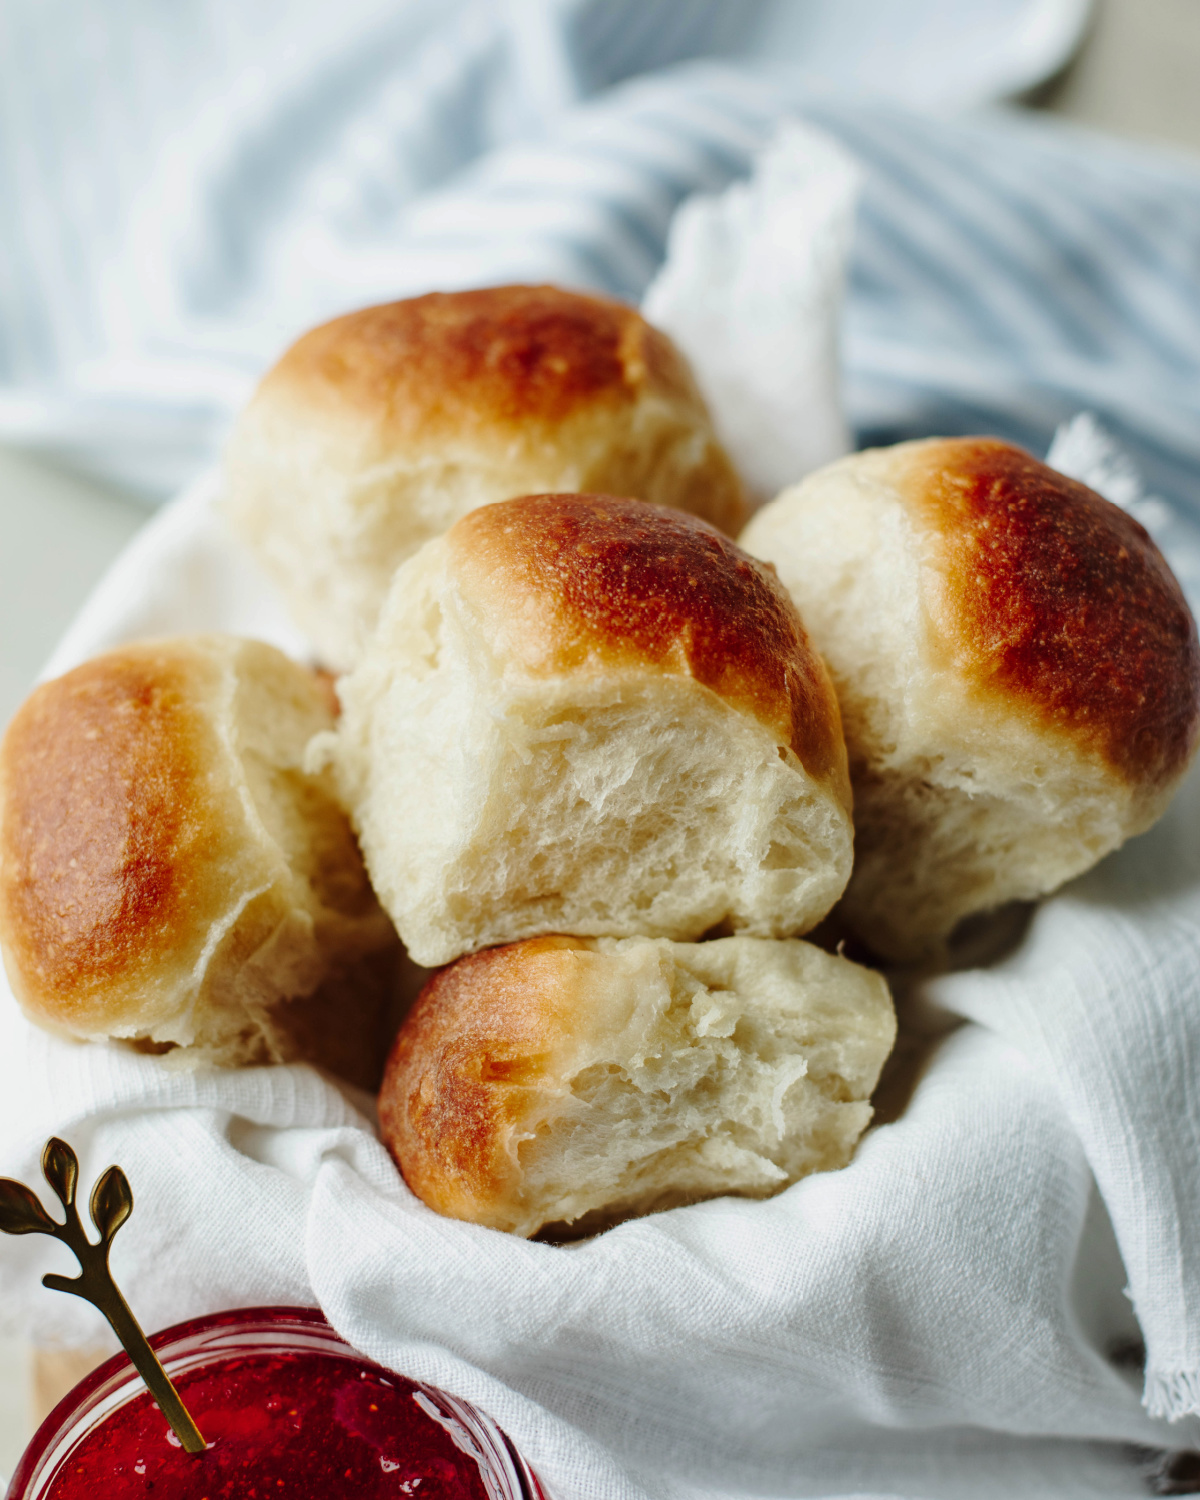
If you've ever been to Texas Roadhouse, you probably know how hard it is to resist the basket of warm rolls and cinnamon butter they bring to the table. These homemade rolls have that same soft, fluffy texture and slightly sweet, buttery flavor we love. If you’re a fan of their menu, be sure to try my Texas Roadhouse Loaded Sweet Potatoes too!
When I first started making dinner rolls in the bread machine, I wasn't actually trying to create a copycat Texas Roadhouse roll. I simply wanted an easy dinner roll recipe my family would love. After the first batch came out of the oven, I knew I had a winner! They quickly became a family favorite, and no tweaking or experimenting was needed.
Quick Look: Buttery Bread Machine Dinner Rolls
These bread machine dinner rolls are made using the dough cycle, so the bread machine does most of the work for you! Once the dough is ready, simply shape the rolls, let them rise, and bake in the oven until soft, fluffy, and golden brown.
- Prep Time: 45 minutes
- Rise Time: 45 minutes
- Bake Time: 16-18 minutes
- Total Time: 1 hour 48 minutes
- Yield: 20 dinner rolls
- Method: Bread machine dough cycle & oven
 Add me as a trusted Google source.
Jump to:
- Quick Look: Buttery Bread Machine Dinner Rolls
- Why these Bread Machine Dinner Rolls are the best
- Ingredient Notes
- How to make Bread Machine Dinner Rolls
- Expert Tips
- Serving Suggestions
- Make Ahead, Storage & Freezing
- Bread Machine Dinner Rolls FAQs
- More Bread Recipes You’ll Love
- Easy Bread Machine Dinner Rolls
Why these Bread Machine Dinner Rolls are the best
Once you see how easy these rolls are to make, you may never go back to store-bought! Here are a few reasons they're a favorite in my house.
- Easy to make: The bread machine does the mixing, kneading, and first rise for you, making homemade rolls much easier to prepare.
- Soft and fluffy: These rolls bake up light and fluffy on the inside with buttery, golden brown tops.
- Simple ingredients: Made with basic pantry staples, including all-purpose flour, yeast, milk, butter, and an egg.
- Freezer-friendly: Make a batch now and freeze the extras to have homemade dinner rolls ready for another meal.
- Perfect for holidays: Serve them with everyday dinners or add them to your Thanksgiving and Christmas menu.
- More than dinner rolls: Divide the dough into 12 larger dough balls instead of 20 and use them as hamburger buns. They're perfect for serving with my homemade burgers for an easy family dinner.
These turned out amazing! It's not even been a week and I'm already making these again! My new go to! Thanks for sharing!
Ingredient Notes
See the printable recipe card below for exact ingredient amounts and instructions.
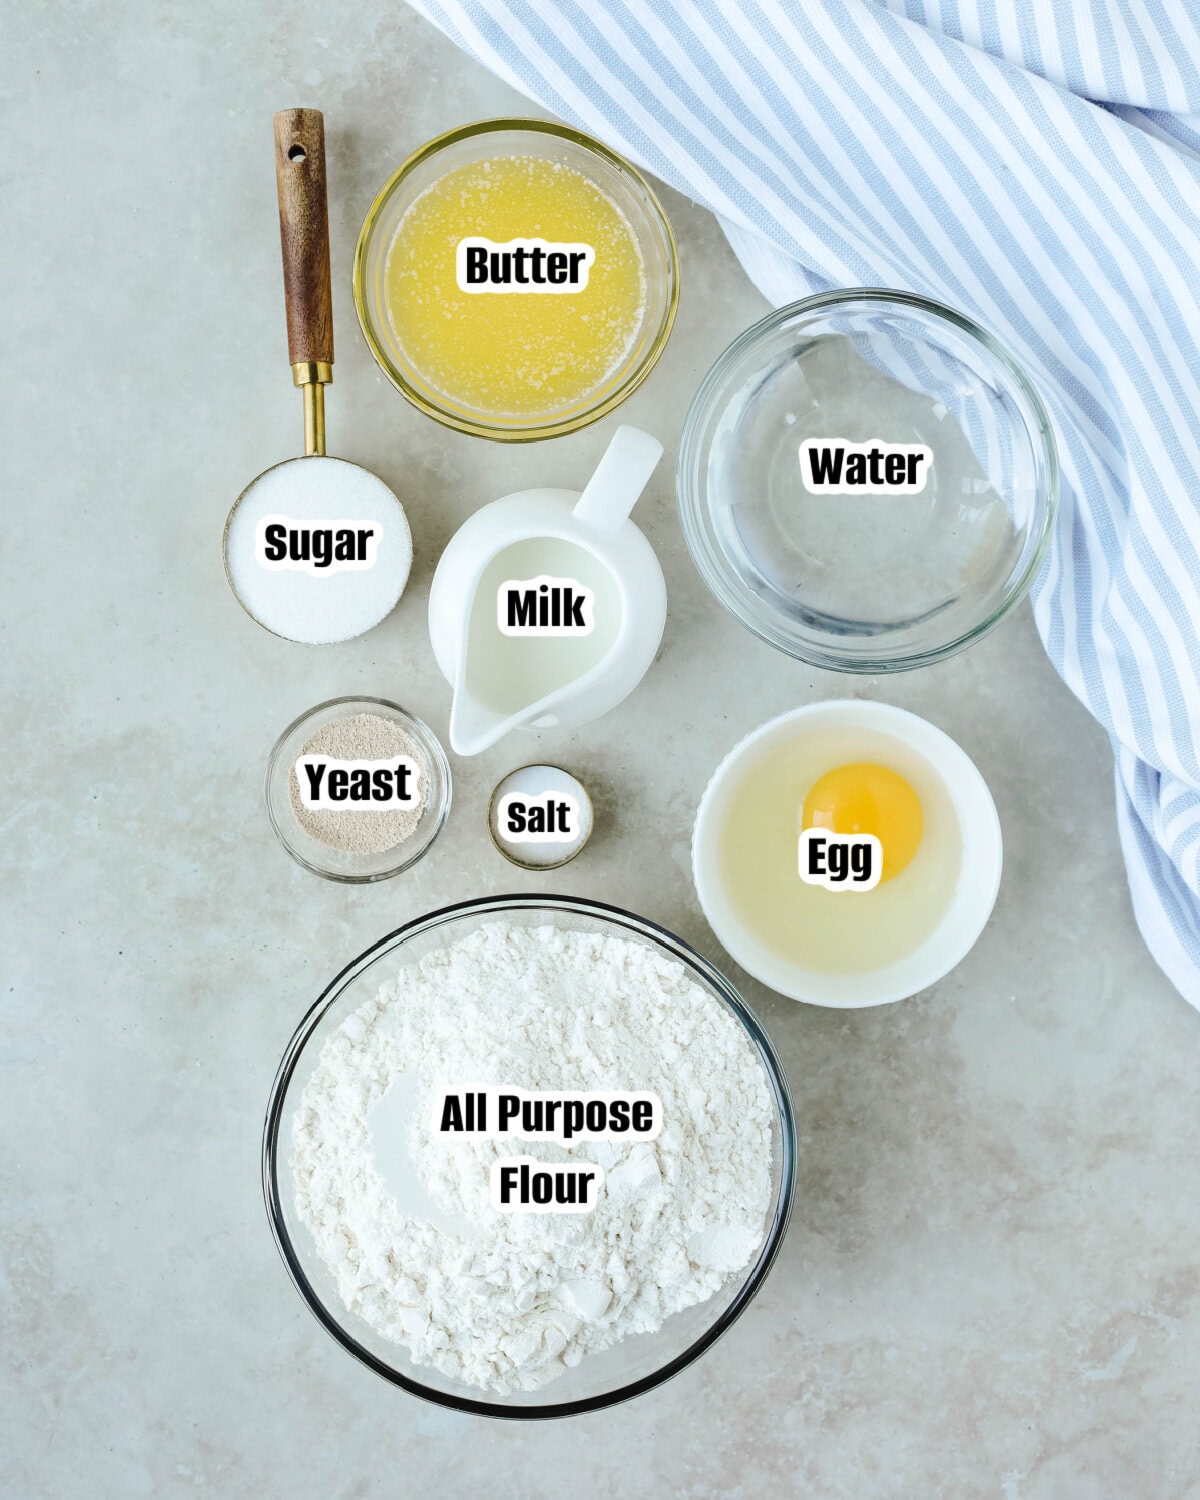
- Water and milk: Both should be warm, but not hot, so the yeast can activate properly. I use regular milk, but whole milk can be used for a slightly richer roll.
- Butter: Use unsalted butter and melt it before adding it to the bread machine. You'll also need additional melted butter for brushing over the rolls before and after baking.
- Flour: All-purpose flour works great in this bread machine rolls recipe and keeps the rolls soft and fluffy. Bread flour can also be used and will give the rolls a slightly chewier texture.
- Yeast: Bread machine yeast works best for this recipe and can be added directly to the bread pan without proofing first. Be sure your yeast is fresh for the best rise.
Variations & Substitutions
- Make hamburger buns: Divide the dough into 12 larger dough balls instead of 20 and shape into buns. Keep an eye on them while baking since the larger size may need a little extra time.
- Add a topping: Sprinkle the tops with garlic salt, herbs, or a little Parmesan cheese before baking for an easy flavor change.
- No bread machine? You can prepare the dough using a stand mixer with a dough hook or knead it by hand. Let the dough rise before shaping, then continue with the recipe as directed.
How to make Bread Machine Dinner Rolls
Making homemade rolls is easy when the bread machine does most of the work! Simply use the dough cycle to mix, knead, and rise the dough, then shape the rolls and bake them in the oven until golden brown.
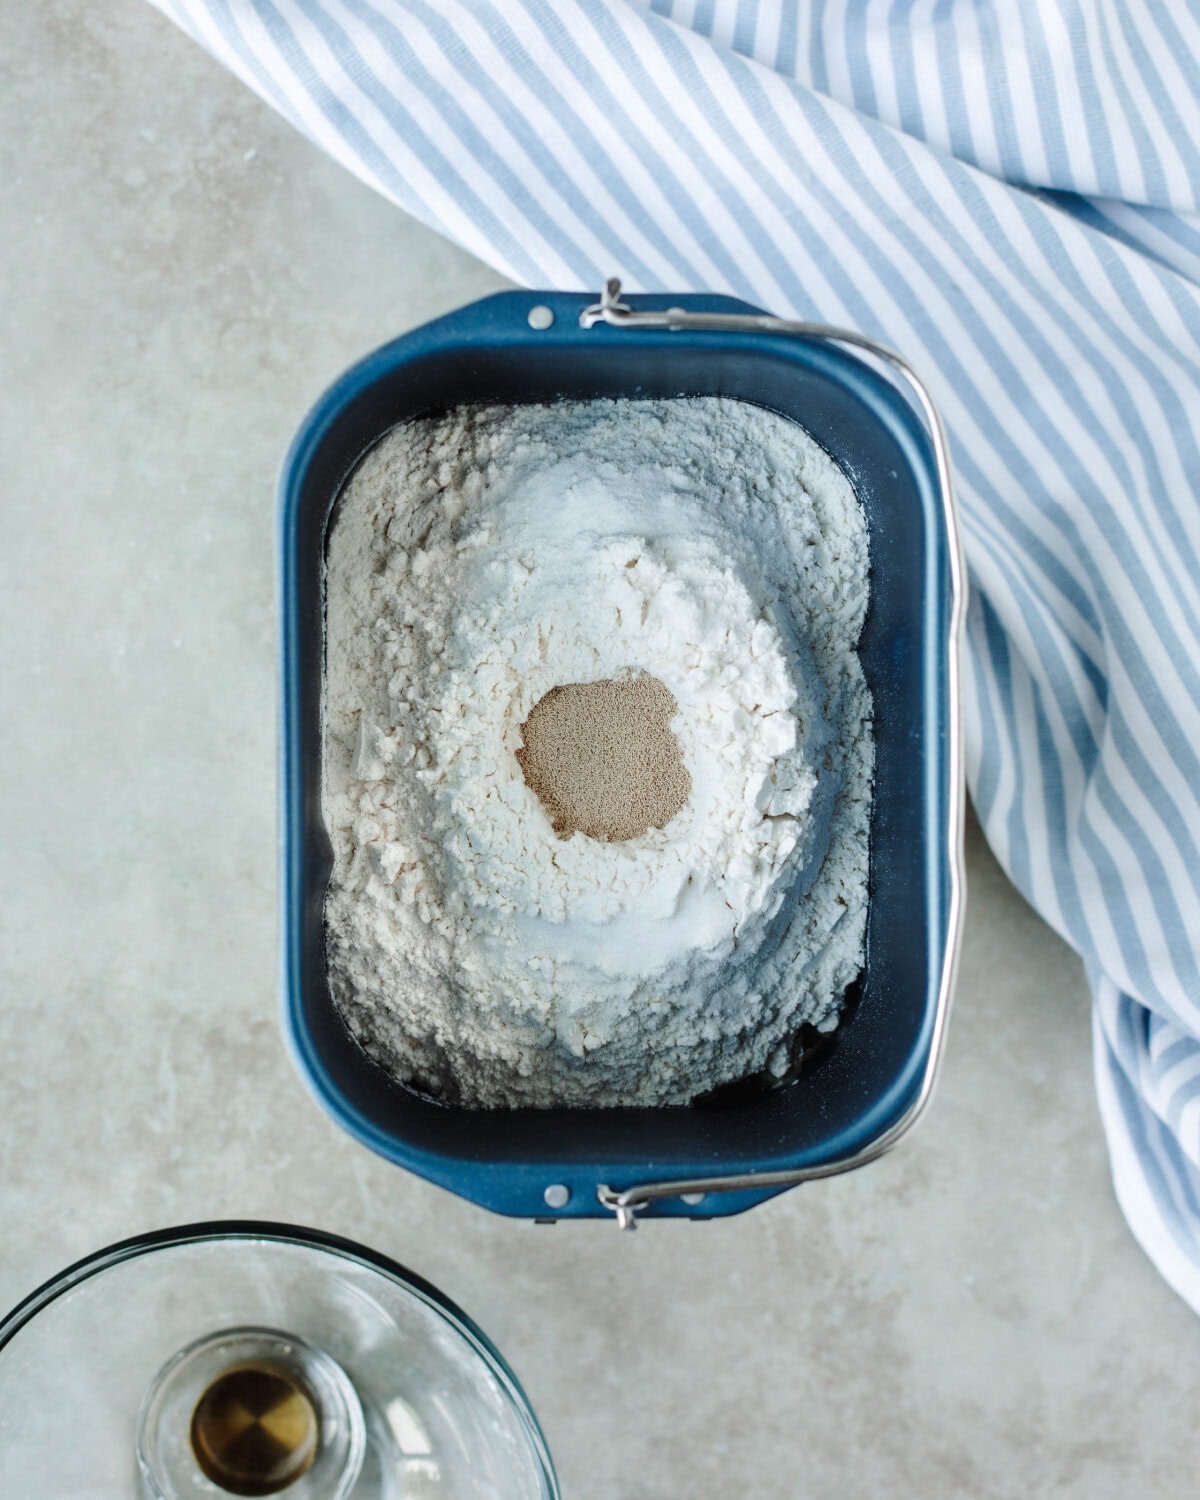
Step 1. Add ingredients to the bread machine: Place the ingredients into the bread machine pan in the order listed. Make a small well in the flour for the yeast, keeping it from touching the wet ingredients. Select the dough cycle and press start.
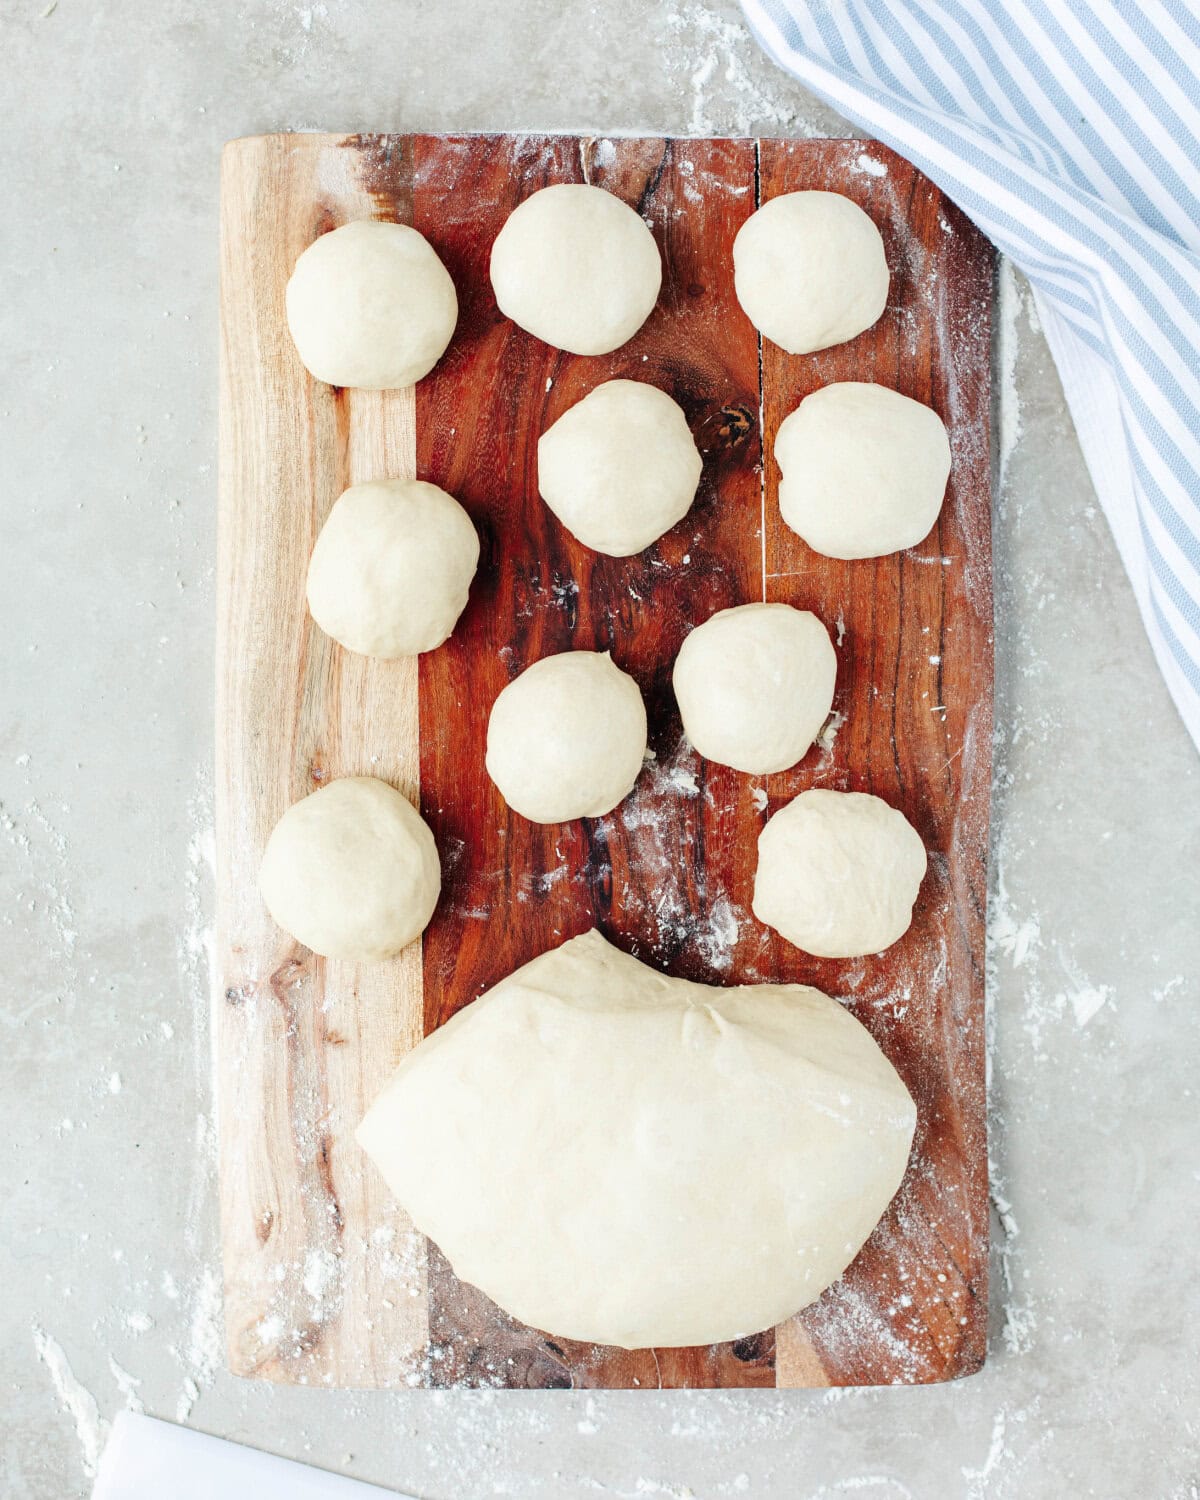
Step 2. Remove the dough: Once the dough cycle is complete, lightly grease a 9×13-inch baking pan with cooking spray. Lightly flour a cutting board or work surface, then remove the dough from the bread machine and place it on the floured surface.
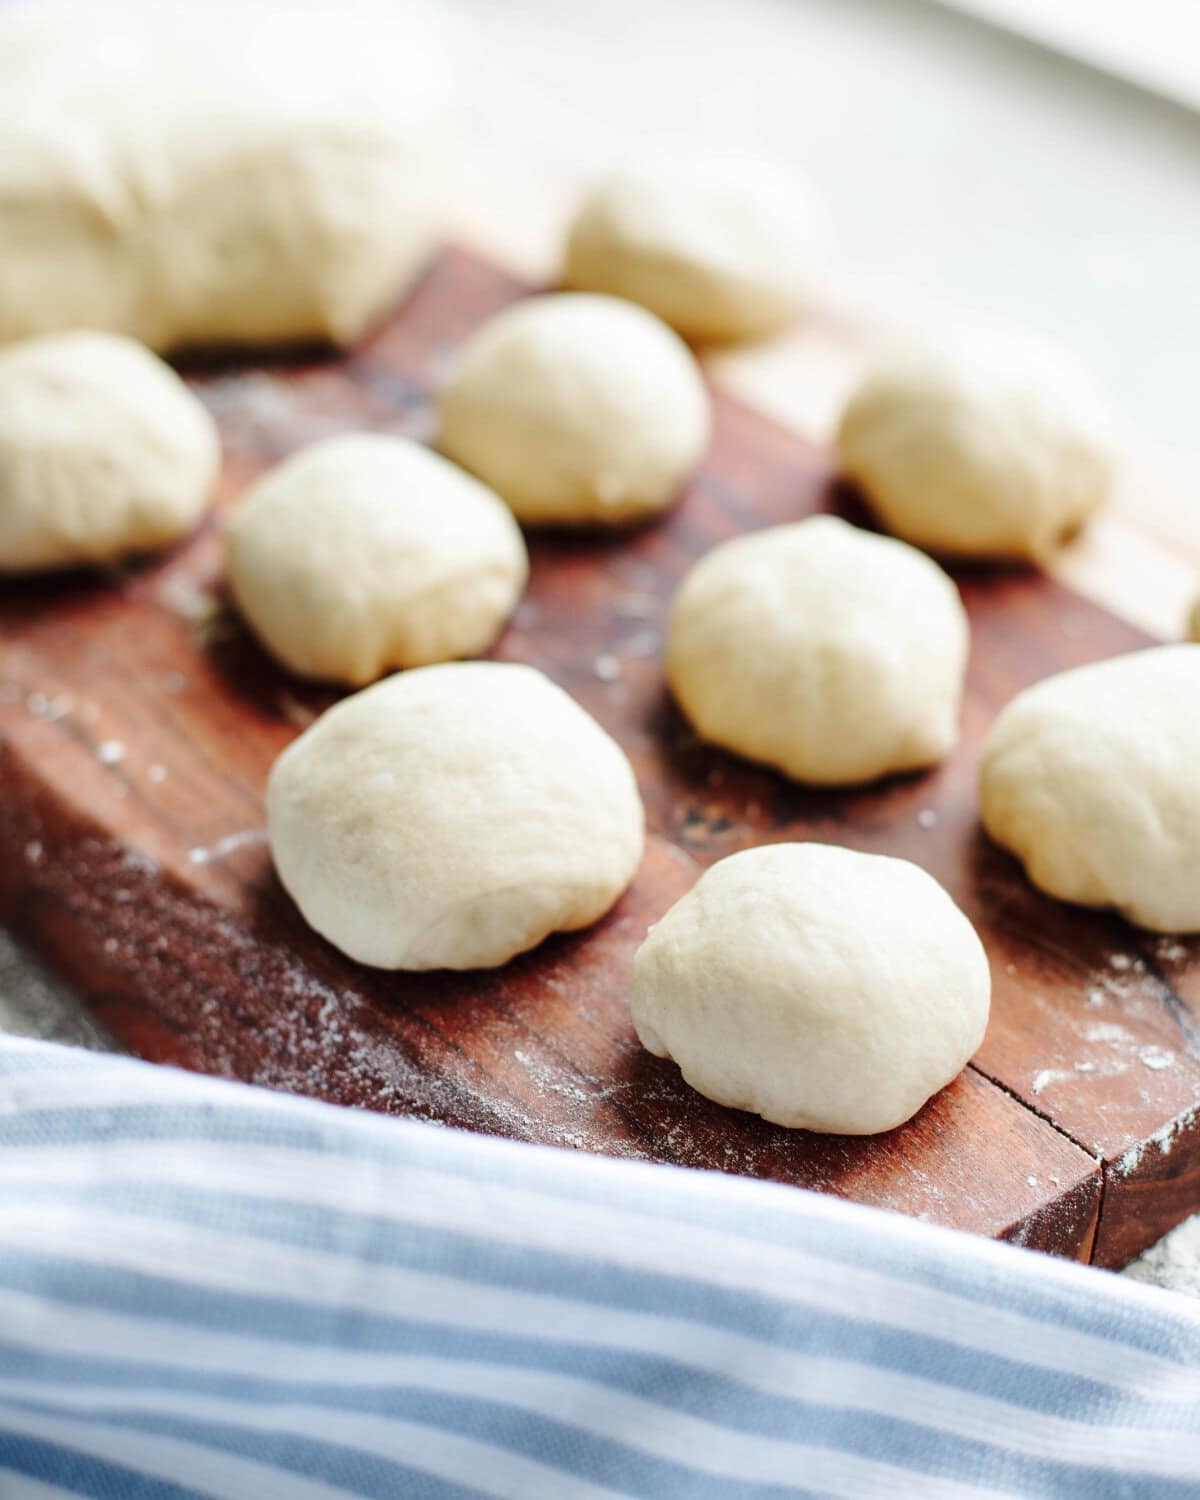
Step 3. Divide the dough: For dinner rolls, divide the dough into 20 equal pieces. If making hamburger buns, divide the dough into 12 larger pieces instead.
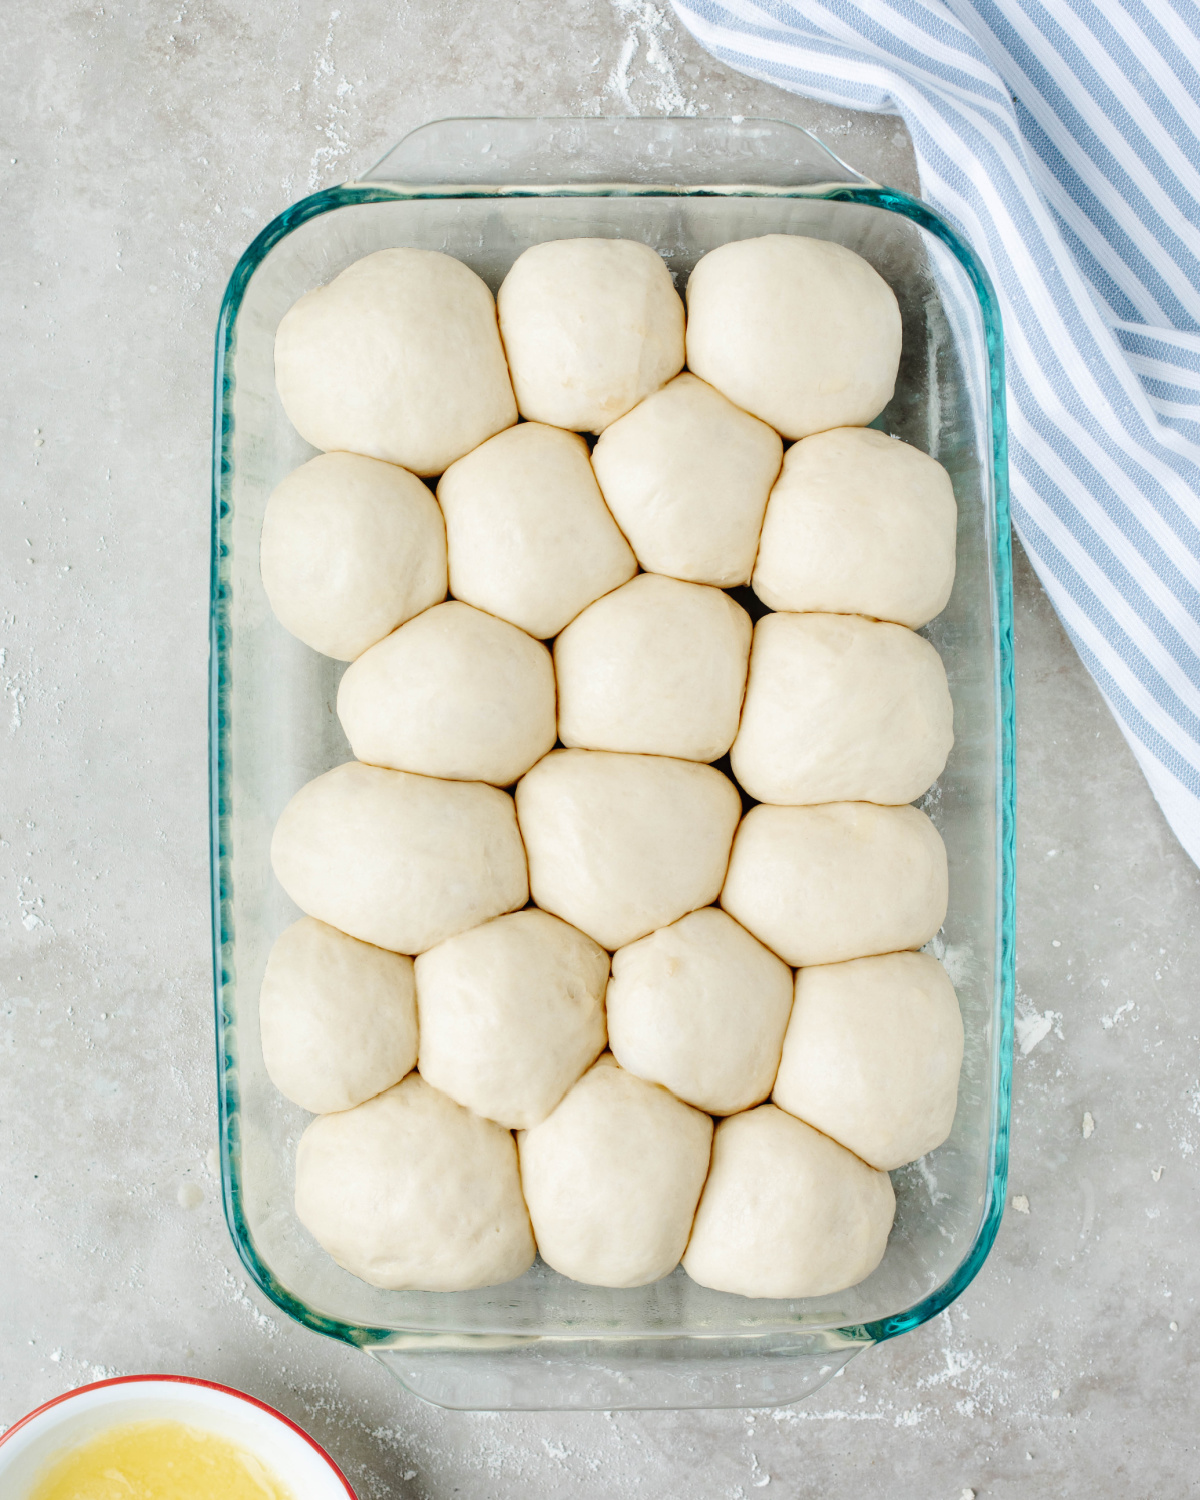
Step 4. Shape the rolls: Roll each piece of dough into a smooth ball using your hands. Place the dough balls seam-side down in the prepared baking pan.
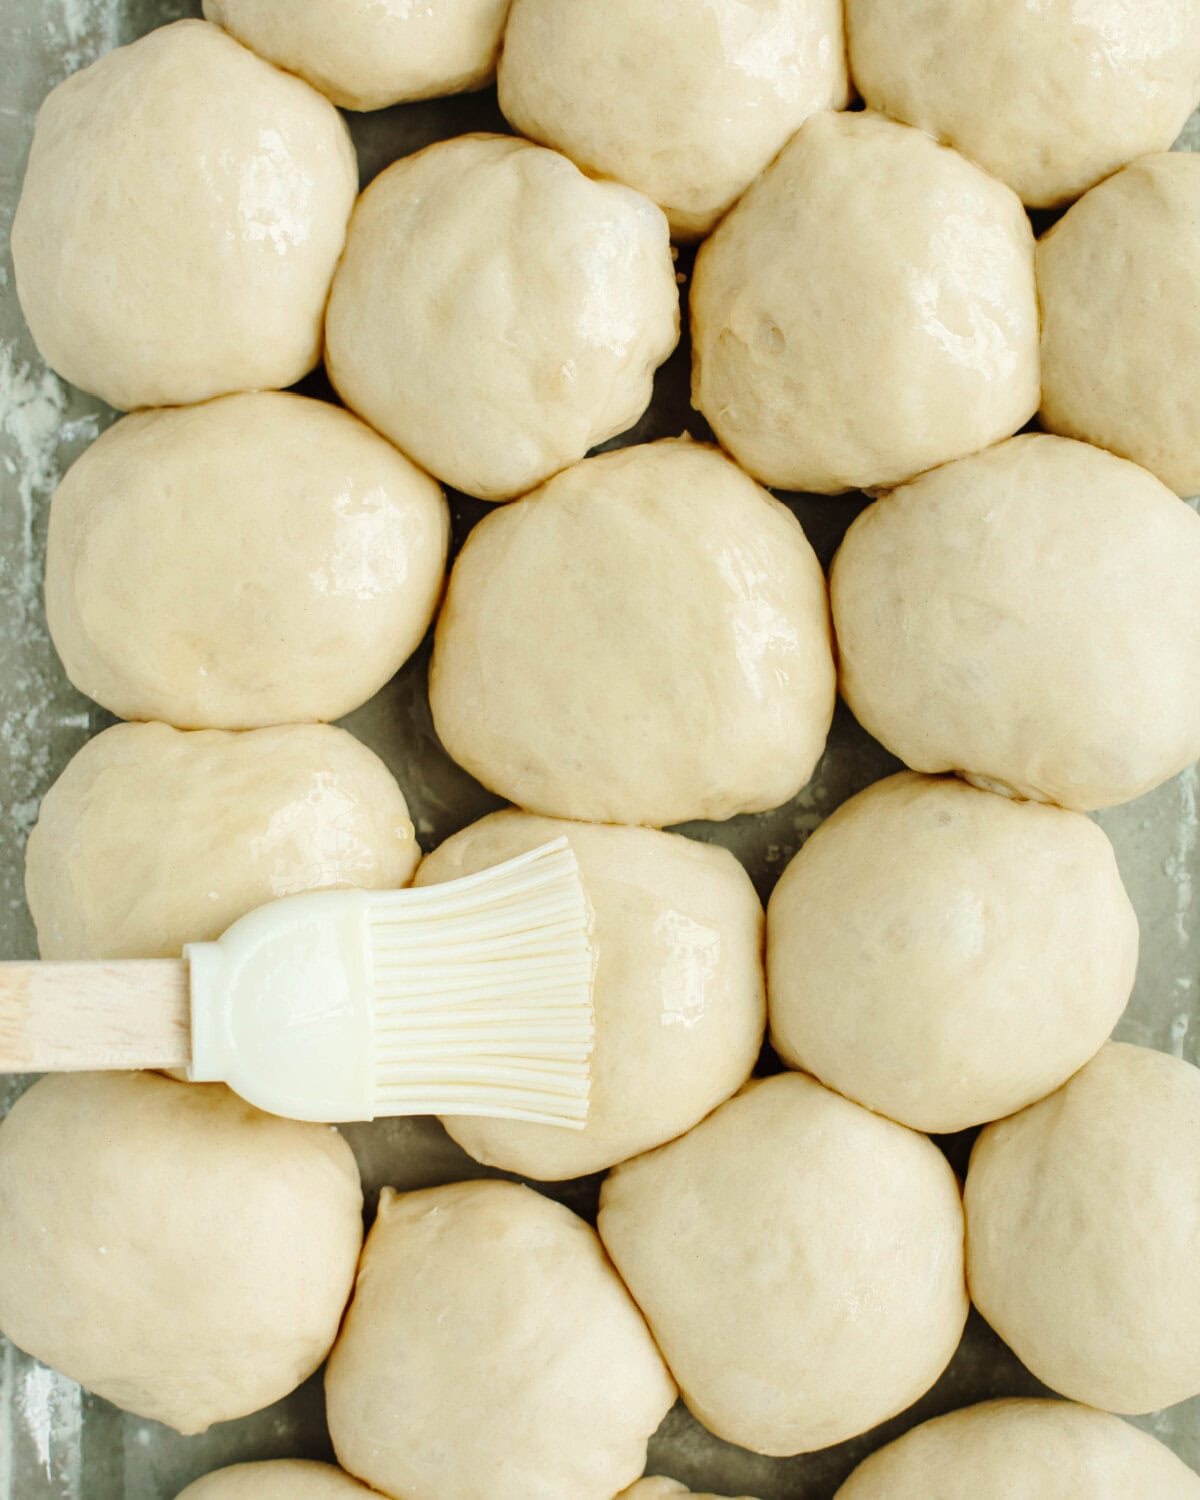
Step 5. Butter and rise: Melt 4 tablespoons of butter and lightly brush half over the tops of the dough balls, reserving the remaining butter for later. Cover the pan and allow the rolls to rise in a warm place for about 45 minutes.
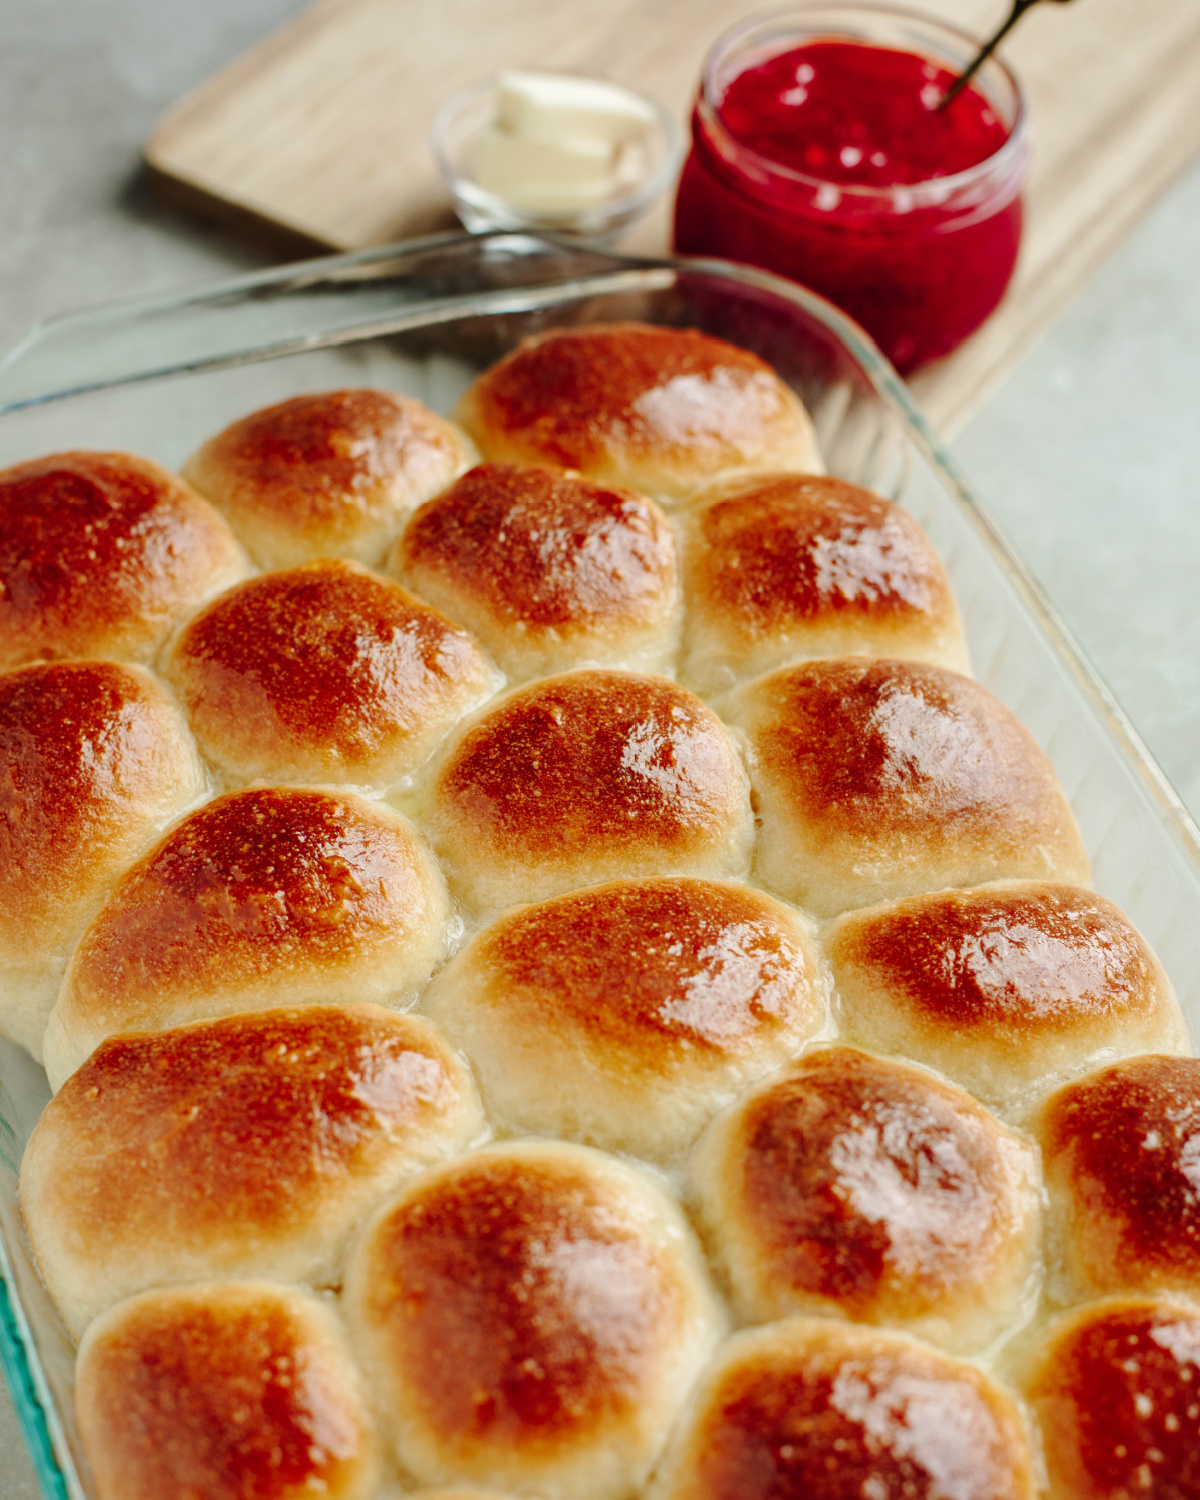
Step 6. Bake and finish: Once the rolls have risen, preheat the oven to 375°F. Bake for 16-18 minutes, or until the tops are lightly golden brown. Remove from the oven and immediately brush with the remaining melted butter. Serve warm and enjoy!
What Bread Machine Cycle Should I Use for Rolls?
Use the dough cycle when making bread machine dinner rolls. This cycle mixes, kneads, and allows the dough to complete its first rise. Once the cycle is finished, remove the dough from the bread machine, shape the rolls, and continue with the recipe as directed.
Expert Tips
- Check your yeast: Fresh yeast is key to soft, fluffy rolls. If your yeast is old or expired, the dough may not rise properly.
- Watch the temperature: Use warm water and milk, not hot. Liquids that are too hot can damage the yeast and prevent a good rise.
- Check the dough: During the dough cycle, the dough should form a soft, smooth ball. If it looks overly sticky, add a little flour; if it seems too dry, add a small amount of water.
- Give them time to rise: After shaping, let the dough balls rise in a warm place for about 45 minutes. If your kitchen is cool, they may need a little longer.
- Avoid overbaking: Bake just until the tops are lightly golden brown, then brush with melted butter as soon as they come out of the oven for that soft, buttery finish.
Serving Suggestions
These bread machine dinner rolls are an easy side for everything from weeknight dinners to Thanksgiving and Christmas meals. Serve them warm with butter, use them to soak up gravy, or pair them with one of these family favorites:
- Chicken and gravy: Serve with Homemade Chicken Gravy for an easy comfort-food combination.
- Soups and stews: These buttery rolls are perfect alongside a bowl of soup, chili, or beef stew.
- Casseroles: Add them to your favorite chicken casserole, beef, or pasta casserole for a complete meal.
- Sloppy Joes: Make the rolls a little larger and use them as hamburger buns for my Easy Homemade Sloppy Joes.
Serve them alongside Mississippi Mud Potatoes for an easy holiday dinner side combination.
Make Ahead, Storage & Freezing
These bread machine dinner rolls are easy to make ahead and store, making them perfect for busy weeknights or holiday meals like Thanksgiving and Christmas.
- Make ahead: Prepare and shape the dough as directed, then place the dough balls in the baking pan and cover tightly with plastic wrap. Refrigerate overnight instead of letting them rise in a warm place. Remove from the fridge 1-2 hours before baking to allow the rolls to finish rising, then bake as directed.
- Storage: Store leftover baked rolls in an airtight container or sealed bag at room temperature for up to 3 days. Warm individual rolls in the microwave for a few seconds before serving to bring back that soft, fluffy texture.
- Freezing: Freeze baked rolls in a freezer bag for up to 3 months. You can also freeze the shaped, unbaked dough balls for up to 30 days. Thaw unbaked rolls in the fridge overnight, then allow them to rise at room temperature before baking as directed.
Bread Machine Dinner Rolls FAQs
Yes, but only if your bread machine has the capacity to handle a double batch of dough. Bread dough expands quite a bit as it rises, so check your machine's maximum flour or dough capacity first. If you're unsure, it's best to make two separate batches.
Yes. Instead of placing the shaped rolls in a 9×13-inch pan, arrange them on a greased or parchment-lined baking sheet with space between each roll. They will bake more individually rather than touching and will have more golden brown edges.
More Bread Recipes You’ll Love

Tried this recipe? Leave a ⭐⭐⭐⭐⭐ rating and let me know what you think in the comments! You can also follow me on Pinterest for even more easy, family-friendly recipes.
Want to save this recipe?
Enter your email & I’ll send it to your inbox. Plus, get great new recipes from me every week!
Easy Bread Machine Dinner Rolls
Equipment
Ingredients
- ½ cup warm water
- ½ cup warm milk
- ⅓ cup unsalted butter melted
- ⅓ cup granulated sugar
- 1 large egg
- 3 ¾ cups all-purpose flour
- 1 teaspoon salt
- 2 ¼ teaspoon bread machine yeast (1 packet)
- 4 tablespoon unsalted butter melted, for brushing
Instructions
- Add the water, milk, ⅓ cup melted butter, sugar, egg, flour, salt, and yeast to the bread machine pan in the order listed. Make a small well in the flour for the yeast, keeping it from touching the wet ingredients.
- Select the dough cycle and press start.
- Once the dough cycle is complete, lightly grease a 9×13-inch baking pan. Lightly flour a cutting board or work surface and remove the dough from the bread machine.
- Divide the dough into 20 equal pieces for dinner rolls or 12 larger pieces for hamburger buns.
- Roll each piece into a smooth dough ball and place seam-side down in the prepared baking pan.
- Brush the tops with half of the 4 tablespoons melted butter, reserving the rest. Cover and allow the rolls to rise in a warm place for about 45 minutes.
- Preheat the oven to 375°F. Bake for 16-18 minutes, or until lightly golden brown. Remove from the oven and immediately brush with the remaining melted butter. Serve warm and enjoy!
Notes
- Bread flour can be substituted for all-purpose flour for a slightly chewier texture.
- Bread machine brands vary, so check your manufacturer’s instructions for the recommended ingredient order and dough cycle.
- The dough should form a soft, smooth ball during the dough cycle. If it is overly sticky, add a small amount of flour; if it seems too dry, add a small amount of water.
- Rise time can vary depending on the temperature of your kitchen. The shaped rolls may need a little longer than 45 minutes in a cooler room.
- For the softest rolls, avoid overbaking and brush with melted butter as soon as they come out of the oven.
Nutrition
Jen says
I had made rolls the day before Christmas, but didn’t like how they turned out. I found your recipe in the morning and made them. Quick, easy and delicious! Results were as pictured. I would have taken my own picture but they disappeared. This will be our family’s go to recipe! Thank you
Kristin says
Yay!! Love hearing this! So glad you all enjoyed and hope you have a great New Year!!
Judy says
I made these tonight for our weekly family dinner. My 5 year old granddaughter helped me. They turned out really good. Golden brown and soft on inside. Everyone loved them. This recipe is a keeper for sure.
Kristin says
Yay!! Love hearing that! So glad you enjoyed, these rolls remind me of Texas Roadhouse!!
Aya says
This is definitely my go-to bread roll recipe. I do have a few subs: I use bread flour, coconut sugar, and pink salt. They turn out fantastic every time!
Kristin says
Yay!! Love hearing that!! I love how similar they are to Texas Roadhouse Rolls!!
Sara says
I’m hoping I can use bread flour. Because that’s what I have for my bread machine. I don’t have enough all purpose. I’m going to try to make my cheesy ranch rolls with this recipe for Thanksgiving. I usually use Rhodes dinner rolls for that recipe. But I want to make them from scratch this time.
Kristin says
Yes, bread flour should work in this recipe as well! Keep me posted what you think and hope you had a wonderful Thanksgiving!
Debbie says
I’ve made these before and they are fantastic!! Can I make these 2 days before I’m ready to bake them? Making them for Thanksgiving Dinner and won’t have time to make on the day before Thanksgiving.
Kristin says
Sorry for the delayed response, you can make these and bake them up to 3 days beforehand and simply place in the oven to reheat when ready! Hope you had a wonderful Thanksgiving!
Gill says
These are the best rolls (and only) rolls I’ve ever made! I was nervous to use my bread machine for the dough but I’m never going back!
Kristin says
Yay!! Love hearing this! They are a fav in my house!
Megan says
Have you ever prepared the rolls, let them rise and then waited to bake them till later(couple of hours later)? Will that work? Do they need to be refrigerated if so?
Kristin says
I personally haven’t tried that, but I do know others that have. It works good, just keep an eye on the rise and if they get too big, place in refrigerator until ready to bake.
Dacia says
When you talk about freezing these, do you mean freezing after baking or freezing when they’re in dough form (before the 2nd rise)?
Kristin says
Great question! Both ways work great! I tend to freeze after baking them so I simply thaw and reheat a bit, however, if you would like to freeze the dough before the 2nd rise, that works great too!
Val says
Hi, found your recipe, can’t wait to try it, do you use quick yeast or traditional? And all purpose flour?
Kristin says
Hi! I use all purpose flour in this recipe and as for yeast, I use the quick yeast! Hope you enjoy!
Holly says
Made these today as I was looking online for a self-raising flour bread maker recipe, and they came out exactly like the picture: soft, buttery, fluffy. I baked mine in a round ceramic dish too and the effect was beautiful on the table to pull apart. Great bread maker recipe, thank you.
Take care,
Holly, Australia.
Kristin says
Yea! Glad you enjoyed these!! I just made a batch last week for the first time in a few years and was reminded just how tasty these are!!
Tim says
What type of flour do you use in this recipe?
Kristin says
I used all purpose flour. That’s my go to flour 😉
Enjoy!!
brenda says
do you use plain flour not bread machine flour
Kristin says
Yes, I use self rise flour, not bread machine flour. Enjoy!!
Pixybrat says
Hi Kristin,
I’m September(2016) you comment that you use self rising flour and in October(2016) you comment that you use All purpose flour. The recipe said all purpose so I’m going to try that but can you clarify which one is best?
Kristin says
Sorry for the confusion, I tend to use all purpose flour as it is what I always have on hand and works great! Hope you enjoy!
Elaine Coleman says
What do you do if you don’t have a bread machine?
Kristin says
You can make the dough by hand, use the same directions, but instead of following the “dough cycle” steps, combine the ingredients and knead by hand, etc. I haven’t done it that way before because I use my bread machine, but I do know a few people have made it by hand. Let me know if you try it and how they turn out!! Enjoy!
Susan the Farm Quilter says
These look so good I want to lick my computer screen!!!
Kristin says
Hehe, they just amazing! Just thinking about them, makes me want to go pull some out of my freezer haha!!
JoNell Sells says
Can thesebuttery Bread Machine Rolls be made without using a Bread Machine? I love to bake but do not have a machine. Thanks, JoNell Sells
Kristin says
Hmmmmm, I am sure that would work just as well. You would just skip the “dough cycle” steps in the recipe, and make it by hand. I wish I was talented in the “make your own dough” department, but I rely way too much on my bread machine for that step, hehe!! Keep me posted if you try these by hand!!