

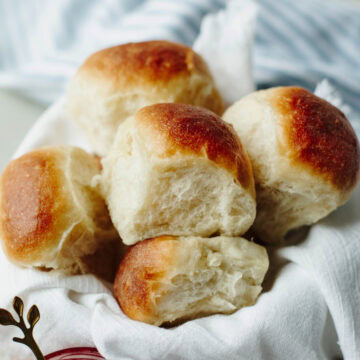
These Buttery Bread Machine Rolls are soft, fluffy, and easy to make using the dough cycle on your bread machine. These homemade bread machine dinner rolls have a buttery, golden brown top and taste similar to the famous Texas Roadhouse rolls!
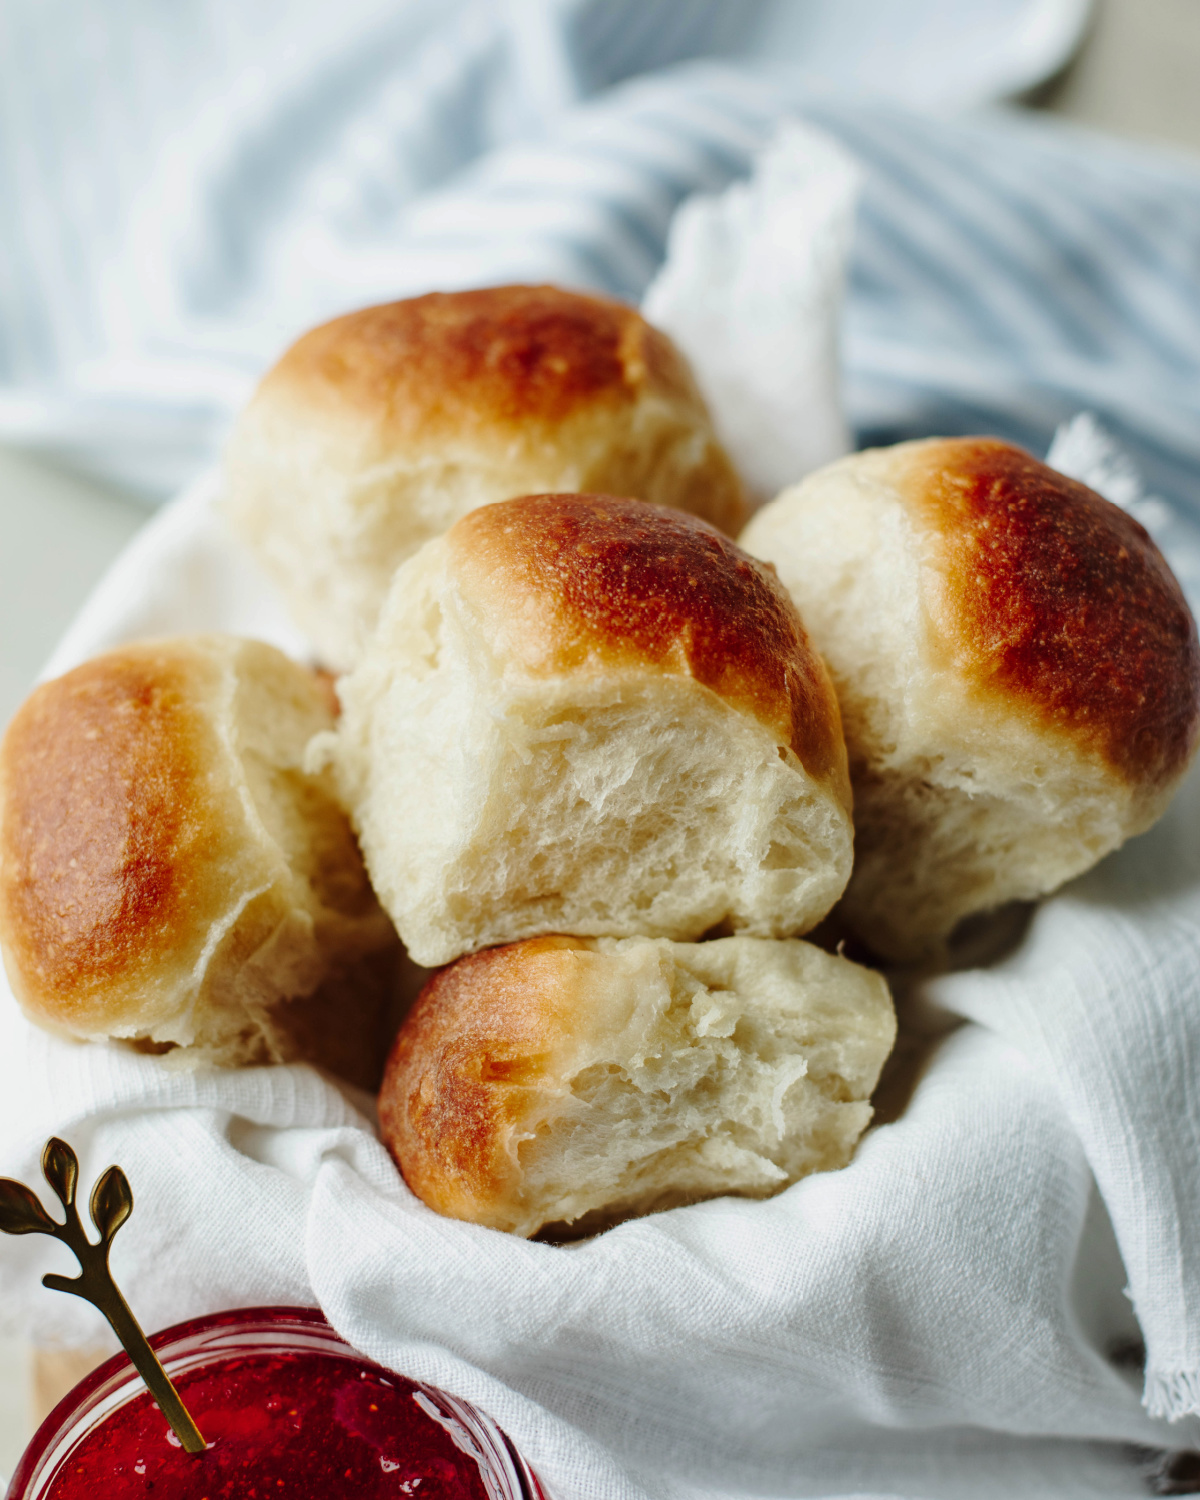
If you've ever been to Texas Roadhouse, you probably know how hard it is to resist the basket of warm rolls and cinnamon butter they bring to the table. These homemade rolls have that same soft, fluffy texture and slightly sweet, buttery flavor we love. If you’re a fan of their menu, be sure to try my Texas Roadhouse Loaded Sweet Potatoes too!
When I first started making dinner rolls in the bread machine, I wasn't actually trying to create a copycat Texas Roadhouse roll. I simply wanted an easy dinner roll recipe my family would love. After the first batch came out of the oven, I knew I had a winner! They quickly became a family favorite, and no tweaking or experimenting was needed.
Quick Look: Buttery Bread Machine Dinner Rolls
These bread machine dinner rolls are made using the dough cycle, so the bread machine does most of the work for you! Once the dough is ready, simply shape the rolls, let them rise, and bake in the oven until soft, fluffy, and golden brown.
- Prep Time: 45 minutes
- Rise Time: 45 minutes
- Bake Time: 16-18 minutes
- Total Time: 1 hour 48 minutes
- Yield: 20 dinner rolls
- Method: Bread machine dough cycle & oven
 Add me as a trusted Google source.
Jump to:
- Quick Look: Buttery Bread Machine Dinner Rolls
- Why these Bread Machine Dinner Rolls are the best
- Ingredient Notes
- How to make Bread Machine Dinner Rolls
- Expert Tips
- Serving Suggestions
- Make Ahead, Storage & Freezing
- Bread Machine Dinner Rolls FAQs
- More Bread Recipes You’ll Love
- Easy Bread Machine Dinner Rolls
Why these Bread Machine Dinner Rolls are the best
Once you see how easy these rolls are to make, you may never go back to store-bought! Here are a few reasons they're a favorite in my house.
- Easy to make: The bread machine does the mixing, kneading, and first rise for you, making homemade rolls much easier to prepare.
- Soft and fluffy: These rolls bake up light and fluffy on the inside with buttery, golden brown tops.
- Simple ingredients: Made with basic pantry staples, including all-purpose flour, yeast, milk, butter, and an egg.
- Freezer-friendly: Make a batch now and freeze the extras to have homemade dinner rolls ready for another meal.
- Perfect for holidays: Serve them with everyday dinners or add them to your Thanksgiving and Christmas menu.
- More than dinner rolls: Divide the dough into 12 larger dough balls instead of 20 and use them as hamburger buns. They're perfect for serving with my homemade burgers for an easy family dinner.
These turned out amazing! It's not even been a week and I'm already making these again! My new go to! Thanks for sharing!
Ingredient Notes
See the printable recipe card below for exact ingredient amounts and instructions.
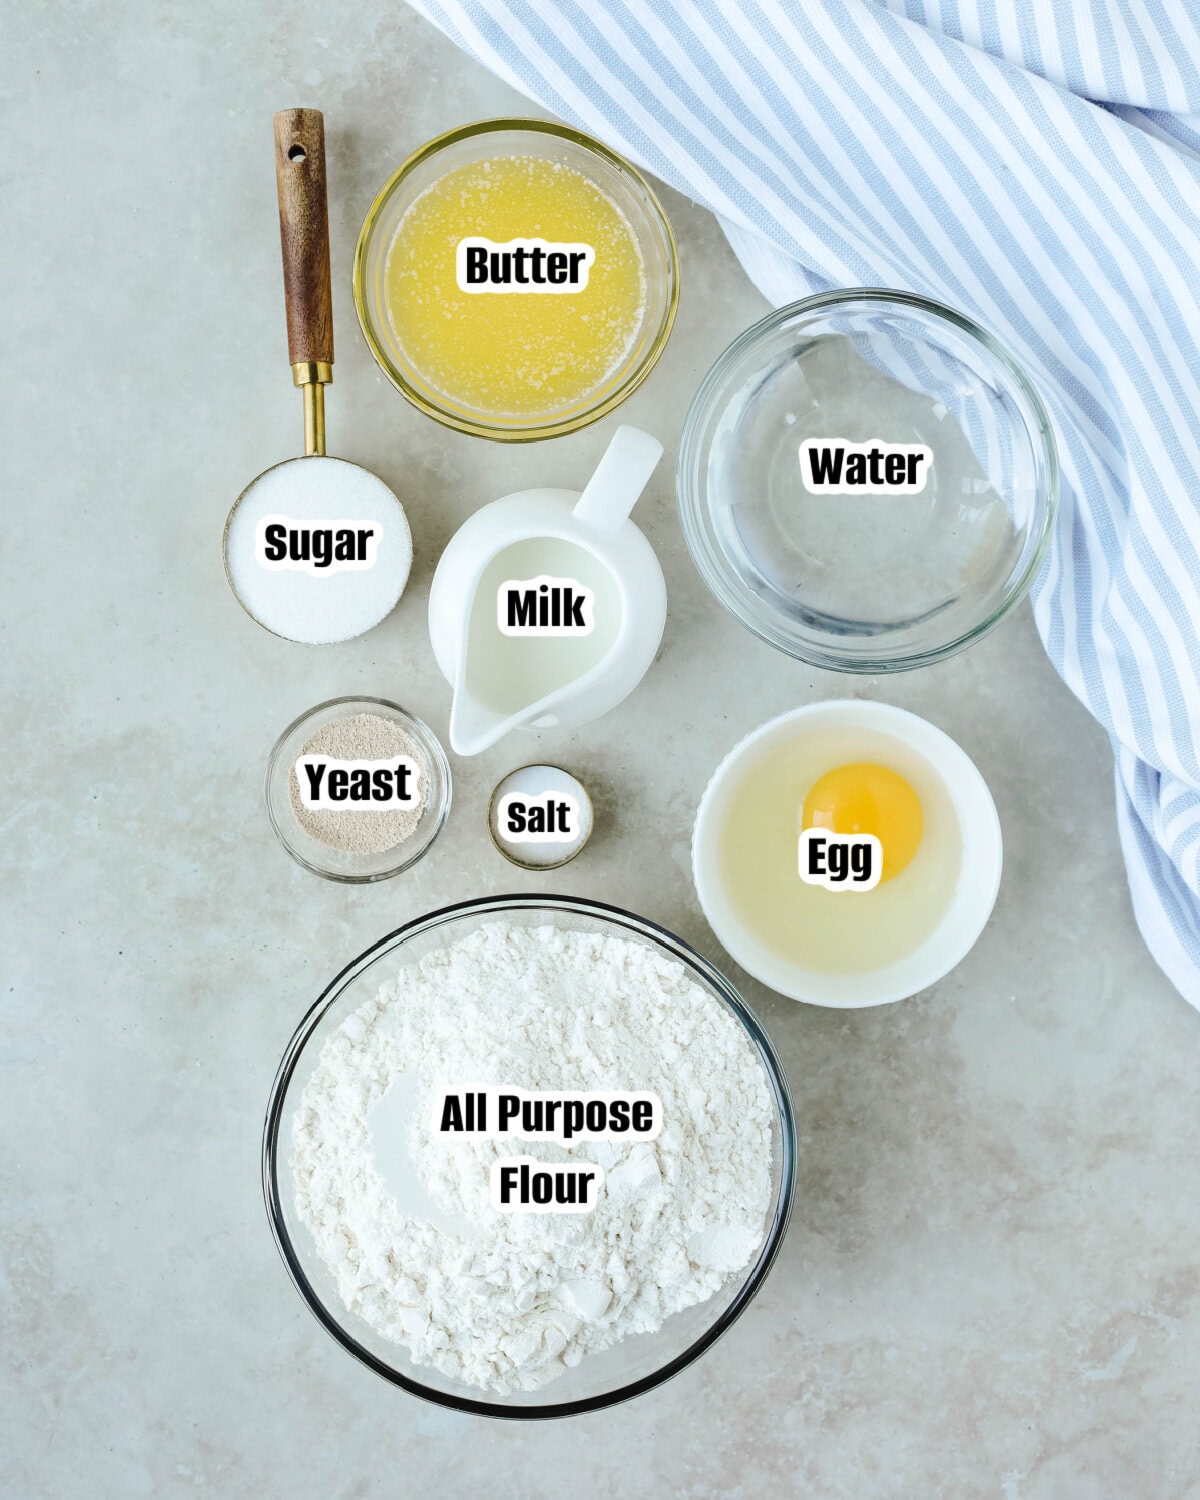
- Water and milk: Both should be warm, but not hot, so the yeast can activate properly. I use regular milk, but whole milk can be used for a slightly richer roll.
- Butter: Use unsalted butter and melt it before adding it to the bread machine. You'll also need additional melted butter for brushing over the rolls before and after baking.
- Flour: All-purpose flour works great in this bread machine rolls recipe and keeps the rolls soft and fluffy. Bread flour can also be used and will give the rolls a slightly chewier texture.
- Yeast: Bread machine yeast works best for this recipe and can be added directly to the bread pan without proofing first. Be sure your yeast is fresh for the best rise.
Variations & Substitutions
- Make hamburger buns: Divide the dough into 12 larger dough balls instead of 20 and shape into buns. Keep an eye on them while baking since the larger size may need a little extra time.
- Add a topping: Sprinkle the tops with garlic salt, herbs, or a little Parmesan cheese before baking for an easy flavor change.
- No bread machine? You can prepare the dough using a stand mixer with a dough hook or knead it by hand. Let the dough rise before shaping, then continue with the recipe as directed.
How to make Bread Machine Dinner Rolls
Making homemade rolls is easy when the bread machine does most of the work! Simply use the dough cycle to mix, knead, and rise the dough, then shape the rolls and bake them in the oven until golden brown.
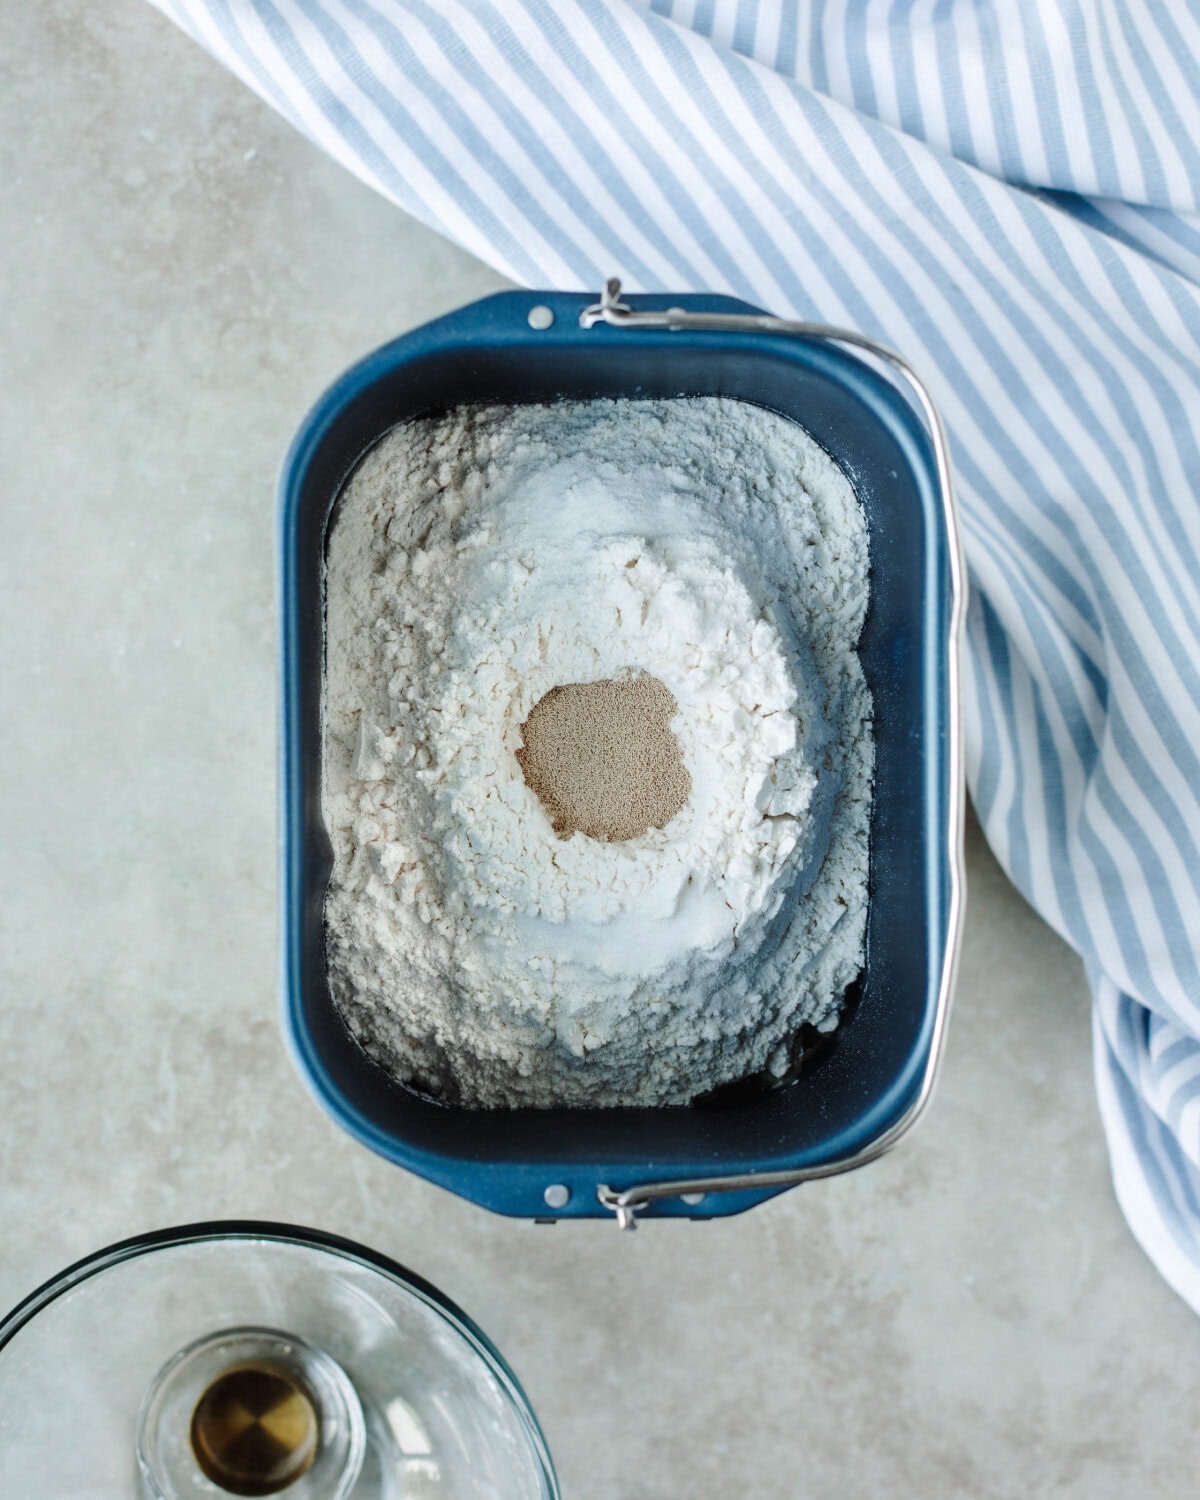
Step 1. Add ingredients to the bread machine: Place the ingredients into the bread machine pan in the order listed. Make a small well in the flour for the yeast, keeping it from touching the wet ingredients. Select the dough cycle and press start.
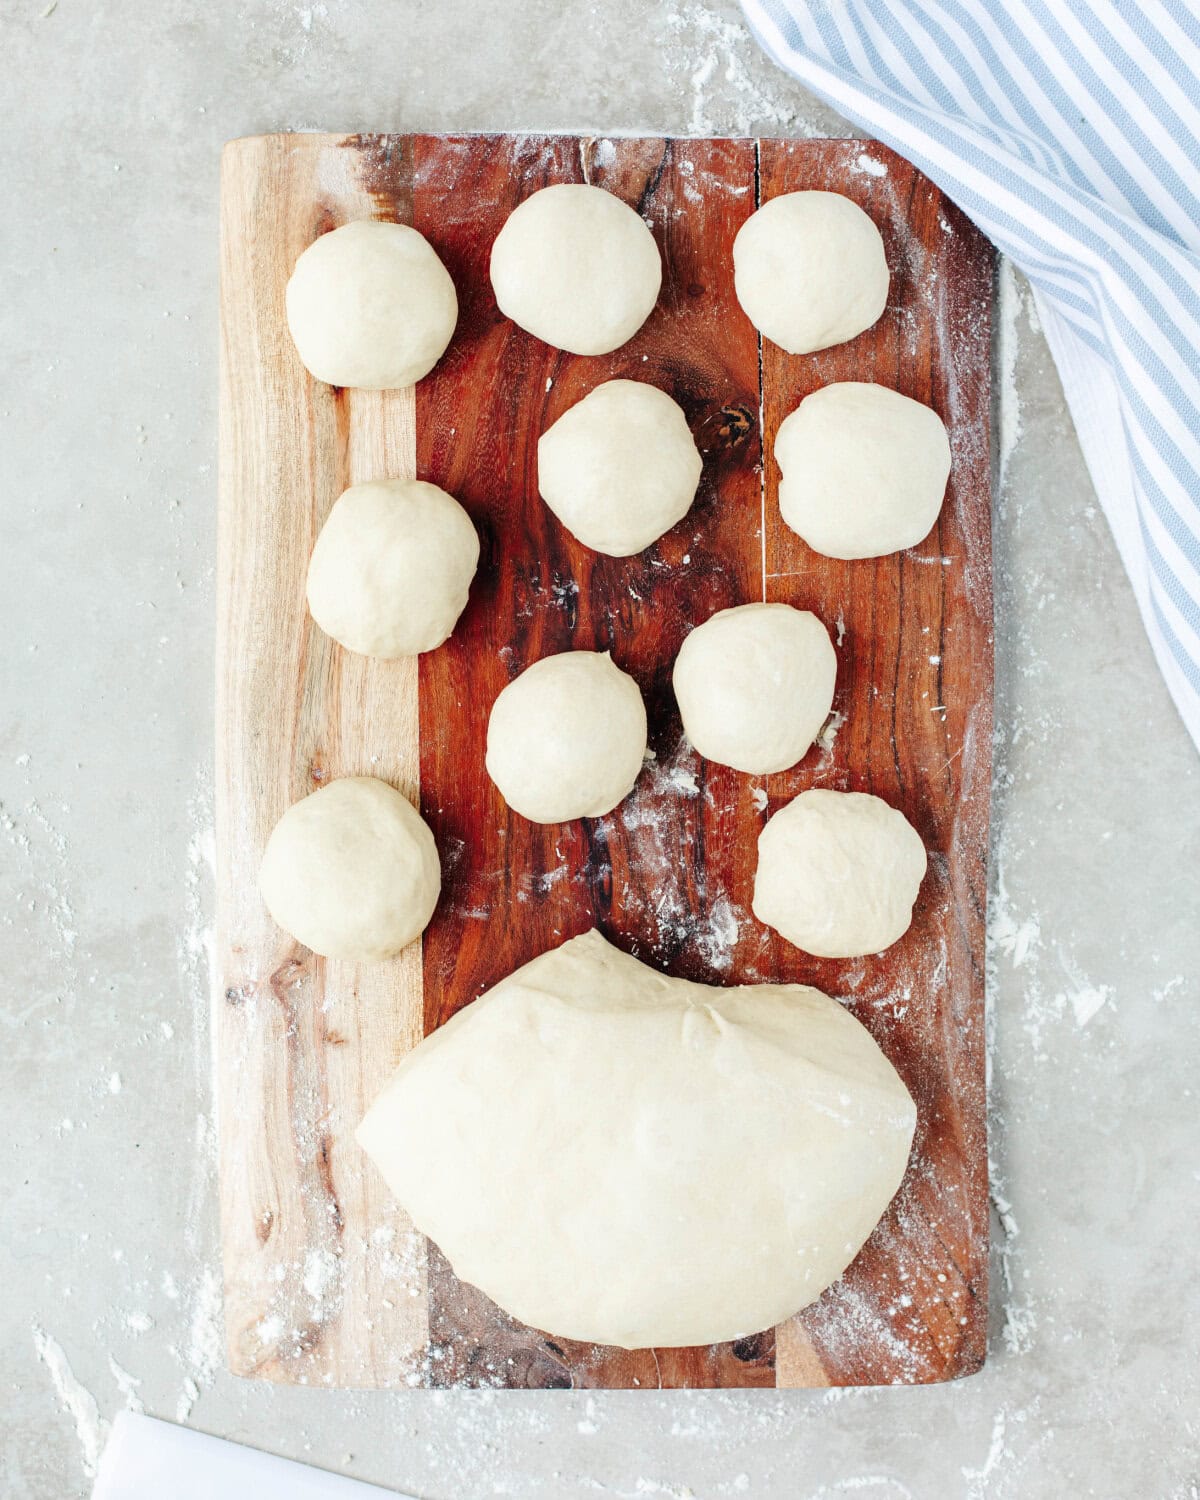
Step 2. Remove the dough: Once the dough cycle is complete, lightly grease a 9×13-inch baking pan with cooking spray. Lightly flour a cutting board or work surface, then remove the dough from the bread machine and place it on the floured surface.
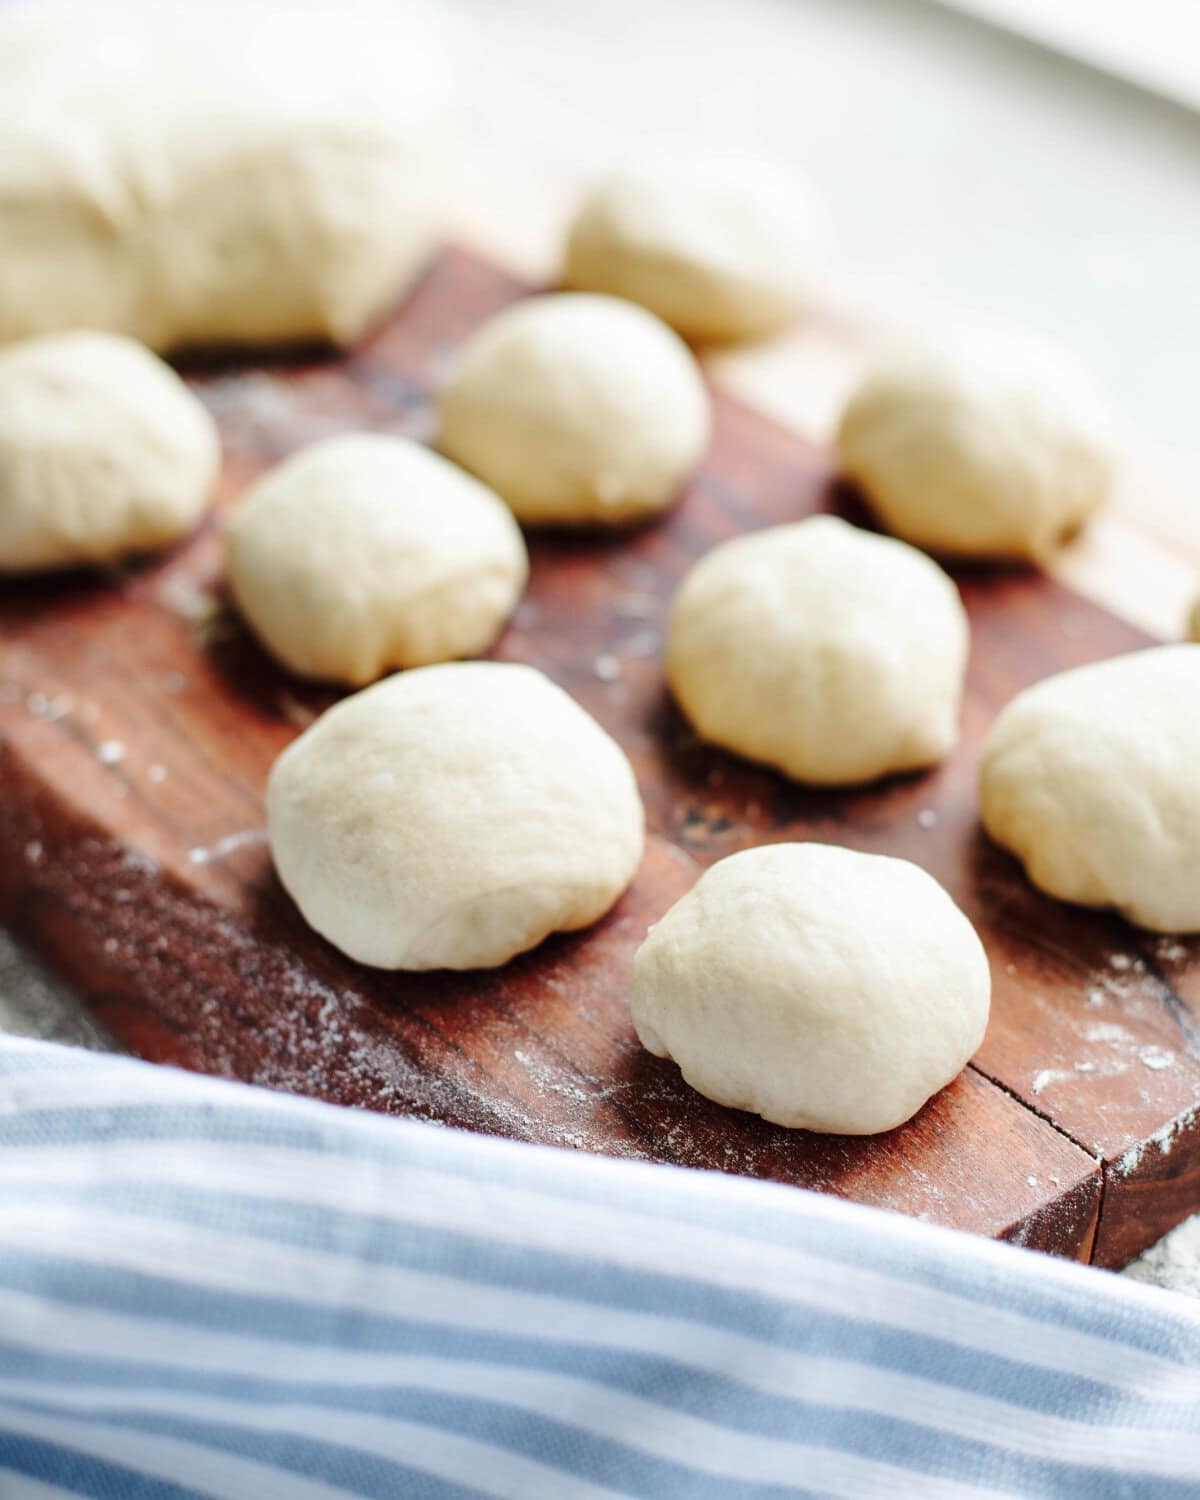
Step 3. Divide the dough: For dinner rolls, divide the dough into 20 equal pieces. If making hamburger buns, divide the dough into 12 larger pieces instead.
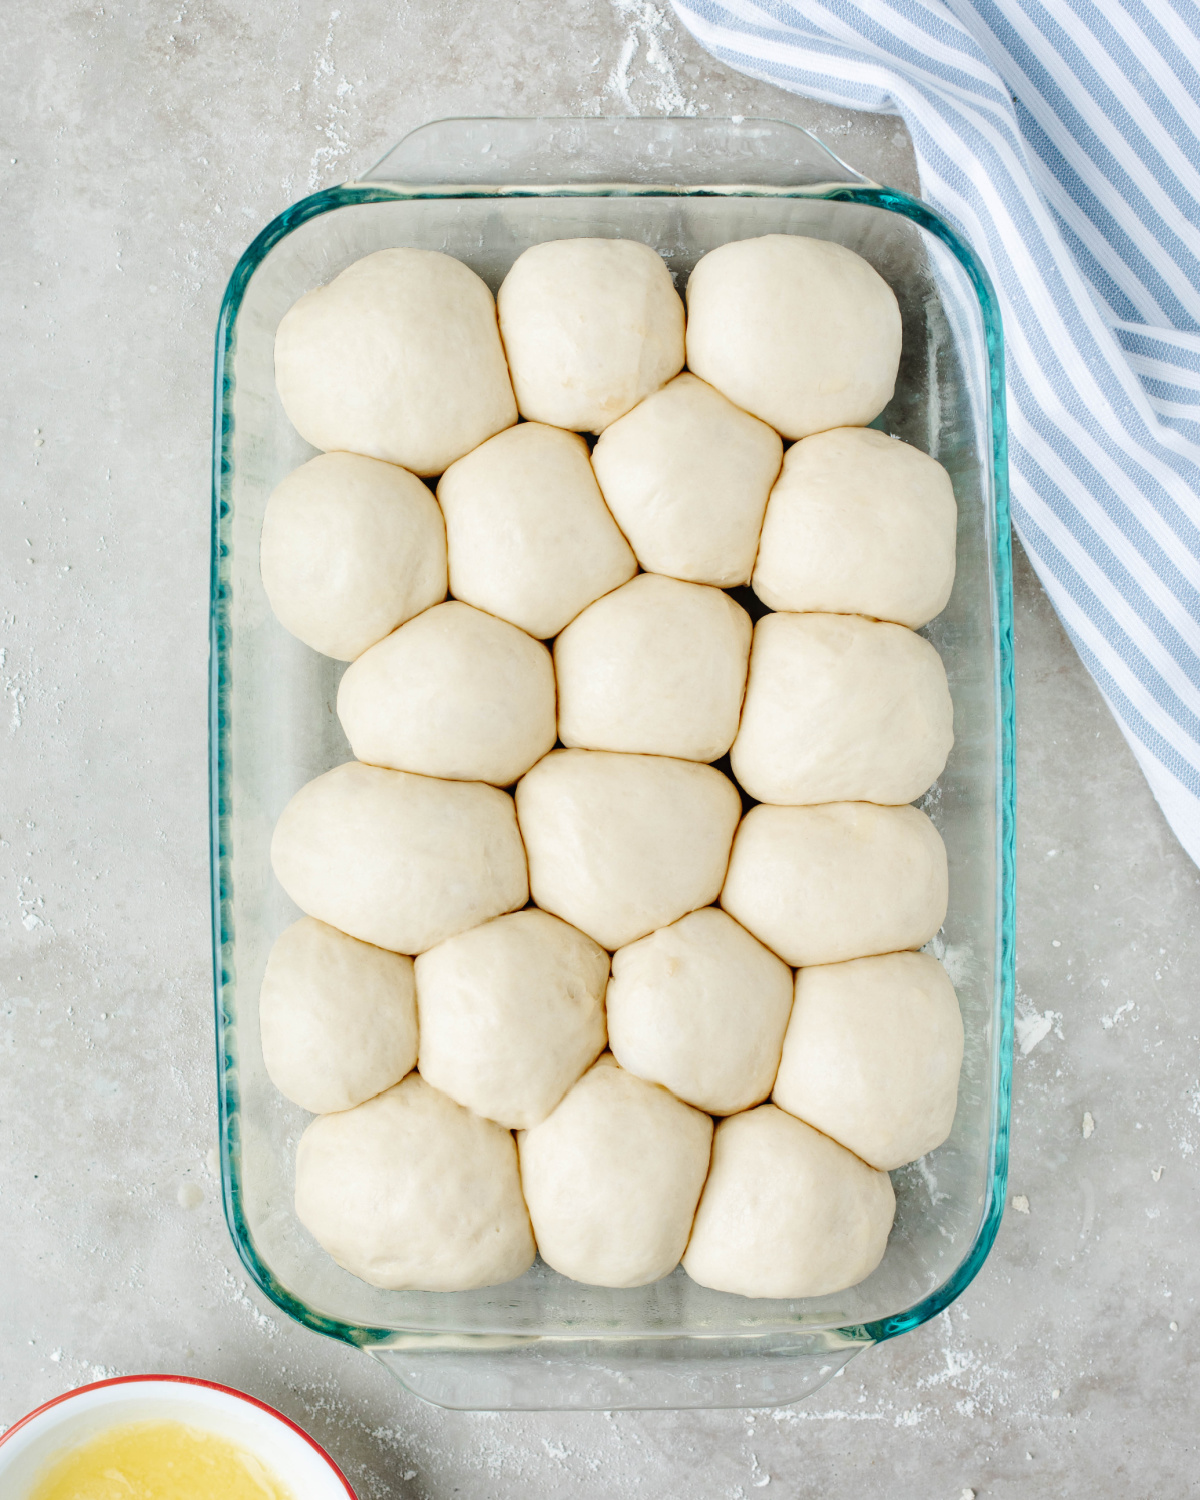
Step 4. Shape the rolls: Roll each piece of dough into a smooth ball using your hands. Place the dough balls seam-side down in the prepared baking pan.
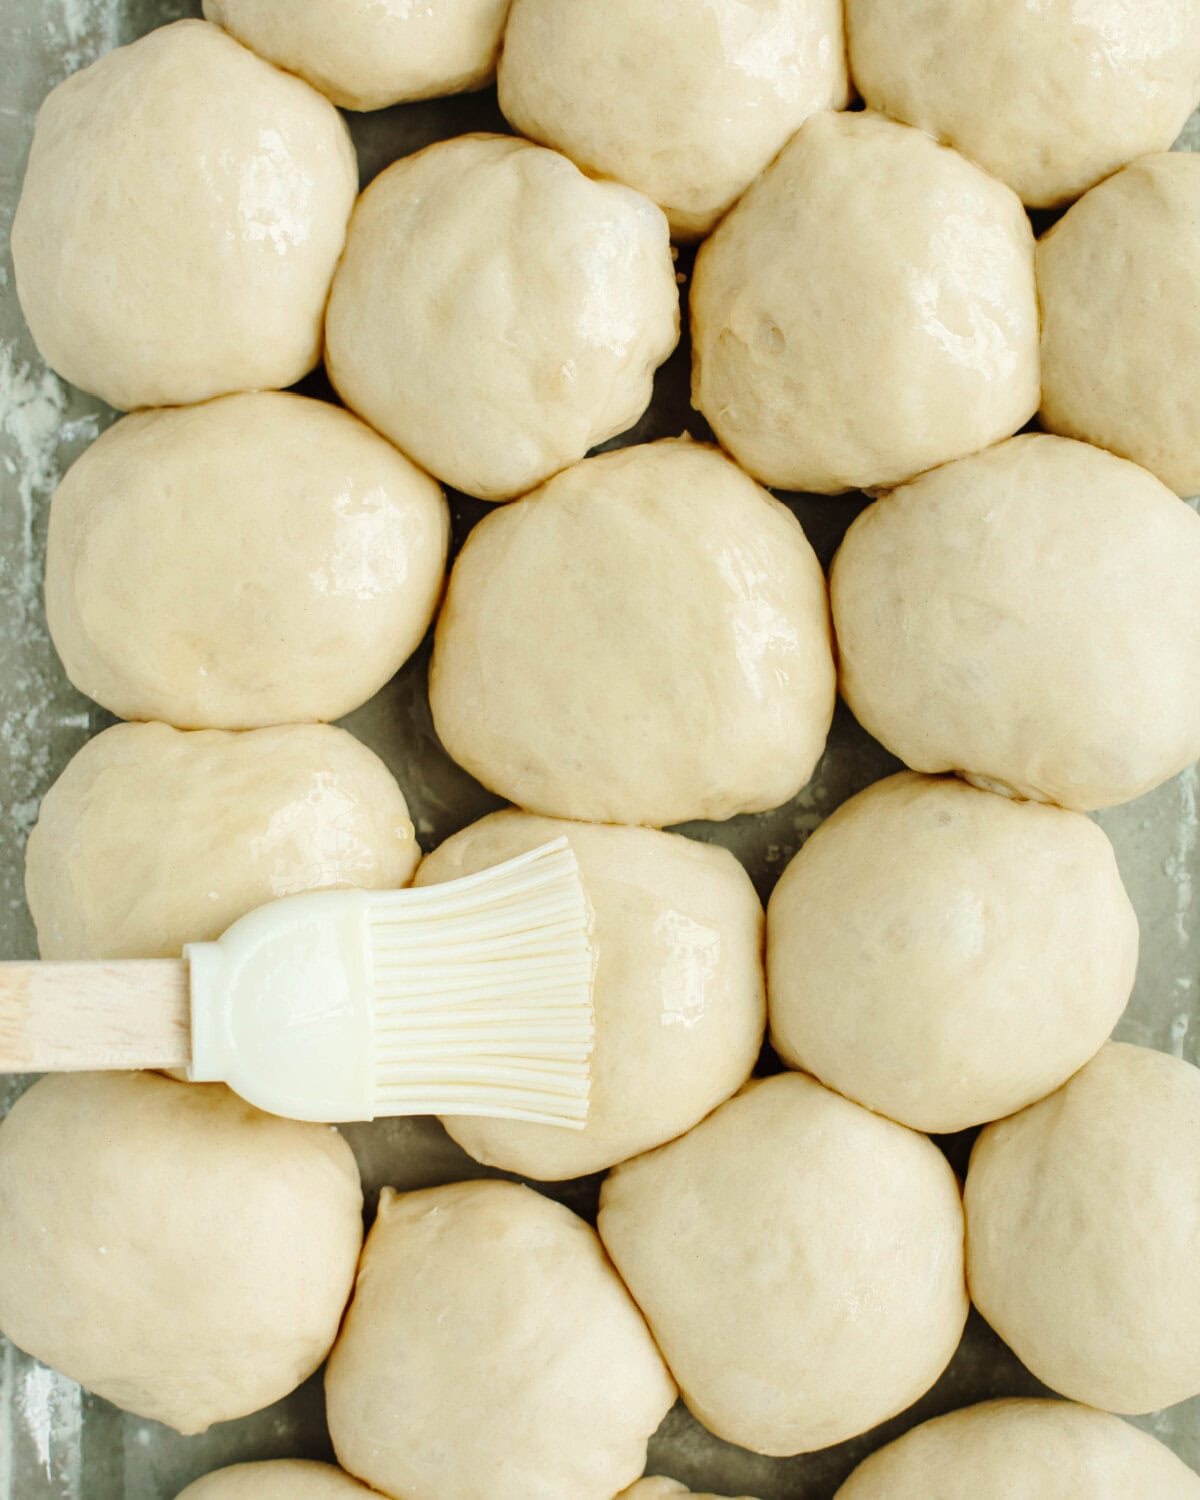
Step 5. Butter and rise: Melt 4 tablespoons of butter and lightly brush half over the tops of the dough balls, reserving the remaining butter for later. Cover the pan and allow the rolls to rise in a warm place for about 45 minutes.
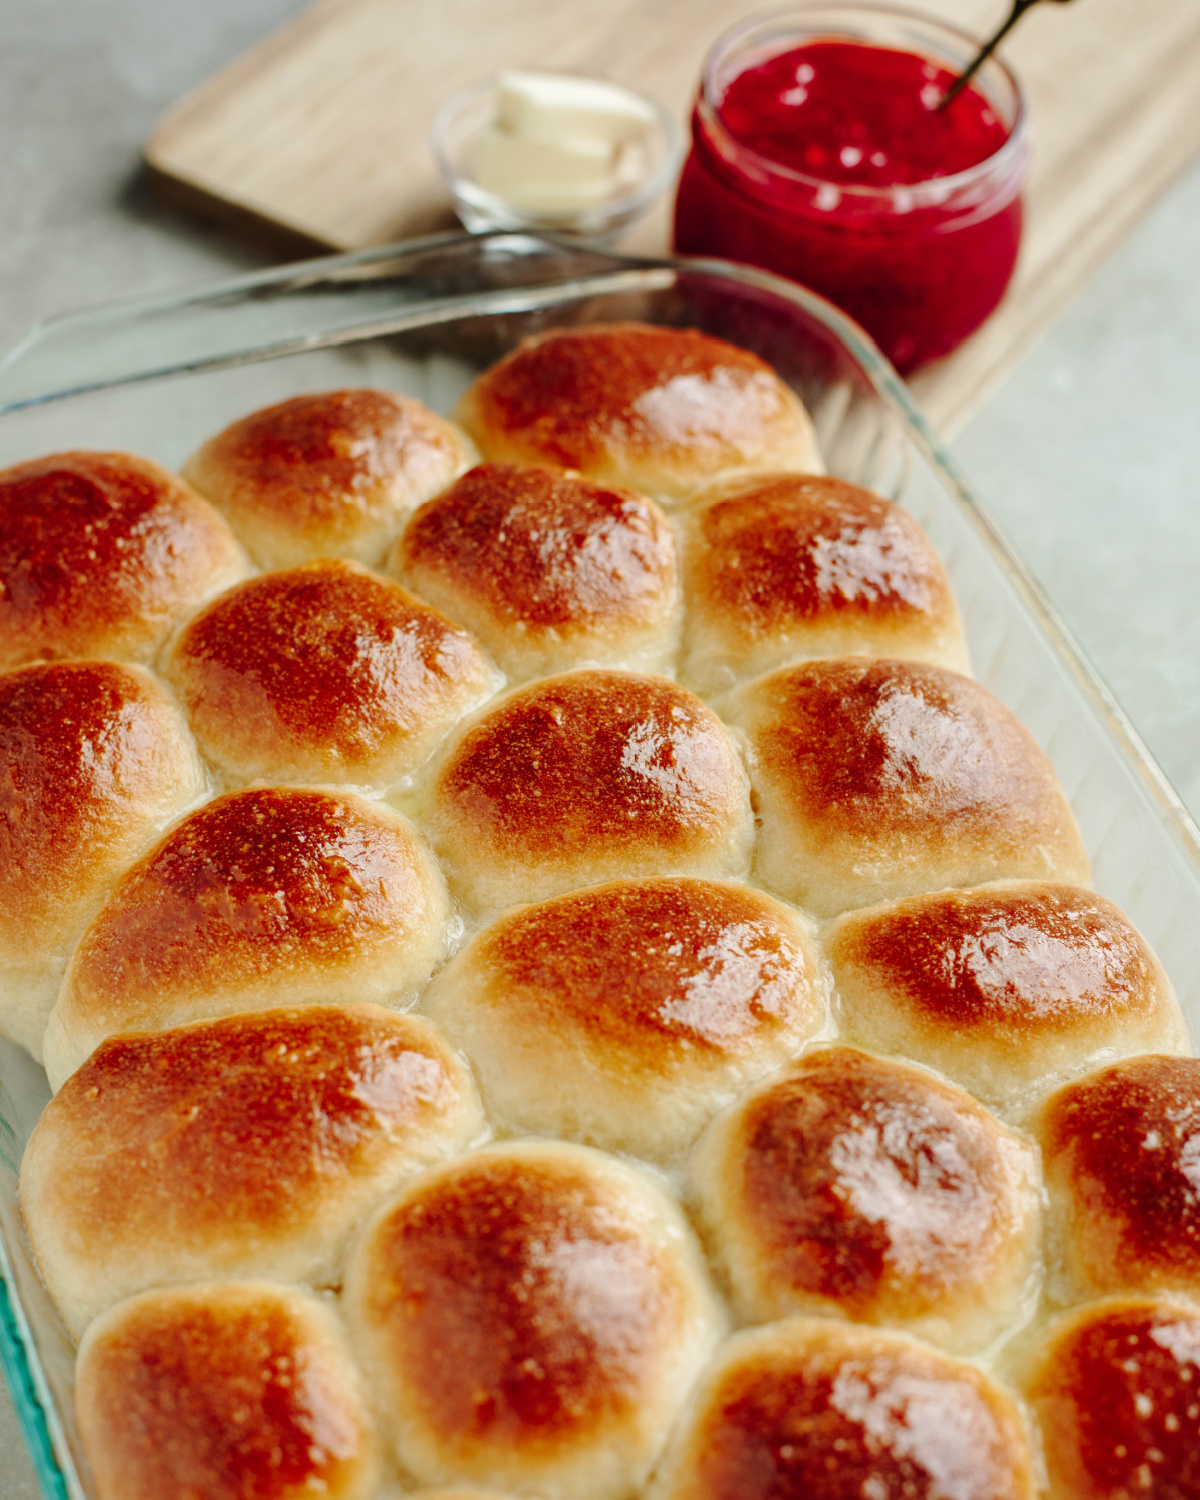
Step 6. Bake and finish: Once the rolls have risen, preheat the oven to 375°F. Bake for 16-18 minutes, or until the tops are lightly golden brown. Remove from the oven and immediately brush with the remaining melted butter. Serve warm and enjoy!
What Bread Machine Cycle Should I Use for Rolls?
Use the dough cycle when making bread machine dinner rolls. This cycle mixes, kneads, and allows the dough to complete its first rise. Once the cycle is finished, remove the dough from the bread machine, shape the rolls, and continue with the recipe as directed.
Expert Tips
- Check your yeast: Fresh yeast is key to soft, fluffy rolls. If your yeast is old or expired, the dough may not rise properly.
- Watch the temperature: Use warm water and milk, not hot. Liquids that are too hot can damage the yeast and prevent a good rise.
- Check the dough: During the dough cycle, the dough should form a soft, smooth ball. If it looks overly sticky, add a little flour; if it seems too dry, add a small amount of water.
- Give them time to rise: After shaping, let the dough balls rise in a warm place for about 45 minutes. If your kitchen is cool, they may need a little longer.
- Avoid overbaking: Bake just until the tops are lightly golden brown, then brush with melted butter as soon as they come out of the oven for that soft, buttery finish.
Serving Suggestions
These bread machine dinner rolls are an easy side for everything from weeknight dinners to Thanksgiving and Christmas meals. Serve them warm with butter, use them to soak up gravy, or pair them with one of these family favorites:
- Chicken and gravy: Serve with Homemade Chicken Gravy for an easy comfort-food combination.
- Soups and stews: These buttery rolls are perfect alongside a bowl of soup, chili, or beef stew.
- Casseroles: Add them to your favorite chicken casserole, beef, or pasta casserole for a complete meal.
- Sloppy Joes: Make the rolls a little larger and use them as hamburger buns for my Easy Homemade Sloppy Joes.
Serve them alongside Mississippi Mud Potatoes for an easy holiday dinner side combination.
Make Ahead, Storage & Freezing
These bread machine dinner rolls are easy to make ahead and store, making them perfect for busy weeknights or holiday meals like Thanksgiving and Christmas.
- Make ahead: Prepare and shape the dough as directed, then place the dough balls in the baking pan and cover tightly with plastic wrap. Refrigerate overnight instead of letting them rise in a warm place. Remove from the fridge 1-2 hours before baking to allow the rolls to finish rising, then bake as directed.
- Storage: Store leftover baked rolls in an airtight container or sealed bag at room temperature for up to 3 days. Warm individual rolls in the microwave for a few seconds before serving to bring back that soft, fluffy texture.
- Freezing: Freeze baked rolls in a freezer bag for up to 3 months. You can also freeze the shaped, unbaked dough balls for up to 30 days. Thaw unbaked rolls in the fridge overnight, then allow them to rise at room temperature before baking as directed.
Bread Machine Dinner Rolls FAQs
Yes, but only if your bread machine has the capacity to handle a double batch of dough. Bread dough expands quite a bit as it rises, so check your machine's maximum flour or dough capacity first. If you're unsure, it's best to make two separate batches.
Yes. Instead of placing the shaped rolls in a 9×13-inch pan, arrange them on a greased or parchment-lined baking sheet with space between each roll. They will bake more individually rather than touching and will have more golden brown edges.
More Bread Recipes You’ll Love

Tried this recipe? Leave a ⭐⭐⭐⭐⭐ rating and let me know what you think in the comments! You can also follow me on Pinterest for even more easy, family-friendly recipes.
Want to save this recipe?
Enter your email & I’ll send it to your inbox. Plus, get great new recipes from me every week!
Easy Bread Machine Dinner Rolls
Equipment
Ingredients
- ½ cup warm water
- ½ cup warm milk
- ⅓ cup unsalted butter melted
- ⅓ cup granulated sugar
- 1 large egg
- 3 ¾ cups all-purpose flour
- 1 teaspoon salt
- 2 ¼ teaspoon bread machine yeast (1 packet)
- 4 tablespoon unsalted butter melted, for brushing
Instructions
- Add the water, milk, ⅓ cup melted butter, sugar, egg, flour, salt, and yeast to the bread machine pan in the order listed. Make a small well in the flour for the yeast, keeping it from touching the wet ingredients.
- Select the dough cycle and press start.
- Once the dough cycle is complete, lightly grease a 9×13-inch baking pan. Lightly flour a cutting board or work surface and remove the dough from the bread machine.
- Divide the dough into 20 equal pieces for dinner rolls or 12 larger pieces for hamburger buns.
- Roll each piece into a smooth dough ball and place seam-side down in the prepared baking pan.
- Brush the tops with half of the 4 tablespoons melted butter, reserving the rest. Cover and allow the rolls to rise in a warm place for about 45 minutes.
- Preheat the oven to 375°F. Bake for 16-18 minutes, or until lightly golden brown. Remove from the oven and immediately brush with the remaining melted butter. Serve warm and enjoy!
Notes
- Bread flour can be substituted for all-purpose flour for a slightly chewier texture.
- Bread machine brands vary, so check your manufacturer’s instructions for the recommended ingredient order and dough cycle.
- The dough should form a soft, smooth ball during the dough cycle. If it is overly sticky, add a small amount of flour; if it seems too dry, add a small amount of water.
- Rise time can vary depending on the temperature of your kitchen. The shaped rolls may need a little longer than 45 minutes in a cooler room.
- For the softest rolls, avoid overbaking and brush with melted butter as soon as they come out of the oven.
Nutrition
Sheri Grant says
I Love, Love, Love this recipe. Before making these rolls, I would have said that I’m not a bread lover. I make these rolls once a week, these are now a staple for me. I have not only shared the rolls, but also shared the recipe. I substituted heavy whipping cream for the milk portion and the rolls came out even softer, if you can believe that. Thank you so much for sharing this recipe!!!!!🩷🥰😋
Kristin Hayes says
Yay!! Love hearing this fabulous feedback! So glad you enjoyed and great idea on the heavy whipping cream!
Aleecia says
I’ve made these rolls dozens of times so it’s time to review them. They are 10/10 amazing everyone always compliments them and they’re so easy to make. I actually make them in my bread maker now and they turn out great. I’ve used AP flour and bread flour and both work great. The bread flour version stay soft for a day or two longer usually.
Kristin Hayes says
Yay!! So glad you enjoy these rolls as much as my family! Great tip on the flour!
Melissa says
Can these be prepped and frozen, for easy baking later, and how to do it as far as the rise is concerned. I just purchased a bread machine and am actually new to the whole baking scene so bear with me , I’m definitely not a pro but working on my 3rd loaf a trying to work towards prefect. Practice and many flour messes later but it’s definitely easier than doing it the whole do it by hand method!
Kristin Hayes says
Yes! Bread dough can be frozen for up to 30 days in advance. If you’re freezing your rolls, shape them, place them in the baking dish and cover them with plastic wrap. Place them into the freezer for a few hours and then transfer them to a zip lock bag and keep frozen until you’re ready to use them.
Tiffany L Douglas says
Can this be doubled in the bread machine?
Kristin Hayes says
Depending on the size of your machine, yes. I typically work in batches versus doubling, however, if you have a large machine, absolutely!
Jackie says
These turned out amazing! It’s not even been a week and I’m already making these again! My new go to! Thanks for sharing!
Kristin Hayes says
Yay!! So glad you enjoy the recipe as much as my family! Thanks for the fabulous feedback!
Sandra says
I make these rolls all the time. Everyone loves them and im wondering about using the recipe for a loaf of bread? what do you think??
Kristin Hayes says
I haven’t tried that before, but honestly, I don’t see why that wouldn’t work perfectly! Just increase the bake time of course, but keep me posted how it turns out!
Cathy says
I made these rolls for Thanksgiving and everyone thought they were delicious. I even got asked for the recipe. :-)
Kristin Hayes says
Awww, love hearing that! So glad they were a hit! They are definitely one of my most favorite bread recipes!
Mindy says
These rolls were delicious! I made the dough in my bread machine and then made the rolls in the oven. They were soft and tasted great.
Kristin Hayes says
Yay!! So glad you enjoyed!!
Jeanette Sharpe says
Not really a baker but did one batch in my bread machine now worried as I don’t know how many rises it has – Cuisinart bread machine. Wondering if I should remove I guess after it rises the first time? They taste delicious, but the first batch didn’t have that pretty golden color, it had a slight yellow, even with the additional butter on top part of baking.
Would love to perfect these before Thanksgiving lol. Crossing my fingers and toes I can!
Kristin Hayes says
Yes, after the dough cycle is complete, you remove and form into rolls to bake in your 9×13 baking pan. The oven gives them the nice golden brown color. Did you have them cook in the bread machine or did you remove from the oven? Keep me posted and I will try to help!! Happy Thanksgiving!!