

These Chocolate Peanut Butter Balls are an easy no-bake treat made with just 5 ingredients! With a crunchy peanut butter and Rice Krispies center covered in chocolate, they’re perfect for Christmas cookie trays, holiday parties, and gifting!
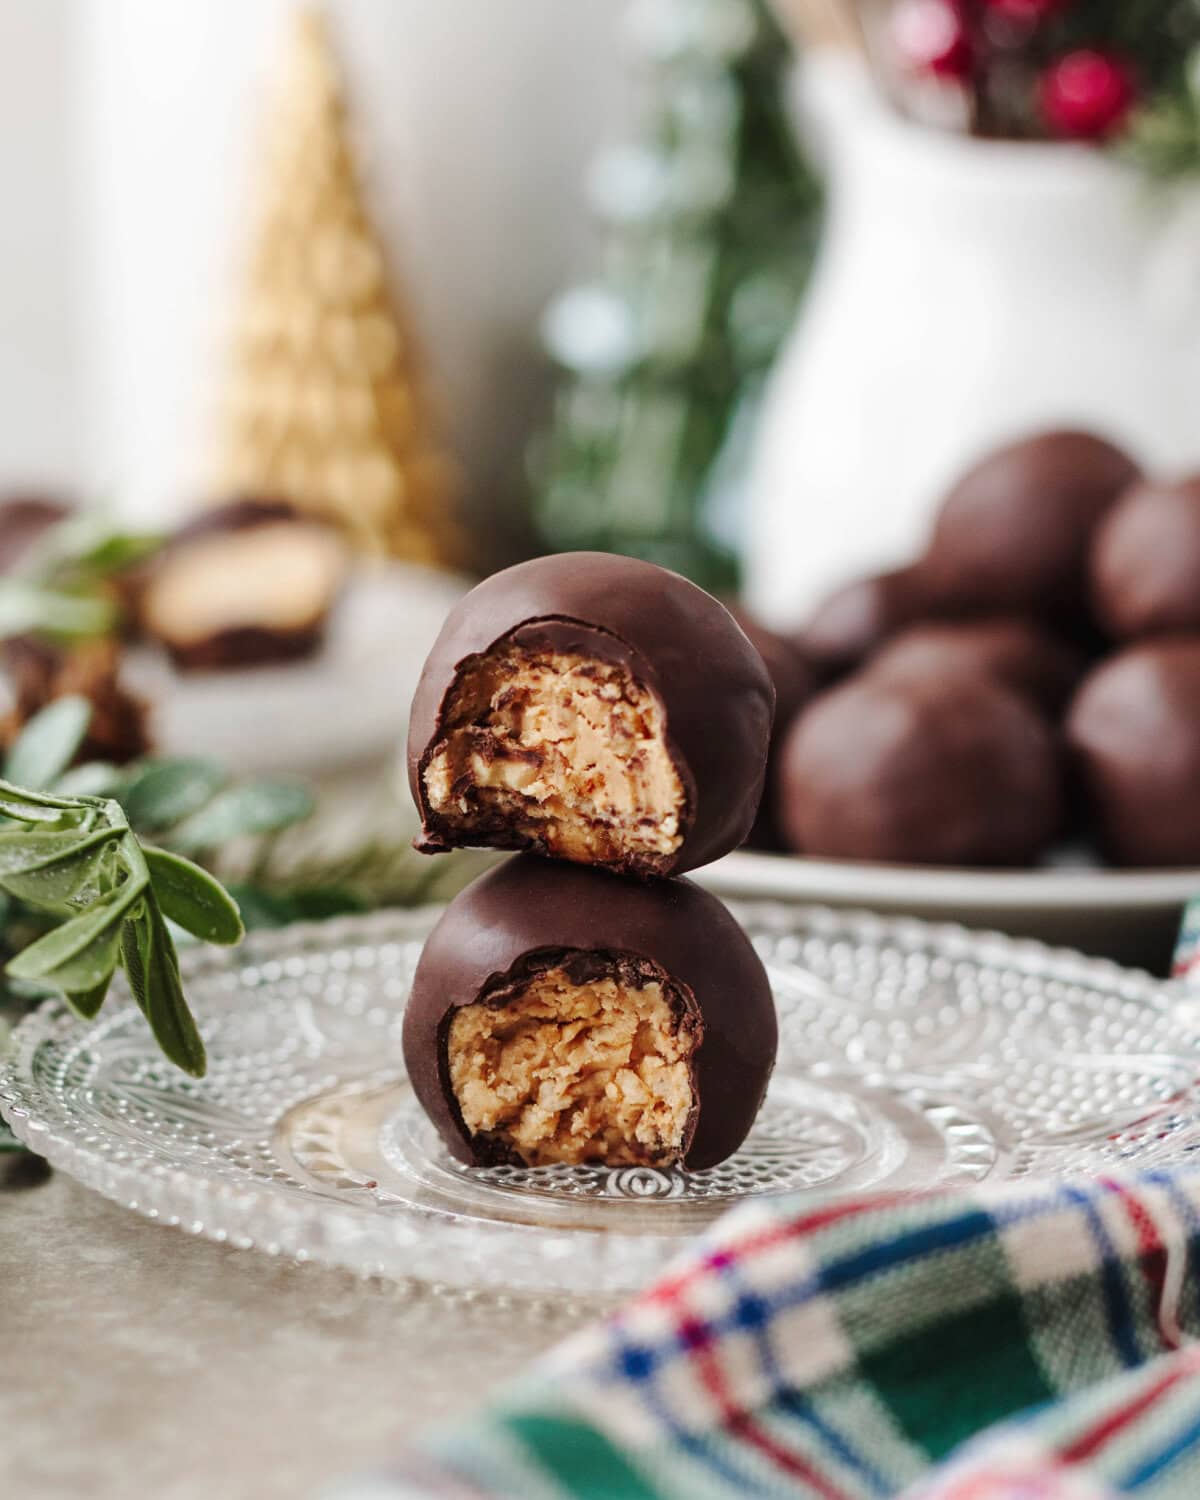
If you love the chocolate and peanut butter combination, these are for you! They’re like a cross between a Reese’s Peanut Butter Cup and my chocolate peanut butter fudge. I will warn you, these peanut butter balls are quite addictive, but luckily Christmas calories don’t count, right?!
If you love easy chocolate and peanut butter treats, be sure to try my Chocolate Peanut Clusters too! They use just three ingredients and come together in the microwave.
Quick Look: Easy No-Bake Peanut Butter Balls
- Prep Time: 15 minutes
- Chill Time: 2 hours
- Total Time: 2 hours 15 minutes
- Servings: 36 peanut butter balls
- Only 5 Ingredients: Made with crunchy peanut butter, powdered sugar, Rice Krispies cereal, butter, and melting chocolate or almond bark.
- Crunchy and Chocolatey: A crunchy peanut butter center with a smooth chocolate coating makes these homemade peanut butter balls hard to resist!
- Perfect for Gifting: A fun treat to make with the kids! Each batch makes 36 peanut butter balls, perfect for packaging in tins or jars alongside treats from my Christmas Cookie Collection.
- Make Ahead: Prepare in advance and store in the refrigerator or freezer until ready to enjoy.
 Add me as a trusted Google source.
Jump to:
- Quick Look: Easy No-Bake Peanut Butter Balls
- What are Peanut Butter Balls?
- Ingredient Notes
- How to Make Chocolate Peanut Butter Balls
- How to Dip Peanut Butter Balls in Chocolate
- Tips for Success
- How to Decorate Peanut Butter Balls
- How to Store & Freeze Chocolate Peanut Butter Balls
- Chocolate Peanut Butter Balls Recipe FAQs
- More No-Bake recipes to try
- Chocolate Peanut Butter Balls Recipe
What are Peanut Butter Balls?
Peanut butter balls are bite-sized candies made with a peanut butter filling and coated in chocolate, similar to a Reese’s Peanut Butter Cup! These chocolate peanut butter balls with Rice Krispies use crunchy peanut butter for added texture. Unlike traditional Buckeye Balls, which have a smooth center and some peanut butter showing, these are completely covered in chocolate.
Ingredient Notes
Only five ingredients are needed to make these peanut butter balls with chocolate, and you may already have everything on hand! See the printable recipe card below for exact amounts and directions.
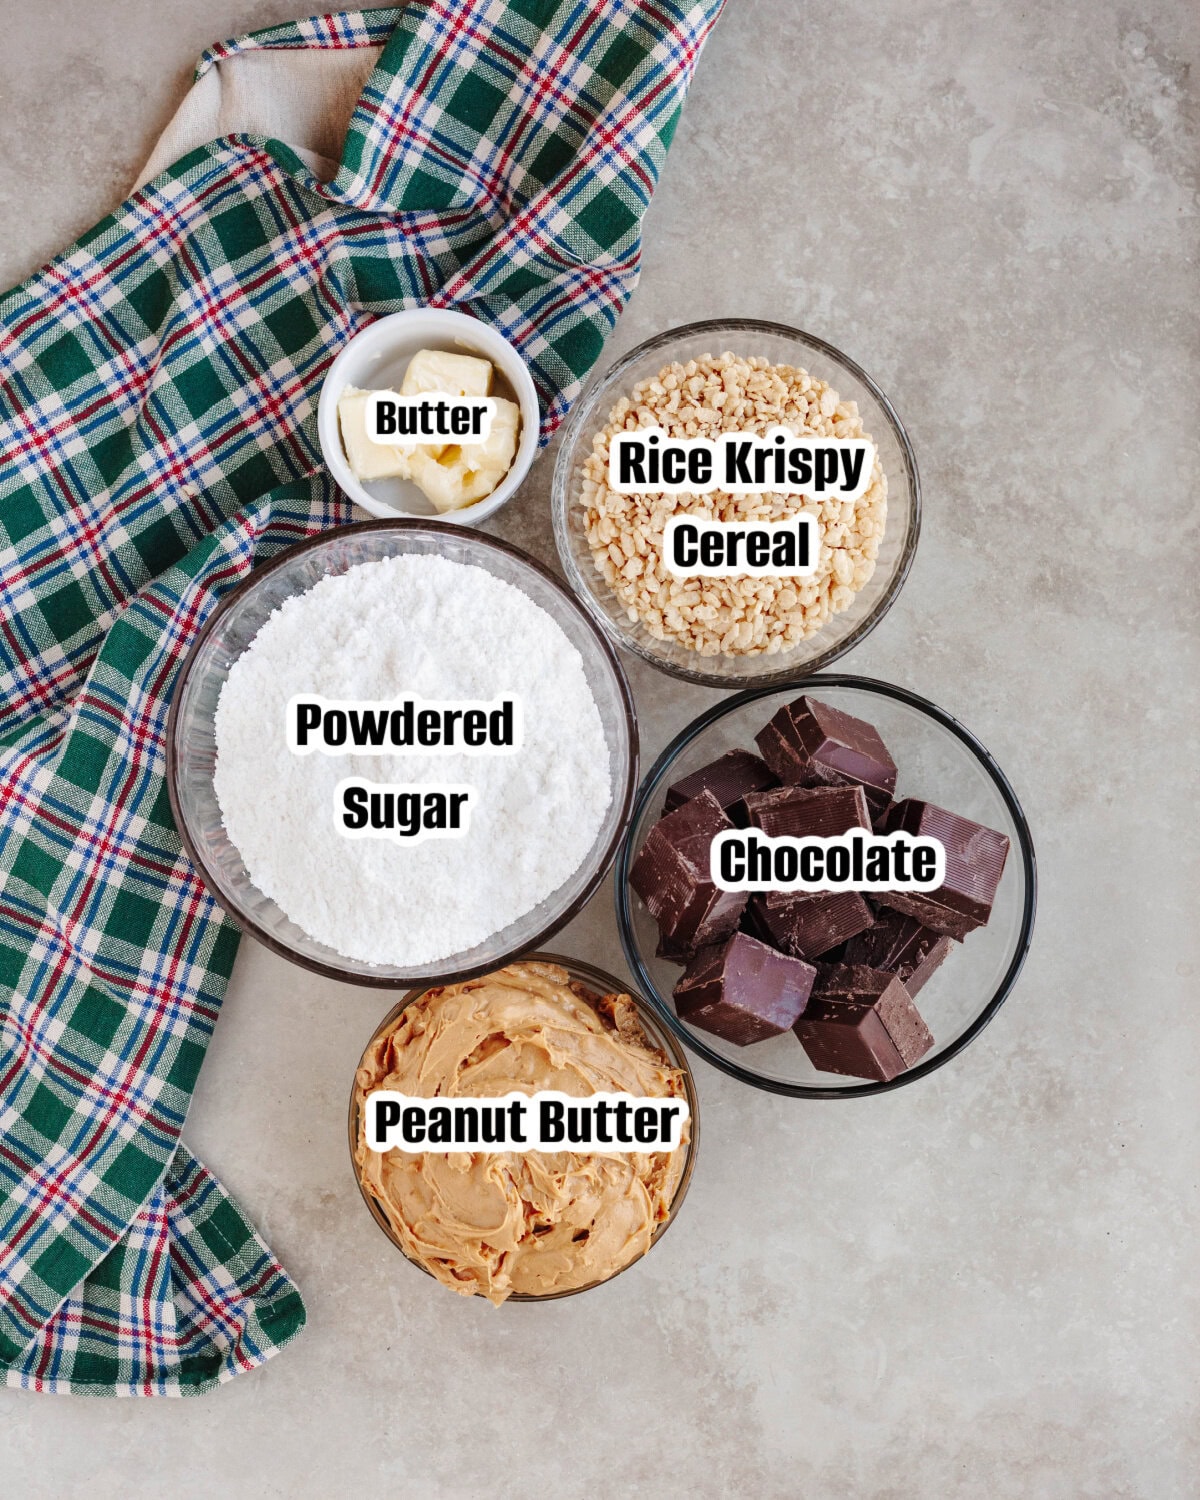
- Chunky Peanut Butter: I prefer crunchy peanut butter for added texture, but creamy peanut butter works too. Avoid natural peanut butter that separates, as it can affect the consistency.
- Powdered Sugar: Sweetens the peanut butter filling and helps hold the balls together.
- Rice Krispies Cereal: Adds a light, crispy crunch to the peanut butter center. Other brands of crispy rice cereal work too. I also use this combination in my Chocolate Peanut Butter Rice Krispie Cups.
- Butter: Use softened, unsalted butter to help bind the filling together. Margarine can also be used.
- Melting Chocolate: I prefer almond bark because it melts smoothly and makes dipping easy. Milk chocolate melting wafers work great too, or use dark or white chocolate for a different flavor.
How to Make Chocolate Peanut Butter Balls
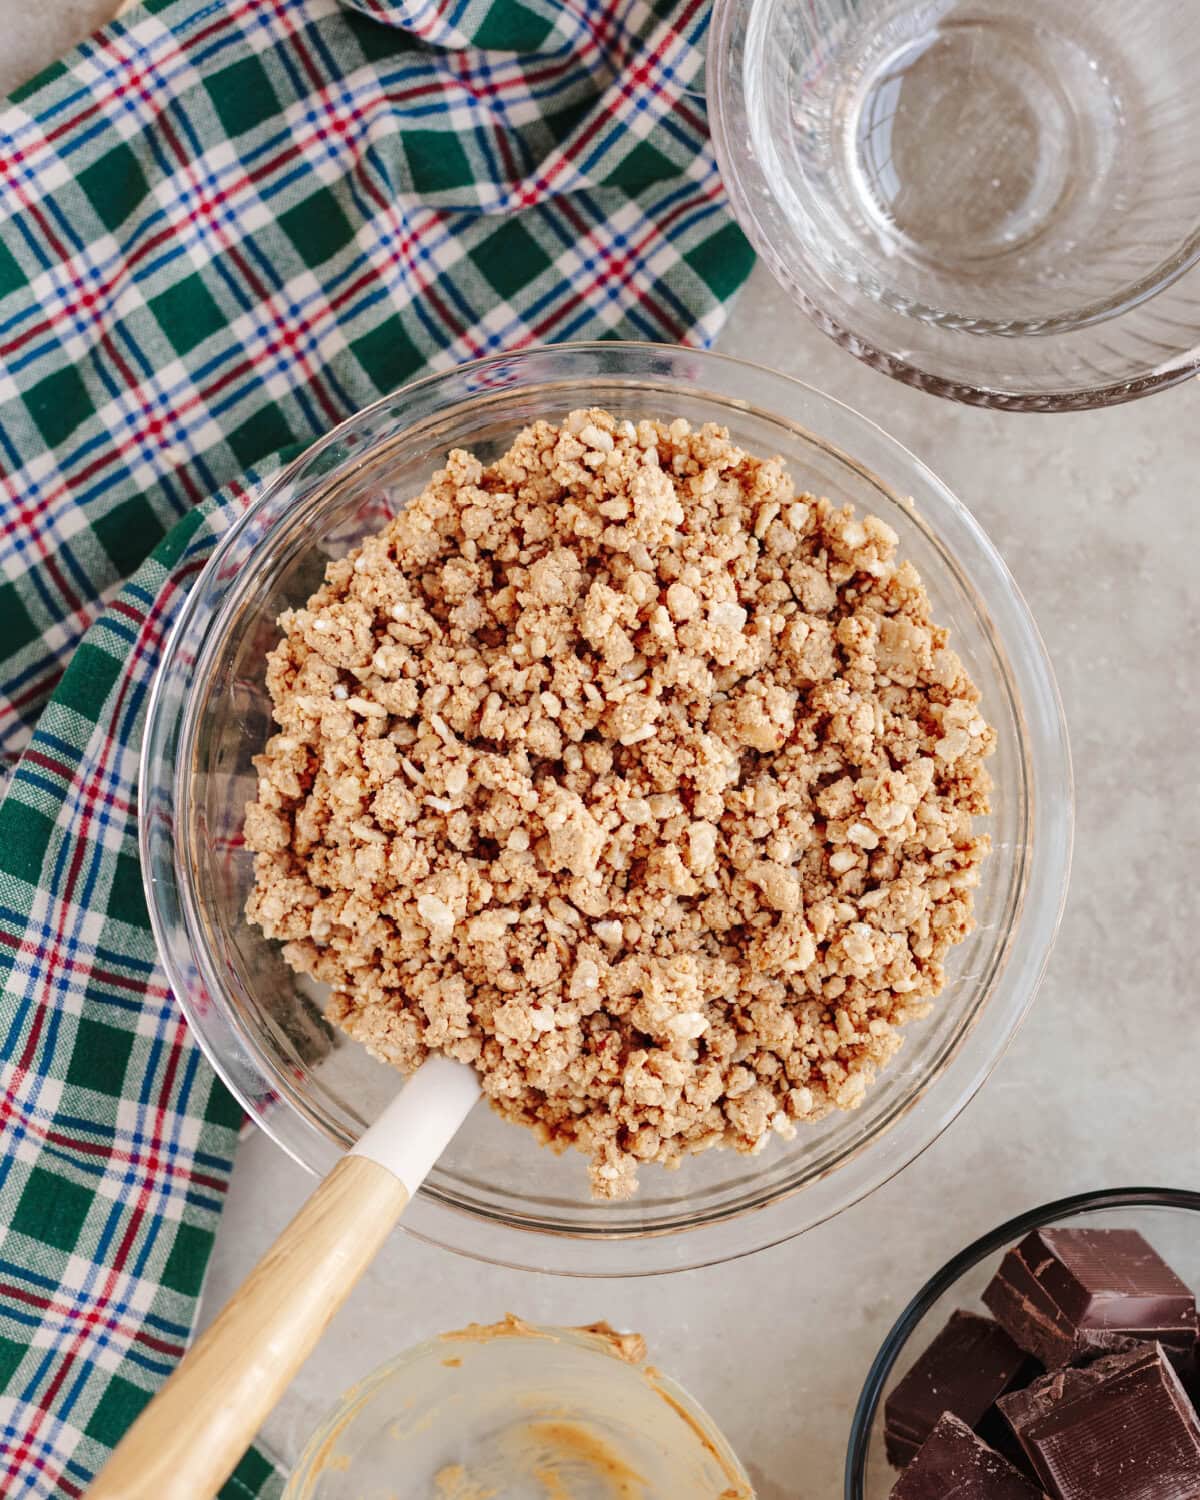
Step 1: Make the Peanut Butter Filling. In a large bowl, mix together the peanut butter, powdered sugar, Rice Krispies cereal, and softened butter until combined. If the mixture is too crumbly to hold together, add a little more peanut butter until it can easily be rolled into balls.
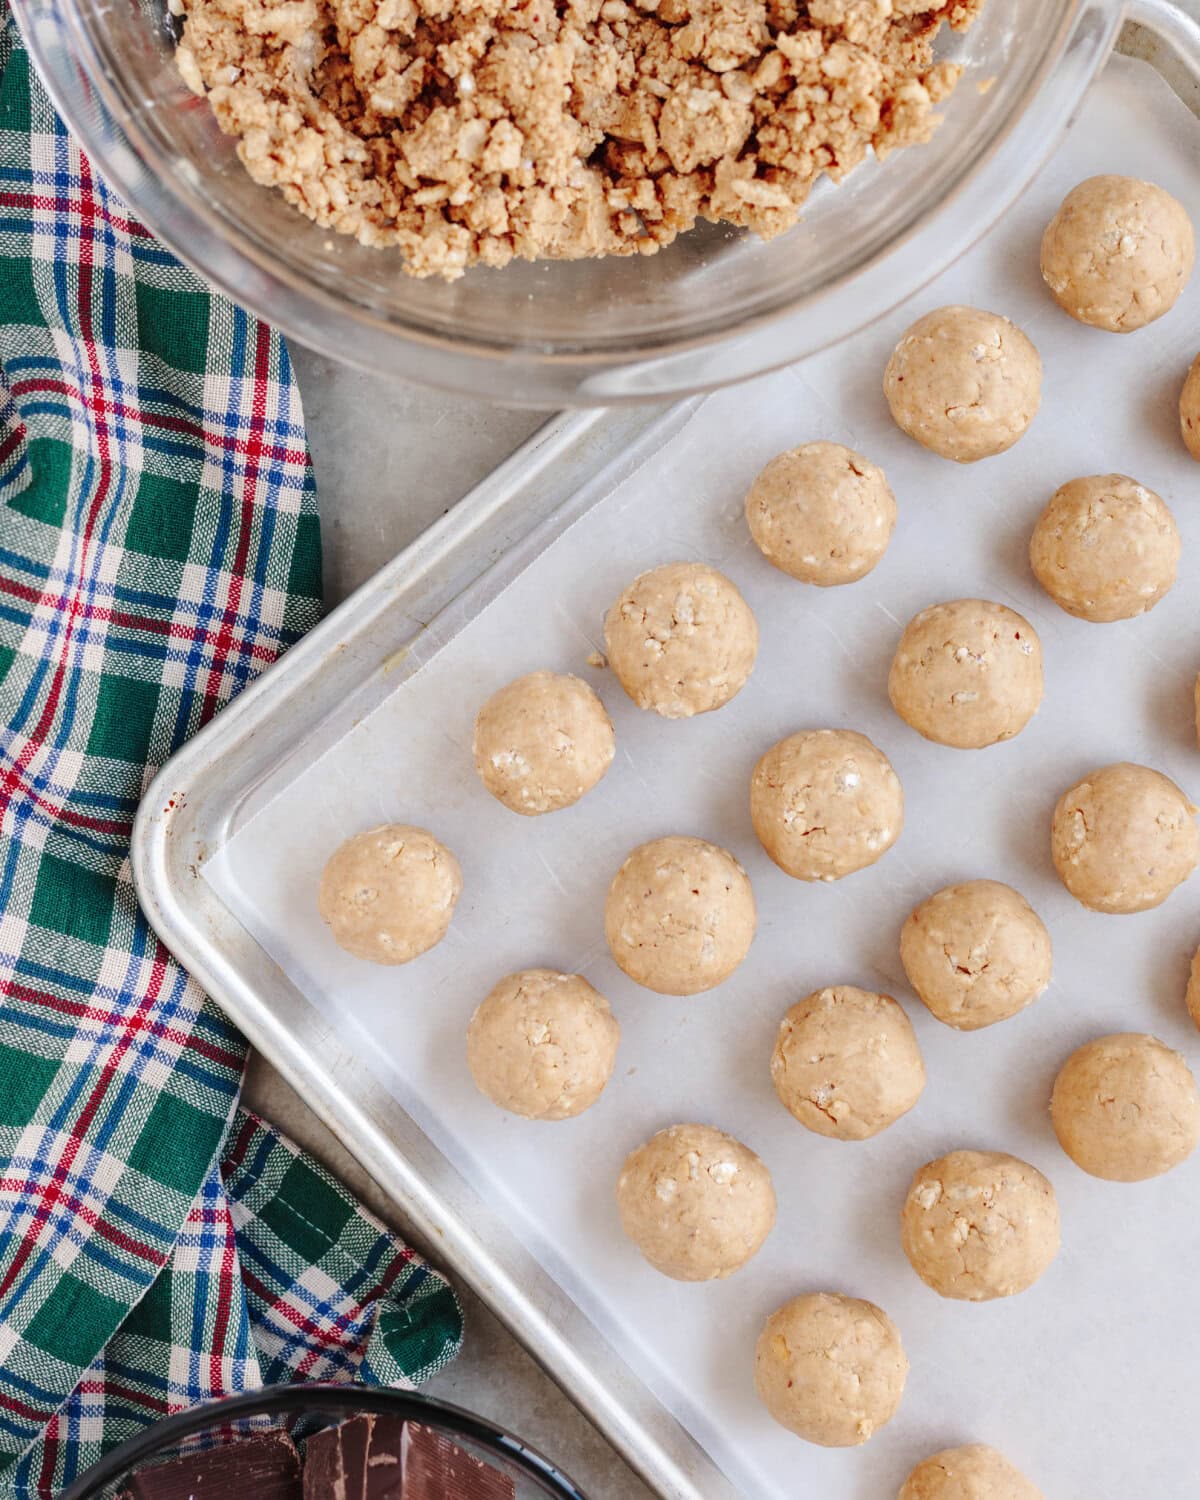
Step 2: Roll and Chill. Line a cookie sheet with wax paper or parchment paper and roll the peanut butter mixture into 1-inch balls. Place them on the prepared cookie sheet and refrigerate for about 2 hours, or until firm enough to dip in chocolate.
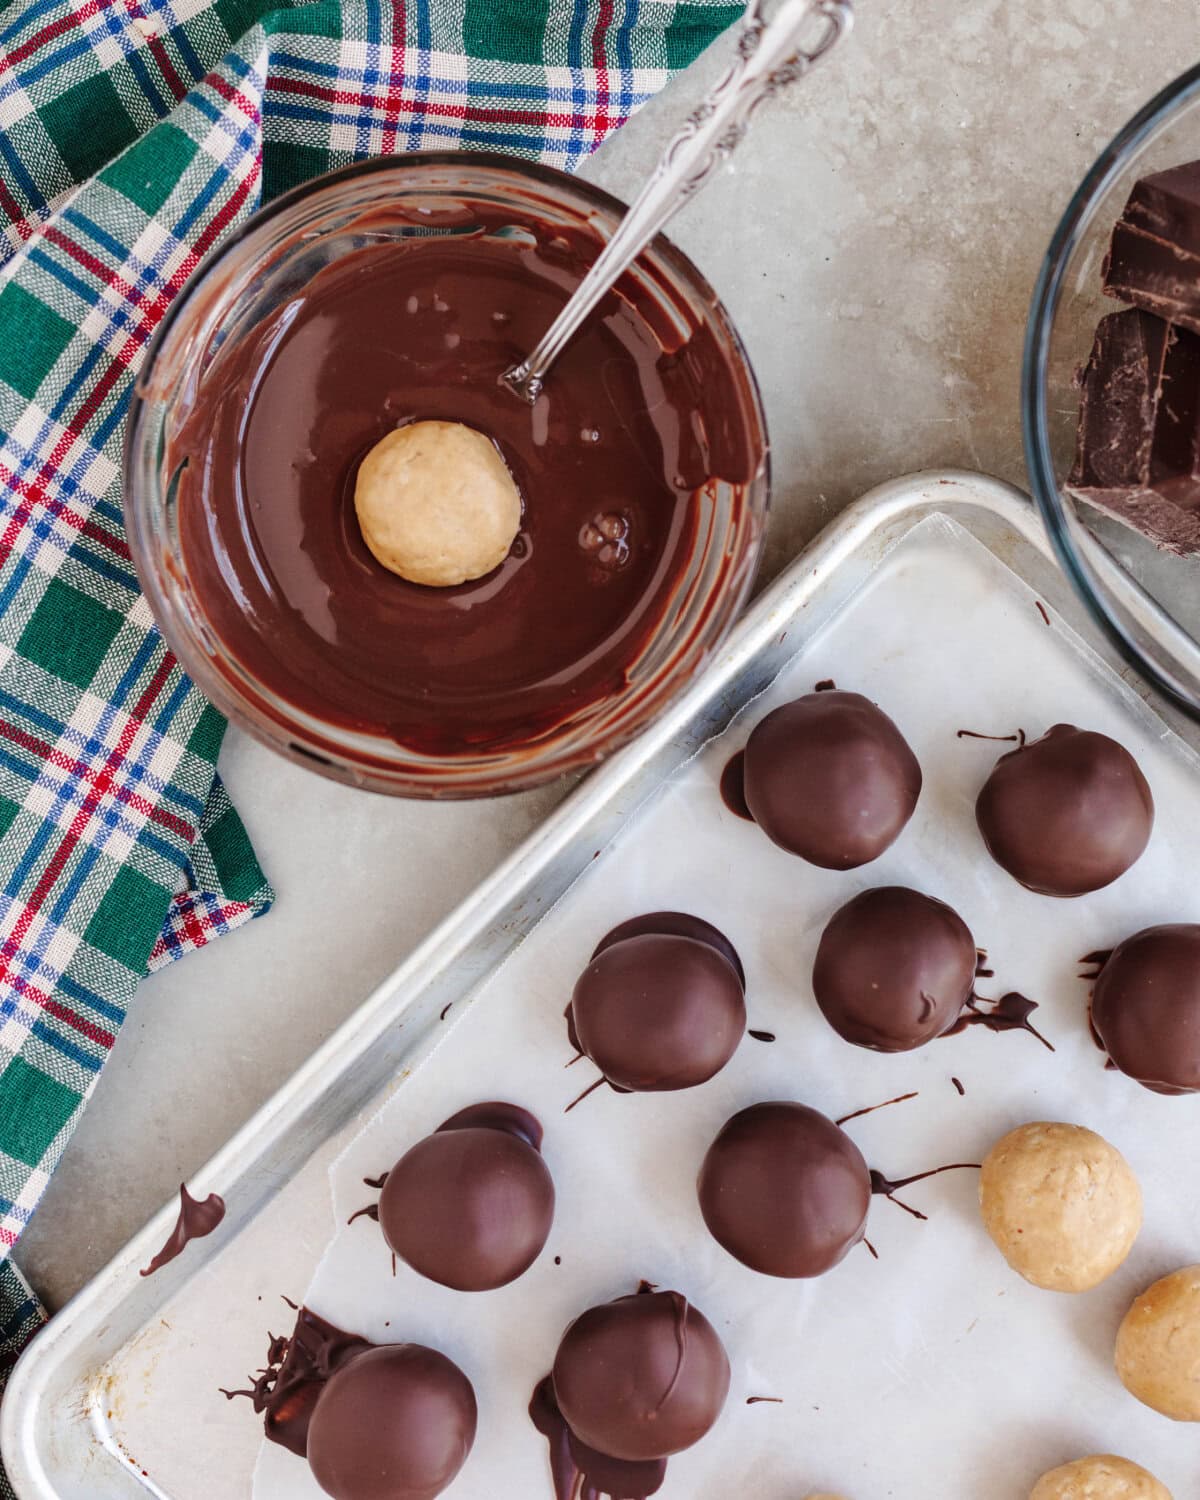
Step 3: Melt and Dip in Chocolate. Once the peanut butter balls are firm, melt a few squares of chocolate at a time in the microwave. Using a fork, roll each peanut butter ball through the melted chocolate twice to coat completely.

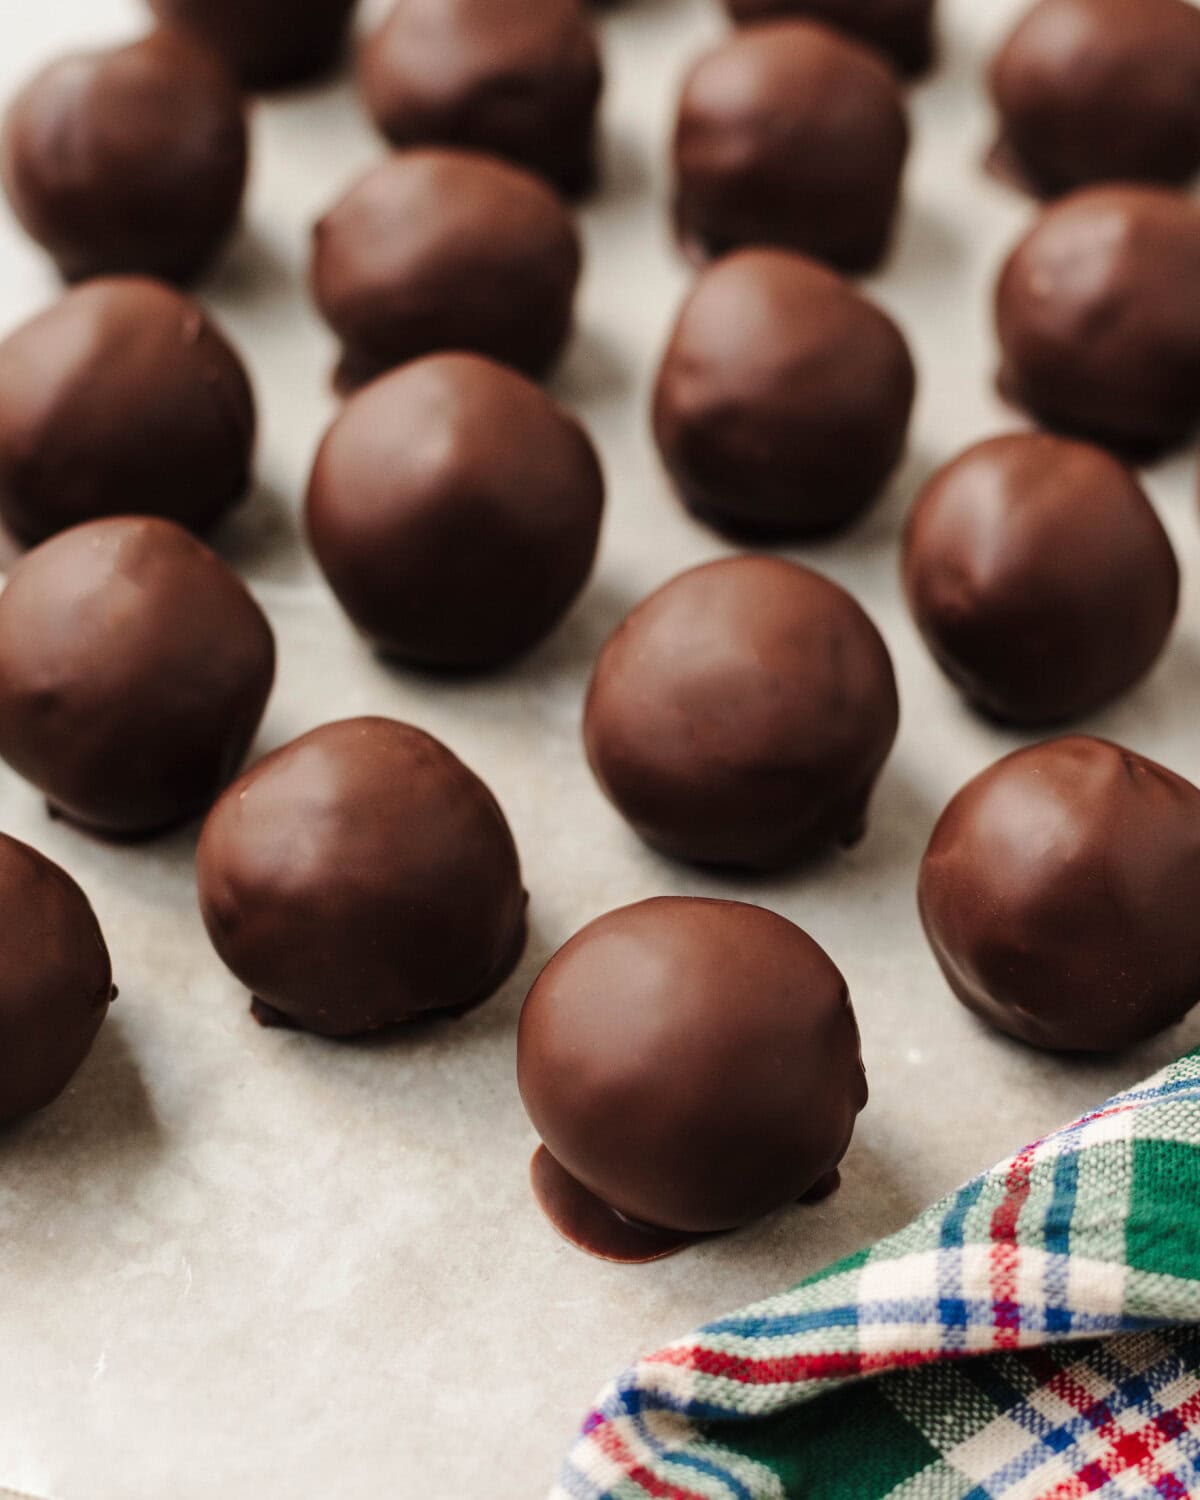
Step 4: Chill and Serve. Place the chocolate-covered peanut butter balls back onto the wax paper and refrigerate until the chocolate has hardened. Once set, transfer to an airtight container and enjoy! You can also freeze them for later, although mine never seem to last that long, ha-ha!
How to Dip Peanut Butter Balls in Chocolate
After years of trying different dipping methods, I’ve learned a few tricks for getting these chocolate-covered peanut butter balls evenly coated without making a mess! My favorite is using a fork instead of a toothpick.
- Chill the Peanut Butter Balls: Make sure the balls are fully chilled before dipping so they don’t fall apart in the warm chocolate. I actually prefer using the freezer over the refrigerator when dipping!
- Melt Chocolate in Small Batches: If using almond bark, melt about half the package of candy coating at a time in the microwave in 30-second increments, stirring between each, to prevent burning.
- Use a Fork for Dipping: I’m usually team toothpick, but I’ve found a fork works much better for this recipe! Drop each chilled peanut butter ball into the melted chocolate, roll to coat, and lift it out with a fork. Tap off any excess chocolate before placing it on wax paper to set.
Tips for Success
- Use a Cookie Scoop: A cookie scoop makes it easy to roll evenly sized peanut butter balls so they all look the same.
- Fix Sticky Dough: If the peanut butter mixture is too soft or sticky to roll, refrigerate it for 20-30 minutes to firm up. If needed, add a little more powdered sugar.
- Fix Crumbly Dough: If the mixture won’t hold together, add a little more peanut butter until it’s firm enough to roll into balls.
- Try Different Chocolates: Milk chocolate, dark chocolate, and white chocolate melting wafers are all delicious options. Almond bark is another great choice for easy dipping.
- Switch Up the Peanut Butter: Creamy peanut butter works in place of crunchy, although the texture will be slightly different. You can also try almond or cashew butter for a different flavor, but the consistency may vary.
- Make Them Gluten-Free: Use certified gluten-free crispy rice cereal and check that your peanut butter, chocolate, and other ingredients are gluten-free. Regular Rice Krispies contain barley malt, so be sure to choose a gluten-free alternative.
How to Decorate Peanut Butter Balls
- Holiday Sprinkles: Add red and green sprinkles for Christmas, or switch up the colors for other holidays and special occasions. Sprinkle them on before the chocolate hardens so they stick!
- Chocolate Drizzle: Drizzle melted white or dark chocolate over the coated peanut butter balls for a fun finishing touch. Let the first layer of chocolate set before adding the drizzle.
- Sea Salt or Chopped Peanuts: Sprinkle a little flaky sea salt or finely chopped peanuts over the chocolate while it’s still wet for extra flavor and crunch.
For another easy treat to add to your Christmas goodie trays, try my Rolo Pretzel Turtles. They’re a fun combination of chocolate, caramel, pretzels, and pecans!
How to Store & Freeze Chocolate Peanut Butter Balls
- Room Temperature: Store in an airtight container in a cool place for up to 4 days.
- Refrigerator: Keep in an airtight container or sealed bag in the fridge for up to 3 weeks.
- Freezer: Freeze in a freezer-safe container or bag for up to 3 months. Thaw overnight in the refrigerator or at room temperature for about 1 hour before serving.
Chocolate Peanut Butter Balls Recipe FAQs
Not necessarily! They can be kept in a cool place for short-term storage, but I prefer refrigerating them so the chocolate stays firm, especially during warmer weather.
Yes, but I prefer almond bark or melting wafers because they’re easier to melt and dip. Chocolate chips tend to make a thicker coating and may not give you the same smooth finish.
More No-Bake recipes to try
If you love easy treats that don’t require baking, here are a few more of my favorite recipes to try!

Tried this recipe? Leave a ⭐⭐⭐⭐⭐ rating and let me know what you think in the comments! You can also follow me on Pinterest for even more easy, family-friendly recipes.
Want to save this recipe?
Enter your email & I’ll send it to your inbox. Plus, get great new recipes from me every week!

Chocolate Peanut Butter Balls Recipe
Ingredients
- 3 cups chunky peanut butter
- 1 lb powdered sugar
- 2 cups Rice Krispies cereal
- 4 tablespoon butter softened (or margarine)
- 2 lbs melting chocolate or almond bark
Instructions
- In a large bowl, mix together the peanut butter, powdered sugar, Rice Krispies cereal, and softened butter until combined. If the mixture is too crumbly to hold together, add a little more peanut butter.
- Line a cookie sheet with wax paper. Roll the peanut butter mixture into 1-inch balls and place them on the prepared cookie sheet. Refrigerate for about 2 hours, or until firm.
- Once chilled, melt a few squares of chocolate at a time in the microwave, stirring between 30-second intervals. Using a fork, roll each peanut butter ball through the melted chocolate twice to coat completely.
- Place the coated peanut butter balls back onto the wax paper and refrigerate until the chocolate has hardened.
- Once set, transfer to an airtight container and store until ready to serve.
Notes
- Peanut Butter: I prefer chunky peanut butter for extra crunch, but creamy works too. Avoid natural peanut butter that separates, as it can affect the consistency.
- Chocolate Coating: Almond bark is my favorite for easy dipping, but milk, dark, or white chocolate melting wafers also work. Chocolate chips may create a thicker coating.
- Dipping Tip: Make sure the peanut butter balls are fully chilled before dipping. Use a fork to coat them in chocolate and tap off any excess before placing them on wax paper.
- Troubleshooting: If the filling is too crumbly, add a little more peanut butter. If it’s too sticky to roll, refrigerate for 20-30 minutes or add a little more powdered sugar.
- Storage: Keep in an airtight container in a cool place for up to 4 days, refrigerate for up to 3 weeks, or freeze for up to 3 months. Thaw frozen balls overnight in the refrigerator before serving.
Nutrition


Leave a Reply