
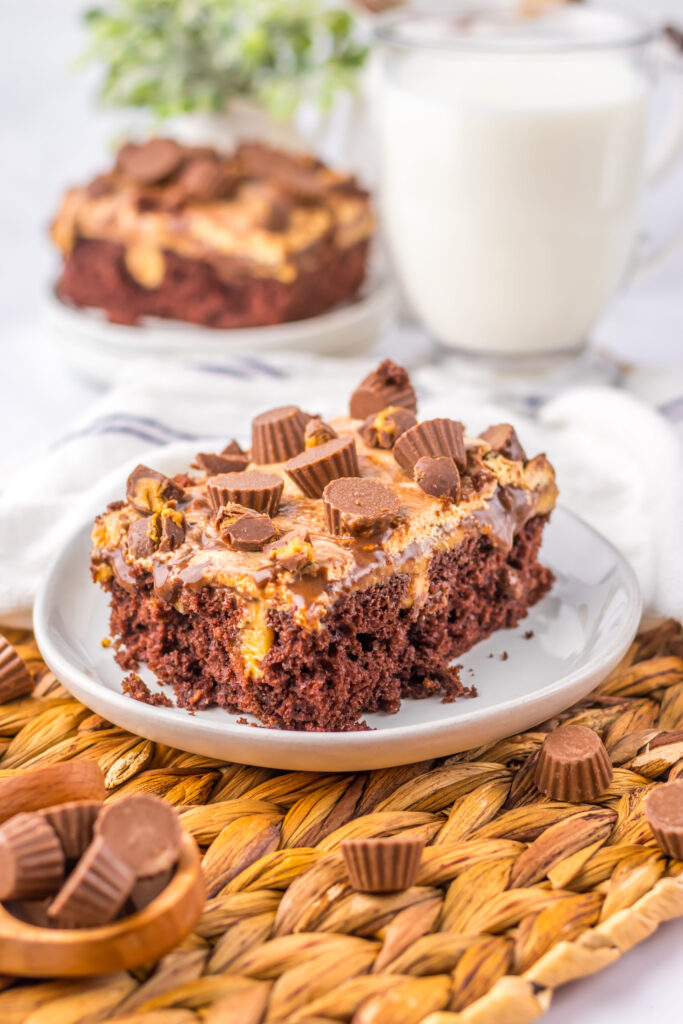
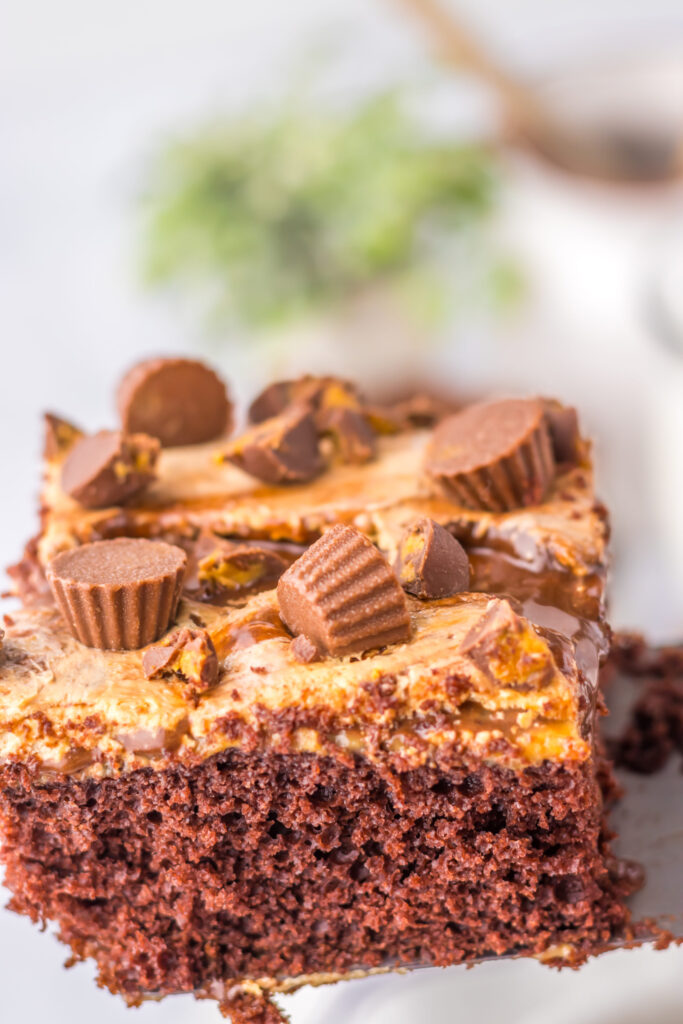
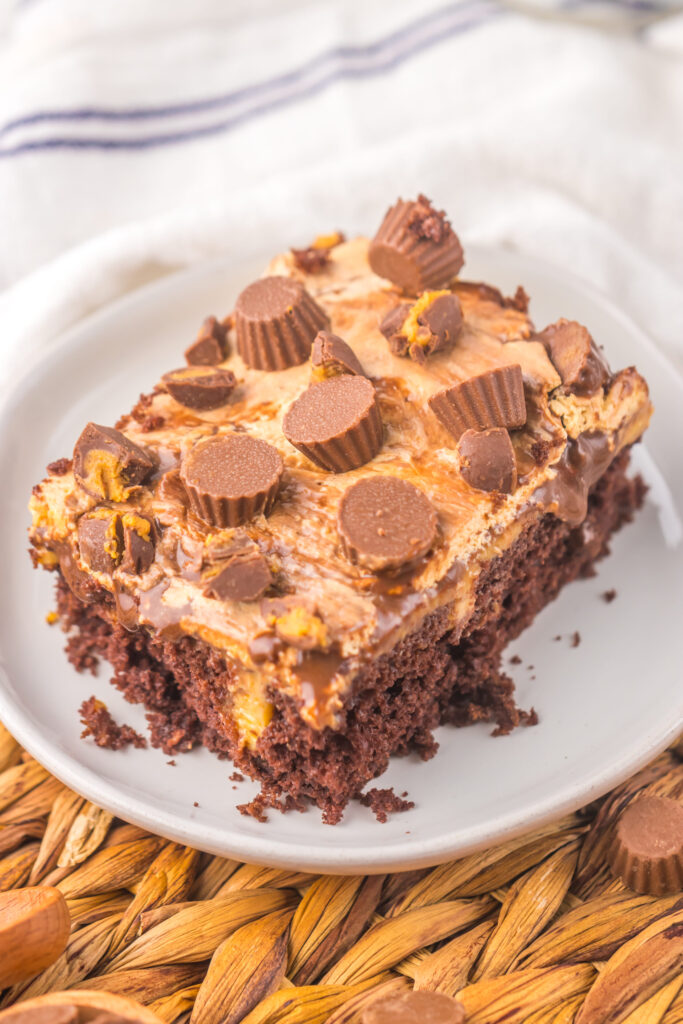
This easy Chocolate Peanut Butter Poke Cake recipe is the ultimate dessert to enjoy for any occasion! Moist chocolate cake with a peanut butter filling, chocolate frosting, and of course, Reese’s peanut butter cups on top!
If you’ve never had a poke cake, prepare to fall in love! With so many flavor combos to choose from, it’s a dessert that just keeps giving! From Banana Pudding Poke Cake to Lemon Poke Cake, S’mores Poke Cake, and now this Peanut Butter Chocolate Poke Cake version, you can’t go wrong!
What is Poke Cake?
Traditionally, poke cakes are made using store bought cake mixes, however, homemade cake recipes work great as well! You simply make the cake as directed, allow it to cool, and using the end of a wooden spoon, you poke holes in the top of the cake. From there, you pour a glaze, pudding, or sauce over the cake which soaks into the holes and then you can top the cake with frosting or whipped cream. When you go to serve the cake, each bite gets both cake AND the pudding mixture that soaks into the cake, resulting in a moist, flavorful dessert everyone enjoys!
For another chocolate twist, try this chocolate Kahlua poke cake recipe with a hint of coffee flavor.

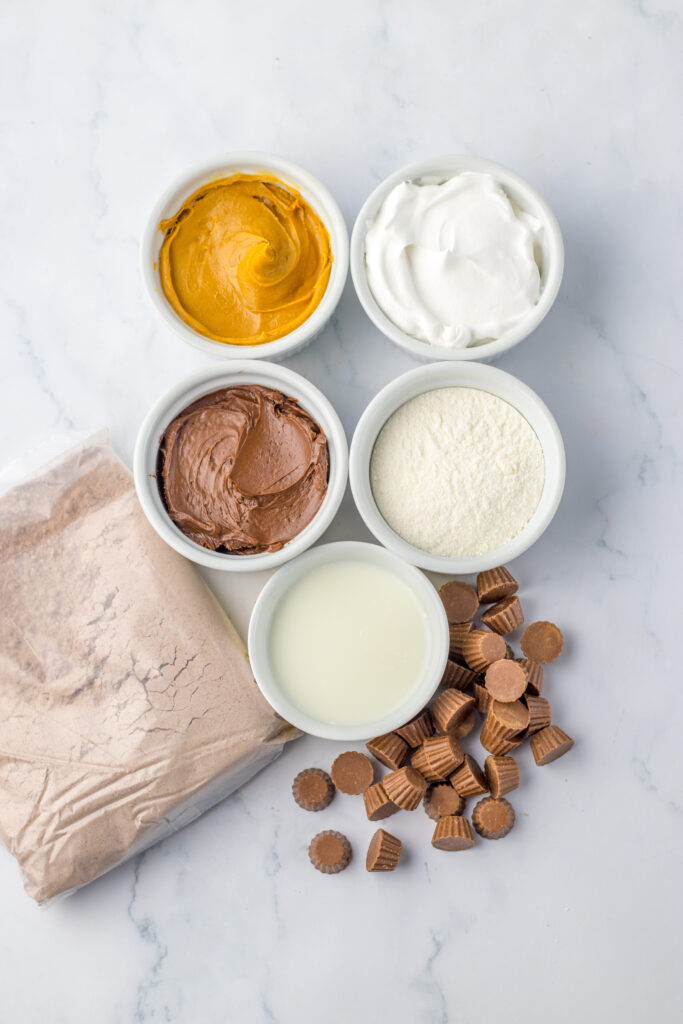
Chocolate Peanut Butter Poke Cake Ingredient Notes
See printable recipe card at the bottom of the post for exact ingredient amounts and step by step instructions.
- Chocolate Cake– for this recipe I used Devil’s food cake mix, a 15 ounce box, plus you will need ingredients listed on box. If you want to go the homemade route, try this Chocolate Mayonnaise Cake recipe!
- Vanilla Pudding– make sure you use Instant Pudding for this recipe so it sets up quickly. 3.4 ounce size box.
- Milk– any type works, I use 2%. This combines with the pudding to help it set up.
- Peanut Butter– I use creamy, smooth peanut butter. This ingredient combines into both the pudding and whipped topping to make the ultimate peanut butter lovers dreams come true.
- Frosting– I tend to go the store bought route and use chocolate frosting, but feel free to change this up to homemade or a flavor you desire.
- Whipped Topping– I buy this in the frozen section, just make sure to thaw it first as you’ll combine it with the creamy peanut butter.
- Reese’s Peanut Butter Cups– you can use mini size pieces, or whole peanut butter cups chopped.
Substitutions and Variations
- Change up the toppings: you can drizzle chocolate, caramel sauce, or peanut butter. You can also add chocolate chips, Reese’s pieces, peanut butter chips, chopped nuts, and chocolate candies.
- Pudding Flavor: if you’re a chocolate lover, feel free to use chocolate pudding in place of the vanilla pudding.
- Whipped Topping: you can make a classic homemade version, use cool whip, or frozen whipped topping.
- Gluten Free: if you are wanting to make this gluten free, be sure to use gluten free flour in a homemade cake recipe, or find a gluten free boxed cake mix. Note, not all canned frosting is gluten free, so check your labels.
- Frosting: if desired, you can use peanut butter frosting in place of chocolate frosting.
How to make Chocolate Poke with Peanut Butter
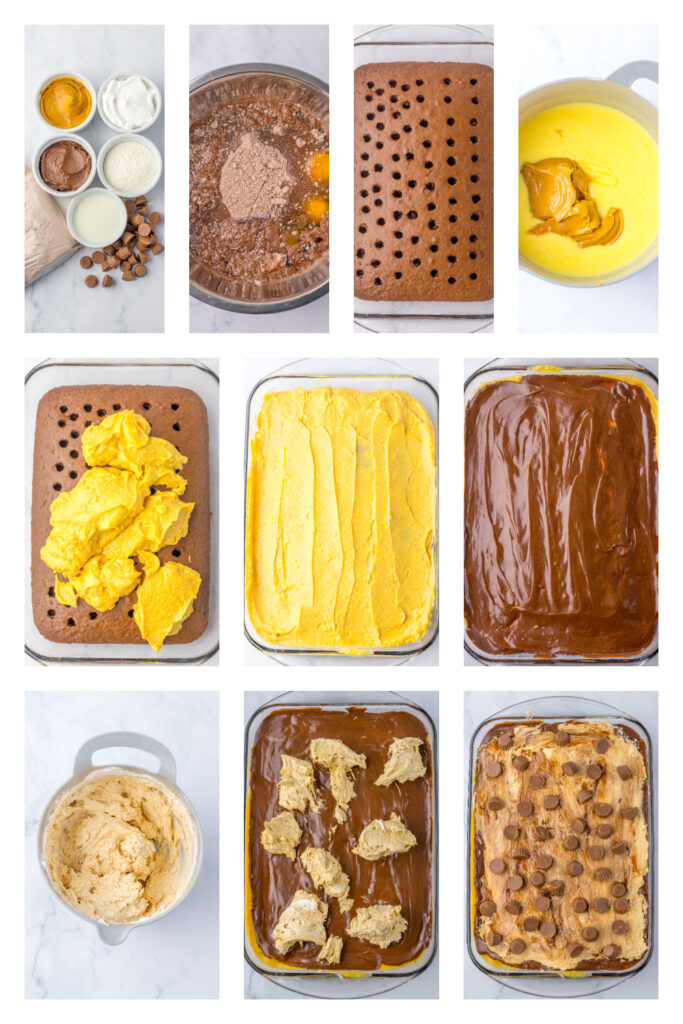
- Prepare the cake mix in a large mixing bowl according to the back of the box. Pour in a 9×13 inch pan and bake according to the box. Let the cake cool completely for 15-20 minutes, using the round end of a wooden spoon poke holes all around the cake, about ½ inch apart from each other.
- In a small bowl add the pudding mix and 2 cups of cold milk. Whisk for 2 minutes or until it is dissolved all the way. Add in ½ cup of peanut butter and whisk again until completely mixed together. Spread the peanut butter mixture all over top of the cake making sure it falls and gets in the holes.
- In a microwave safe bowl add the chocolate frosting and microwave for 10-20 seconds or until the frosting is melted. Pour it all over top of the cake and spread it lightly around the entire cake with the back side of a spoon or spatula. Place the cake in the fridge for 30-40 minutes.
- In a large bowl add the 1 cup of peanut butter and the whipped topping, stir until everything is completely mixed together. Spread over the top of the cake, don't worry, the chocolate frosting will end up mixing with the whipped peanut butter and start to swirl as you mix it, it'll look weird at first but it turns out pretty.
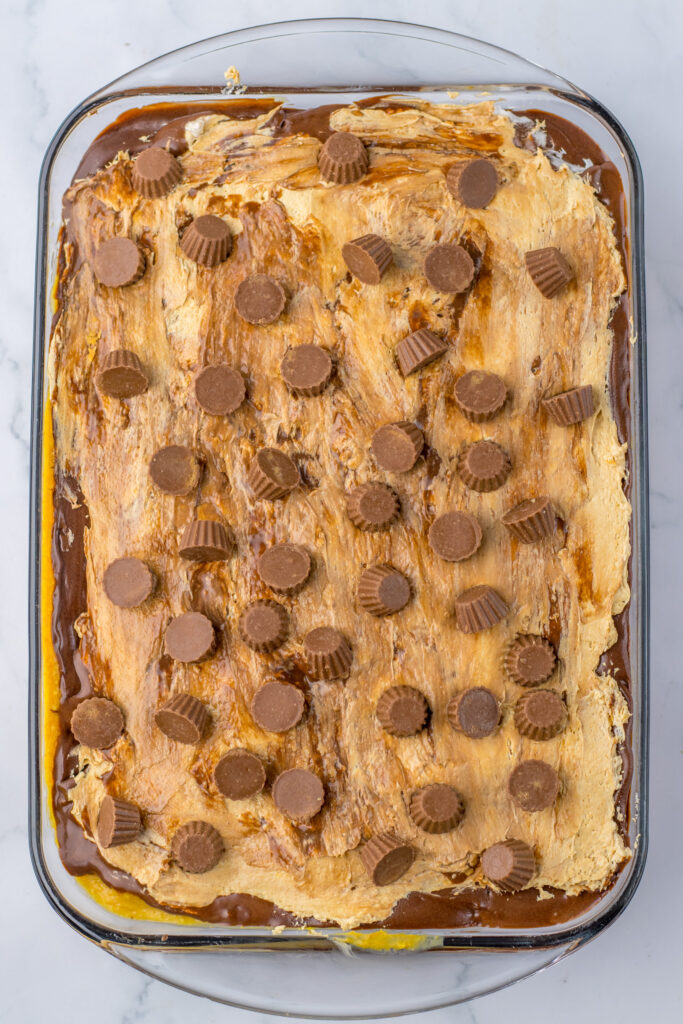
- Sprinkle the chopped peanut butter cups all over the top of the cake (whole or chopped your choice) and then place in the refrigerator for 3-4 hours. Slice and enjoy!
Storing Reese’s Poke Cake
- Store leftover poke cake in an airtight container in the refrigerator for up to 5 days.
- Unfortunately, due to the whipped topping, you will need to keep this cake in the fridge versus leaving out at room temperature.
- Slice the cake and wrap each slice tightly in plastic wrap. Then, freeze for up to 3 months. Allow cake to thaw overnight before serving.
- Make Ahead: feel free to make this up to 24 hours in advance as it actually tastes BETTER when you let it sit for a few hours!
Easy Chocolate Peanut Butter Poke Cake Tips
Follow these simple tips for the best chocolate and peanut butter cake!!
- When poking the holes into your cake, use the end of a wooden spoon for consistency. You can also use a smoothie straw if preferred.
- Allow cake to cool completely in-between layers so the layers don’t melt or blend together.
- Ensure that your cake mix ingredients are at room temperature so they combine easily. You want to make sure you don’t over-mix the cake batter as this can lead to a dense cake versus moist and fluffy.
- Since each oven cooks differently, be sure to keep an eye on your cake about five minutes before the box or recipe says it should be done. You can insert a toothpick into the center of the cake and if it comes out clean, it is ready to be removed from the oven.
Chocolate & Peanut Butter Cake FAQ’s
How do I poke the cake?
Once the cake is fully cooled, turn a wooden spoon over and poke holes. I tend to be a little OCD about it and count even numbers of holes in rows so it is all even and each piece gets the yummy pudding filling throughout.
Why is my poke cake soggy?
Unfortunately, if you poke holes that are too close together or use a liquid filling, this can happen. Ensure that the holes throughout are evenly spaced to where they won’t seep together. Also, make sure the pudding mixture has set up and is not watery. Allowing the cake to set in the fridge for a few hours also helps prevent this!
Can I make this Reese’s poke cake ahead of time?
Absolutely! Go ahead and make your poke cake and store tightly covered in the refrigerator up to 2 days. Personally, I recommend no more than 24 hours in advance, but 48 hours works too. Remove the cake from the fridge and allow it to warm to room temperature before slicing and serving.
More Cake Recipes to try
Chocolate Oatmeal Cake– moist, rich, and full of flavor, this old fashioned dessert is perfect for any occasion and a great way to satisfy any sweet tooth craving!
Starbucks Carrot Cake– a moist and fluffy spiced cake with an incredible cream cheese frosting, what's not to love?
Oreo Dirt Cake– this dirt cake is loaded with chocolate goodness in every bite. Moist chocolate cake combined with hot fudge, pudding, Cool Whip, and crushed Oreos! The ULTIMATE sweet tooth lovers dessert!
Old-Fashioned Chocolate Eclair Cake– indulge in the delectable delight of an easy, no-bake dessert that the whole family will love
Texas Sheet Cake– a delicious and classic dessert that is loved by many for its chocolate flavor, fudge frosting, and easy preparation. This sheet cake is a thin, flat cake made with a rich chocolate batter, baked in a jelly roll pan, and typically topped with a thick layer of incredible chocolate frosting.
Copycat Zebra Cakes– a copycat version of the classic Little Debbie dessert!
Want to save this recipe?
Enter your email & I’ll send it to your inbox. Plus, get great new recipes from me every week!
Reese’s Peanut Butter Chocolate Poke Cake
Equipment
Ingredients
- 15 oz chocolate cake mix plus ingredients listed on box
- 3.4 oz Instant Vanilla Pudding
- 2 cups cold milk
- 1 ½ cups peanut butter divided, creamy
- 16 oz chocolate frosting
- 8 oz whipped topping thawed
- Reese's Cups mini or chopped
Instructions
- Prepare the cake mix in a large mixing bowl according to box directions. Pour into a greased 9×13 baking pan and bake in oven as directed on box.
- Once cake is baked, allow to cool completely and using the end of a wooden spoon, poke holes evenly over the entire cake, about ½ inch apart from each other.
- In a small mixing bowl, whisk together the pudding mix and cold mix until pudding mix has dissolved. Add in ½ cup peanut butter and continue whisking until smooth and combined. Pour pudding mixture evenly over the top of the cake ensuring all the holes get filled.
- In a microwave safe bowl, adding the chocolate frosting and microwave for about 15-20 seconds, or until melted. Pour it evenly over the entire cake and spread around. Place the cake in the refrigerator to chill for about 30-40 minutes.
- In a large bowl, add the remaining 1 cup of peanut butter and whipped topping. Stir until combined. Remove cake from fridge and spread mixture evenly on top of cake. It's okay if the chocolate frosting mixes with the peanut butter whipped topping. It can swirl and add a pretty addition.
- Sprinkle Reese peanut butter cups over the top of the cake and place back into the refrigerator to chill for about 3-4 hours. Slice into desired sized pieces and enjoy!


Leave a Reply