
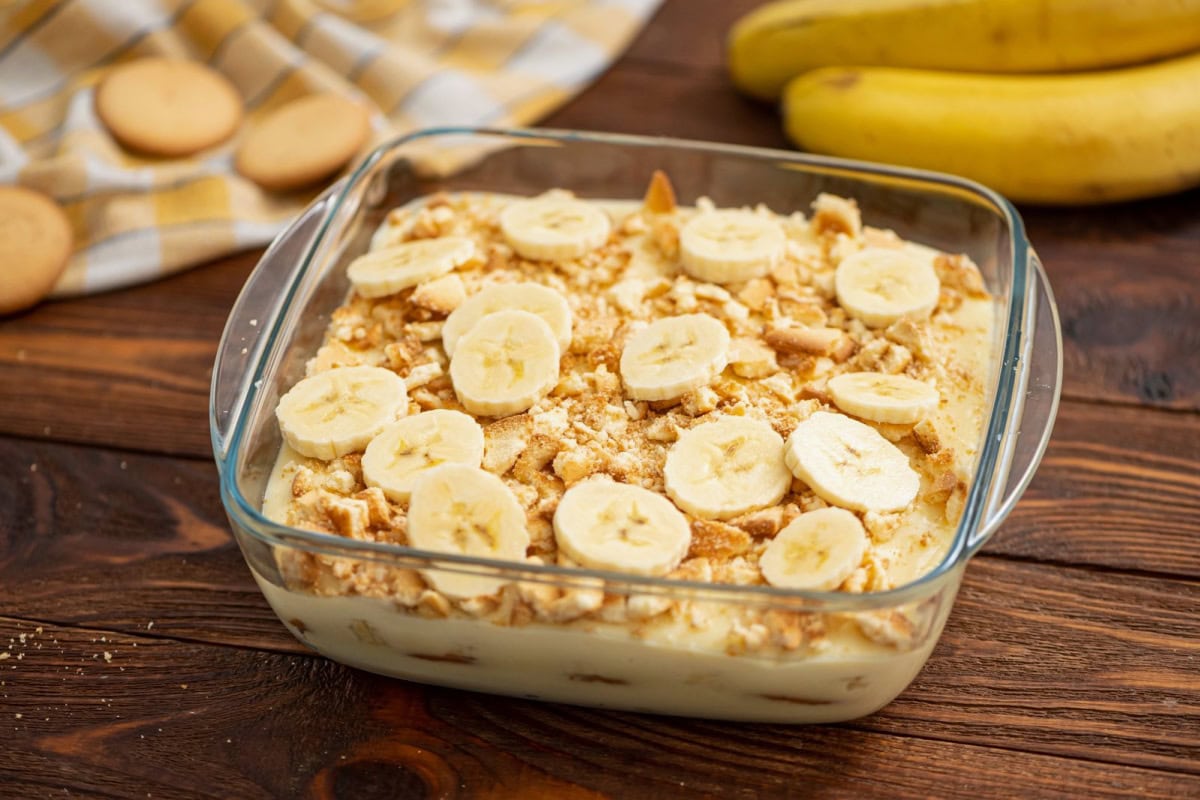
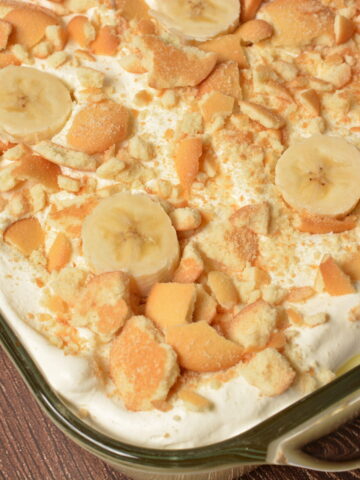
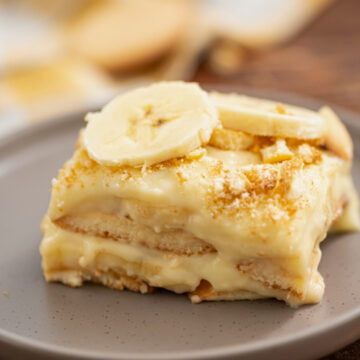
Old-Fashioned Homemade Banana Pudding from scratch is a creamy, nostalgic dessert made with layers of rich vanilla pudding, vanilla wafers, and perfectly ripe bananas. Easy to assemble and packed with flavor, this old-fashioned dessert is always a favorite at potlucks, picnics, BBQs, holidays, and family gatherings!
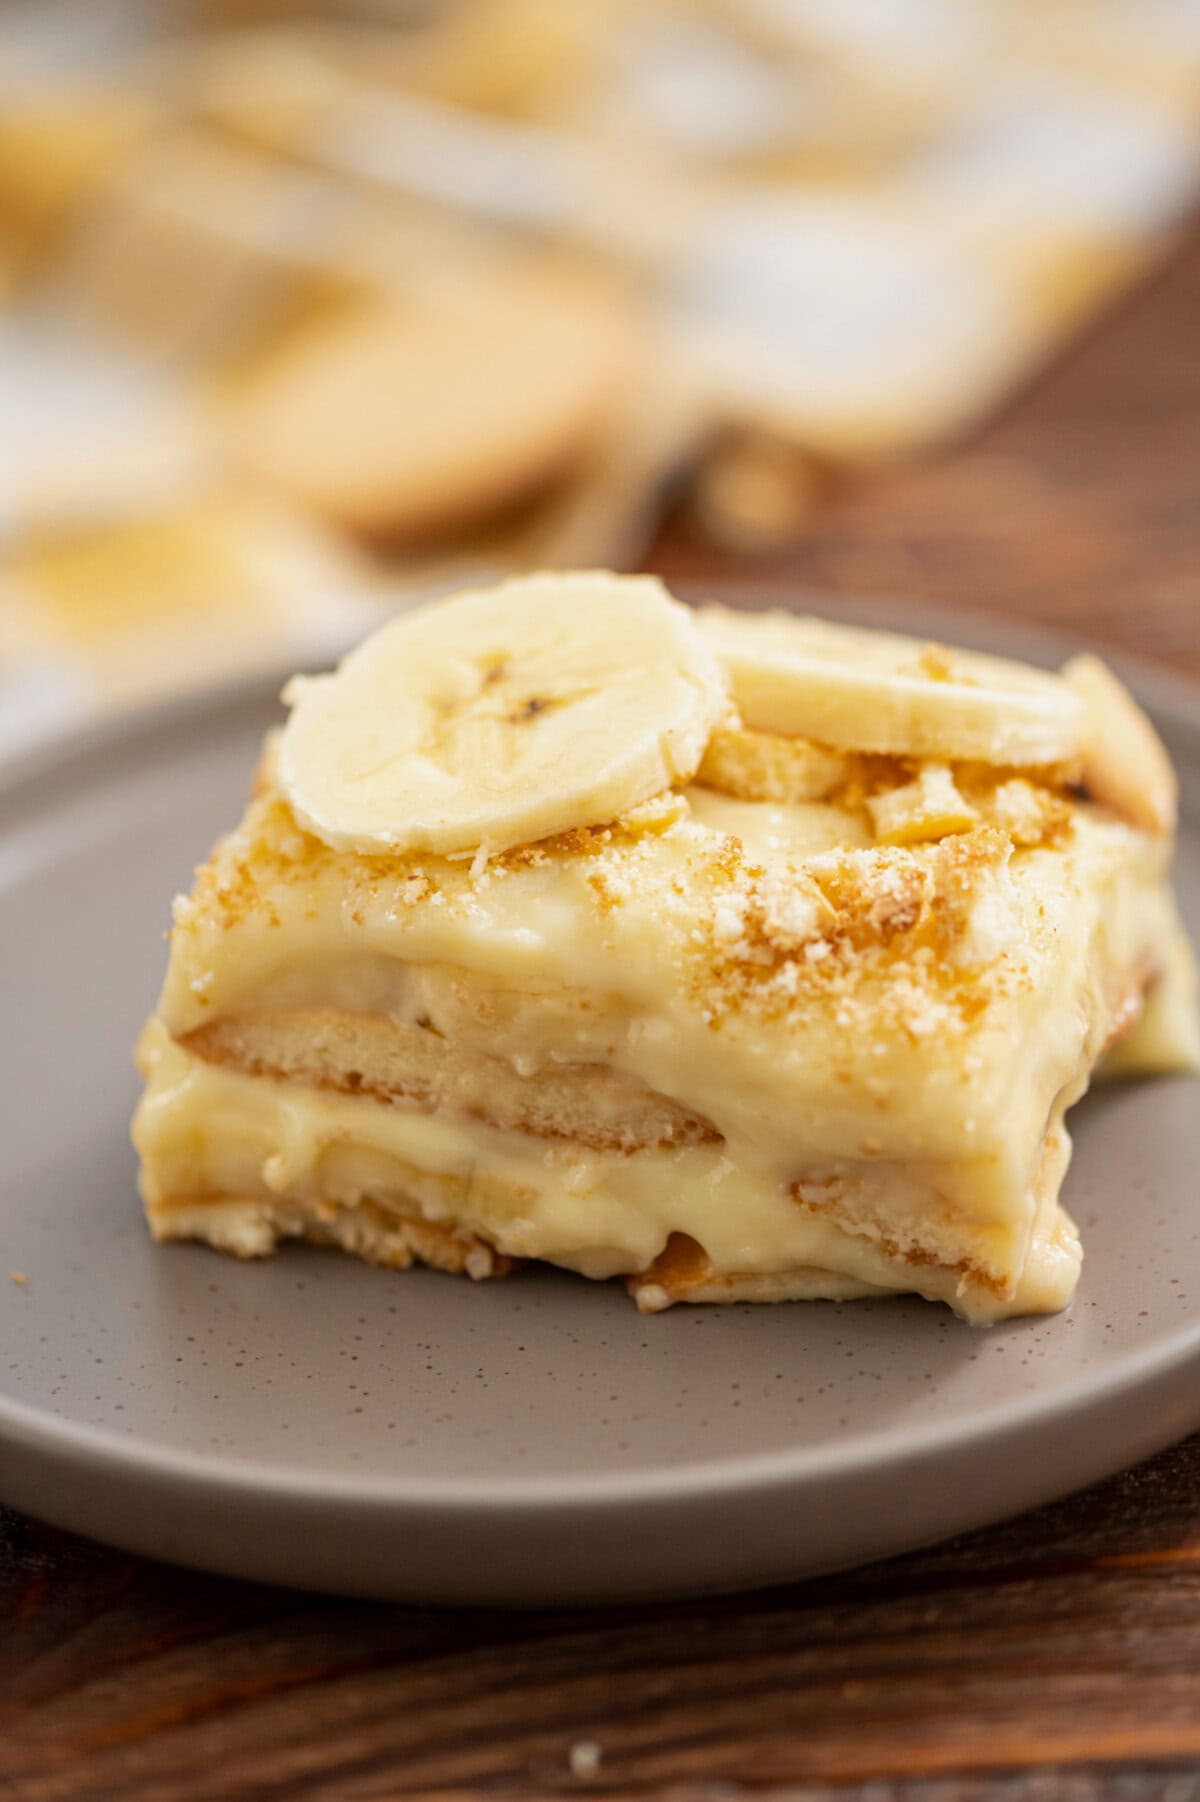
Creamy, flavorful, and downright amazing! This homemade banana pudding is a Southern classic dessert layered with vanilla wafers, fresh banana slices, and rich homemade vanilla pudding in every bite. Make it ahead of time and let it chill overnight so the flavors blend together perfectly! For another creamy banana dessert, try my Banana Pudding Cheesecake Squares!
Quick Look: Homemade Banana Pudding
- Prep Time: 10 mins
- Cook Time: 10 mins
- Chill Time: 4 hrs
- Total Time: 4 hrs 20 mins
- Servings: 8
- Flavor: Creamy, sweet, nostalgic
- Texture: Smooth pudding with soft bananas and vanilla wafers
- Best For: Potlucks, holidays, BBQs, summer desserts
- Make Ahead Friendly: Yes! Tastes even better chilled overnight
What is Banana Pudding?
Banana pudding is a classic Southern dessert made with layers of creamy vanilla pudding, fresh bananas, and vanilla wafers. This old-fashioned homemade banana pudding is served chilled and is a favorite for potlucks, picnics, holidays, and family gatherings.
The first mention of banana pudding dates back to the late 1800s, and since then, it has become a nostalgic dessert loved for its creamy texture and sweet banana flavor. Whether served at BBQs, church potlucks, or holiday gatherings, it's a timeless dessert that never goes out of style.
OH MY. this is by far one of the best banana puddings I've ever had. no artificial taste. no boxed pudding mix. I added mashed bananas to the pudding mixture as well just based off our preferences. it's a definite hit for my southern man! thank you!!
Ingredient Notes
See the printable recipe card below for exact measurements and full directions.
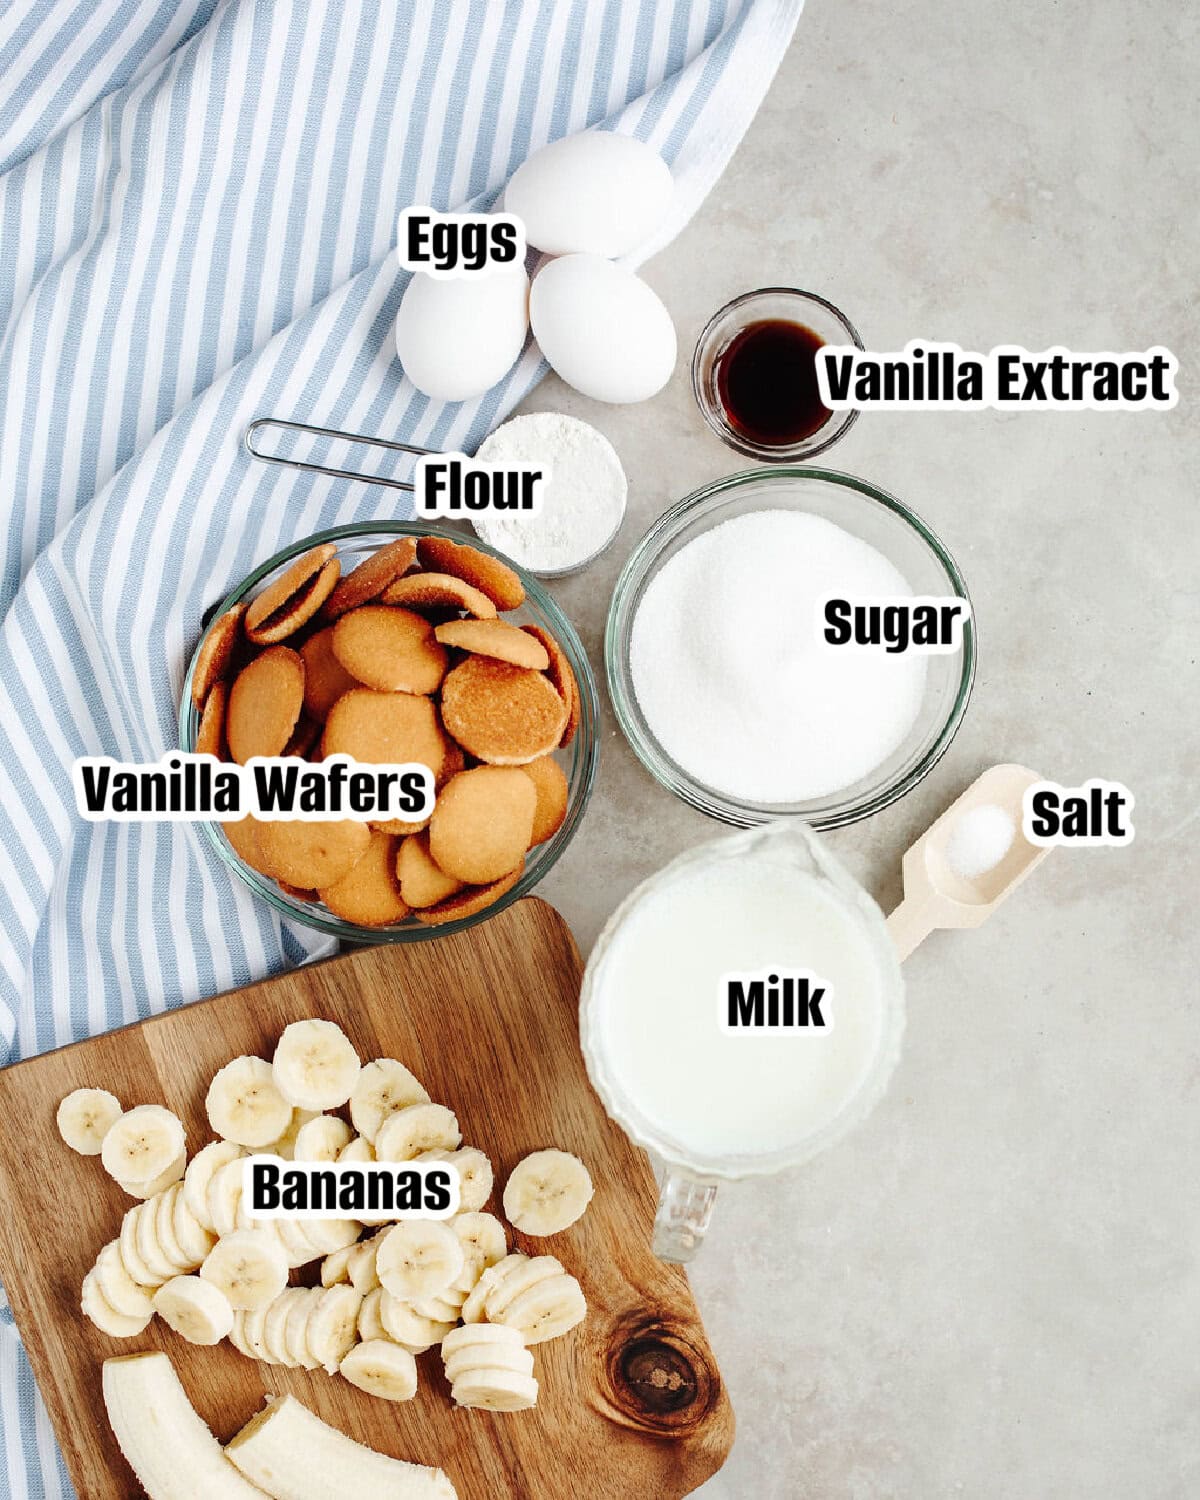
- Vanilla Wafers: I highly recommend using classic Nilla Wafers for the best flavor and texture. They soften perfectly as the pudding chills overnight.
- Bananas: Use ripe bananas with a few brown spots for the best sweet banana flavor. Avoid overly green bananas since they can be firm and less flavorful.
- Vanilla Extract: Pure vanilla extract gives this homemade pudding the best classic flavor. I don't recommend imitation vanilla for this recipe.
- Milk: Whole milk creates the creamiest homemade pudding texture, but 2% milk can also work if that's what you have on hand.
Variations
- Add Whipped Cream: For an extra creamy layer, add whipped cream or whipped topping between the pudding layers or on top before serving.
- Use Lady Fingers: Lady fingers can be used in place of vanilla wafers for a slightly different texture and flavor.
- Make Banana Pudding Cups: Layer everything into small jars or dessert cups for parties, BBQs, and potlucks.
- Use Boxed Vanilla Pudding: Short on time? Instant vanilla pudding can be used instead of homemade pudding for a quicker version.
- Try Chessmen Cookies: Swap the vanilla wafers for Chessmen cookies for a richer, buttery flavor twist.
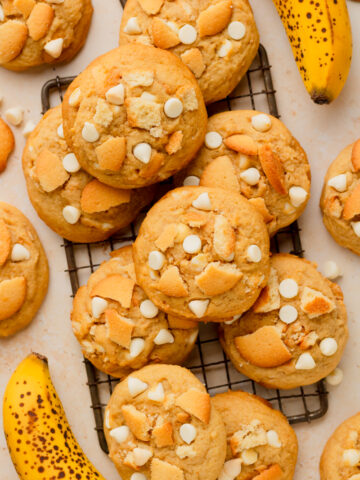
For something a little richer, try my Chunky Monkey Brownies, a fudgy banana brownie recipe loaded with chocolate chips.
How to Make Homemade Banana Pudding from Scratch
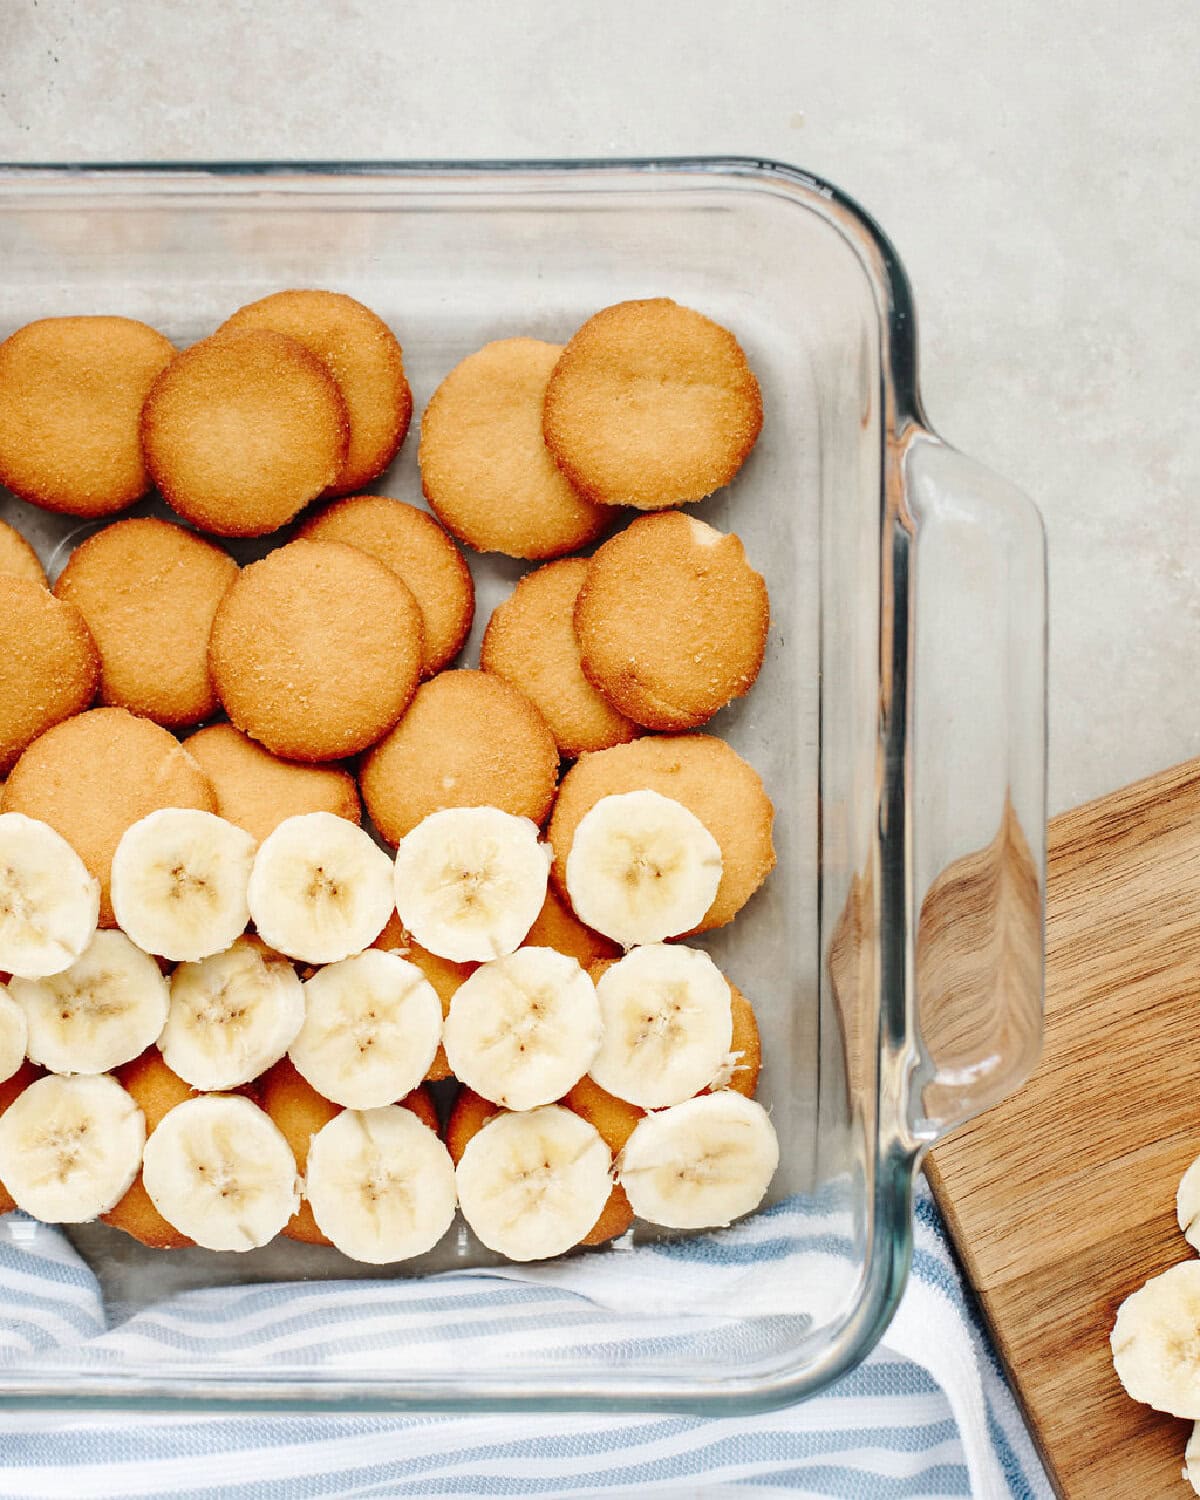
Step 1. In an ungreased 8-inch square pan, layer about 25 vanilla wafers on the bottom, followed by half of the sliced bananas.
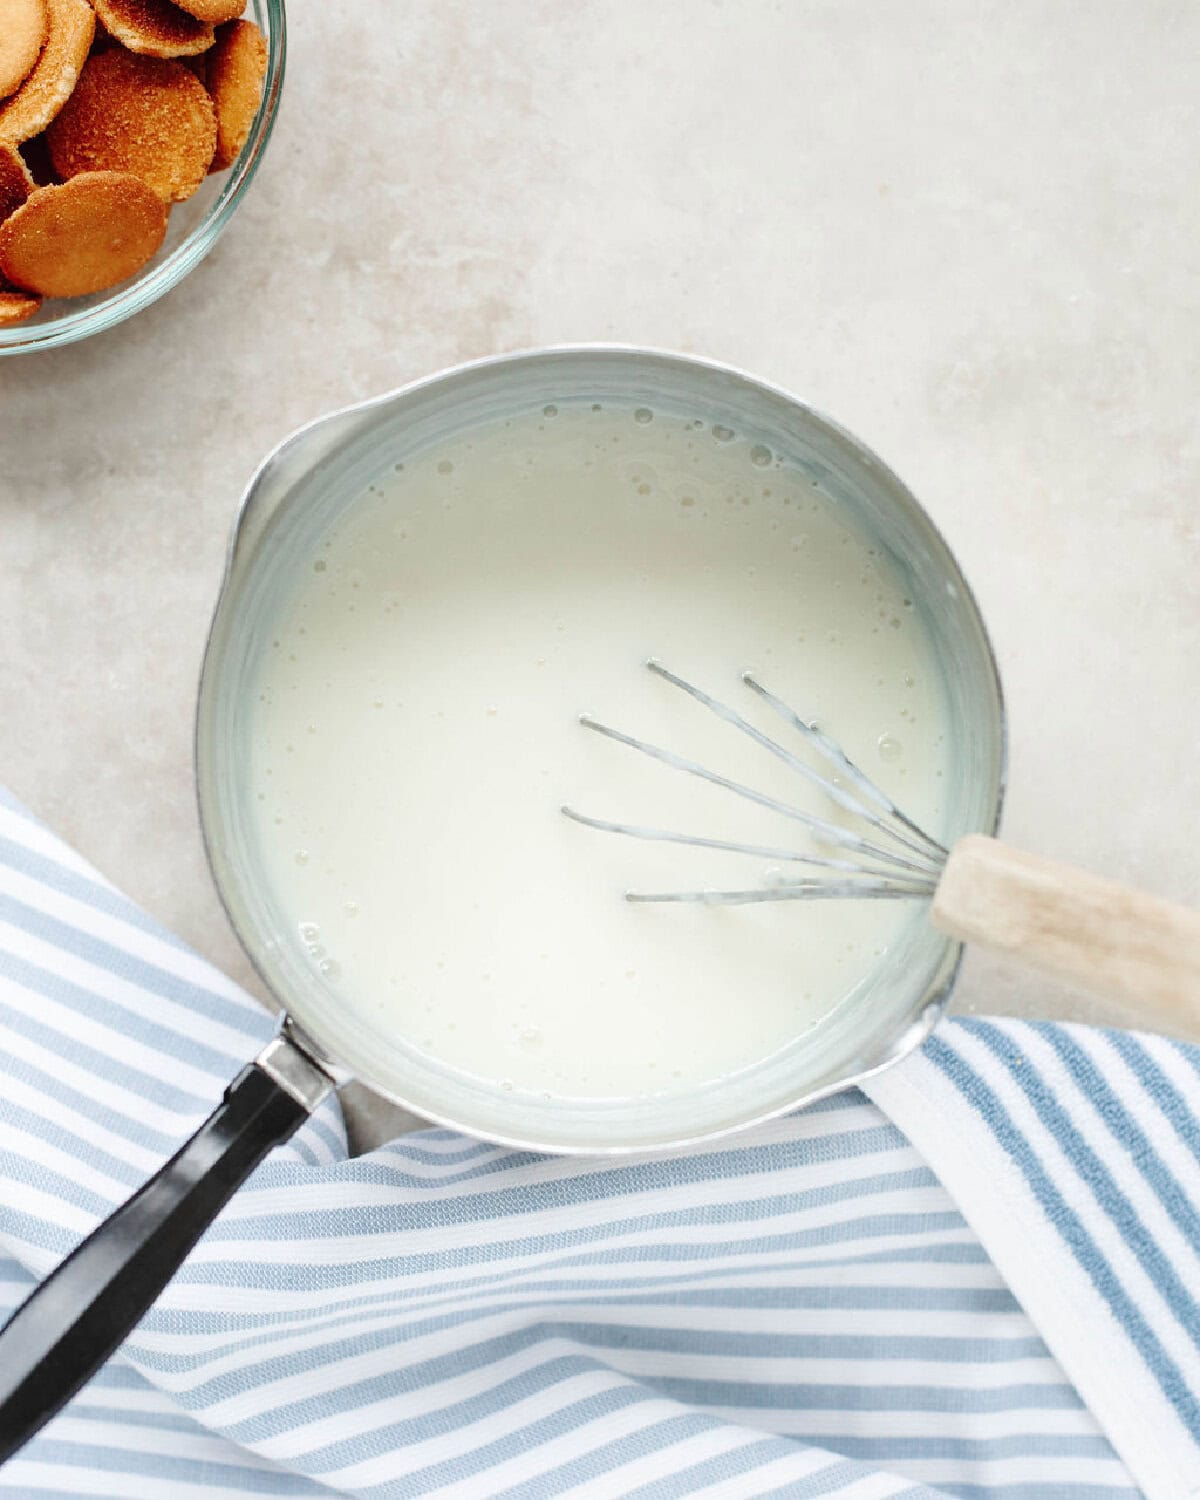
Step 2. In a saucepan, whisk together the sugar, flour, and salt. Slowly whisk in the milk and cook over medium heat until thickened and bubbly. Reduce heat to low and cook an additional 2 minutes before removing from heat.
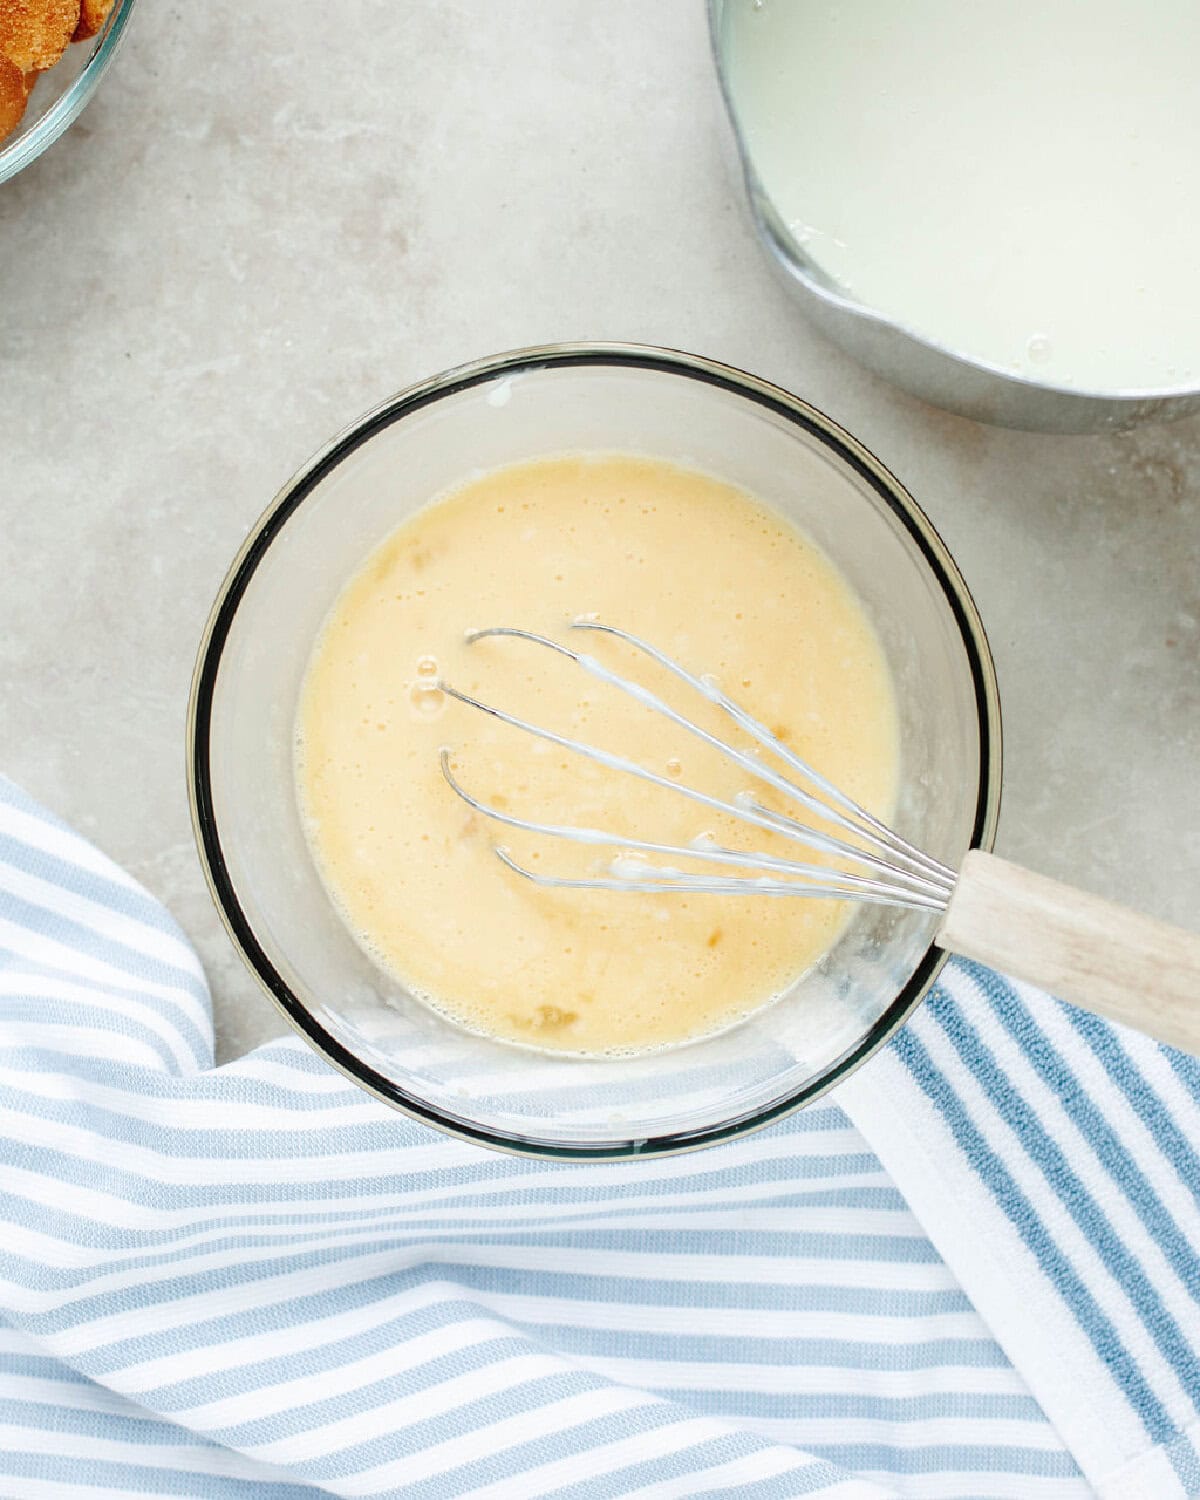
Step 3. In a small bowl, whisk together the eggs. Slowly add a small amount of the hot pudding mixture into the eggs, whisking constantly. Pour the egg mixture back into the saucepan and return to heat. Cook until a gentle boil begins and continue cooking for about 2 minutes. Stir in the vanilla extract, remove from heat, and allow the pudding to cool for about 15 minutes, stirring every few minutes.
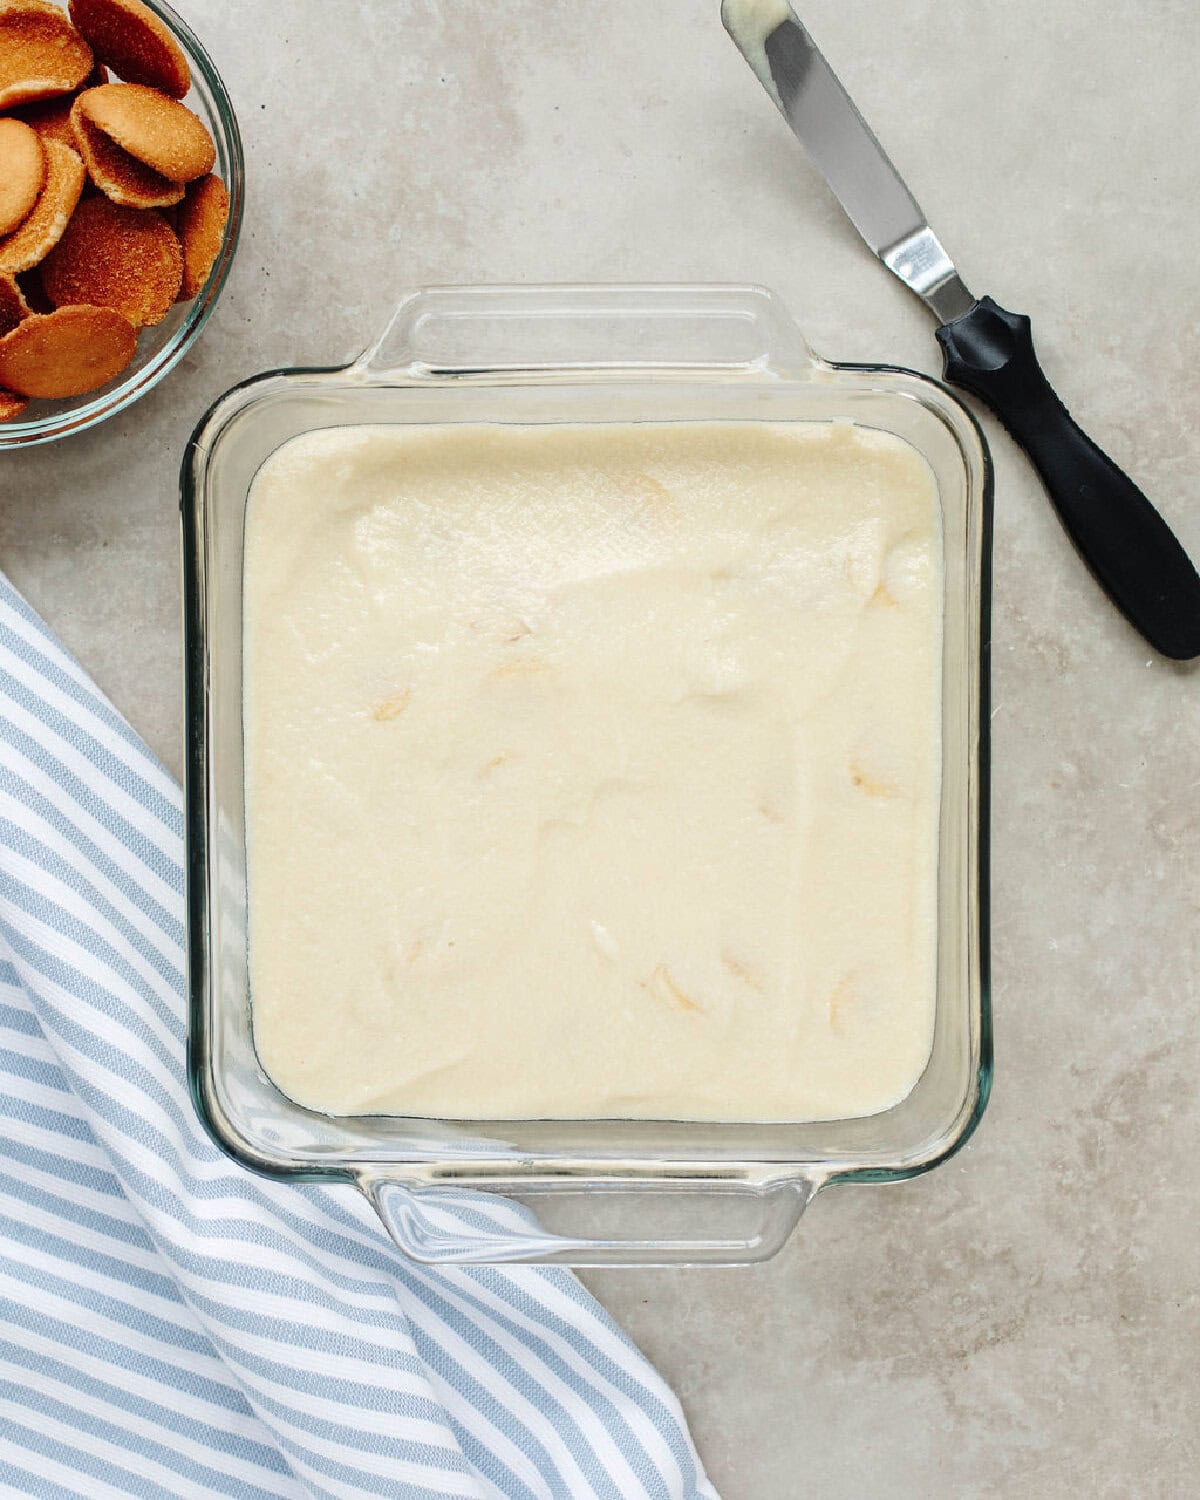
Step 4. Pour half of the homemade vanilla pudding mixture over the bananas and vanilla wafers. Repeat the layers one more time, ending with the remaining pudding on top.
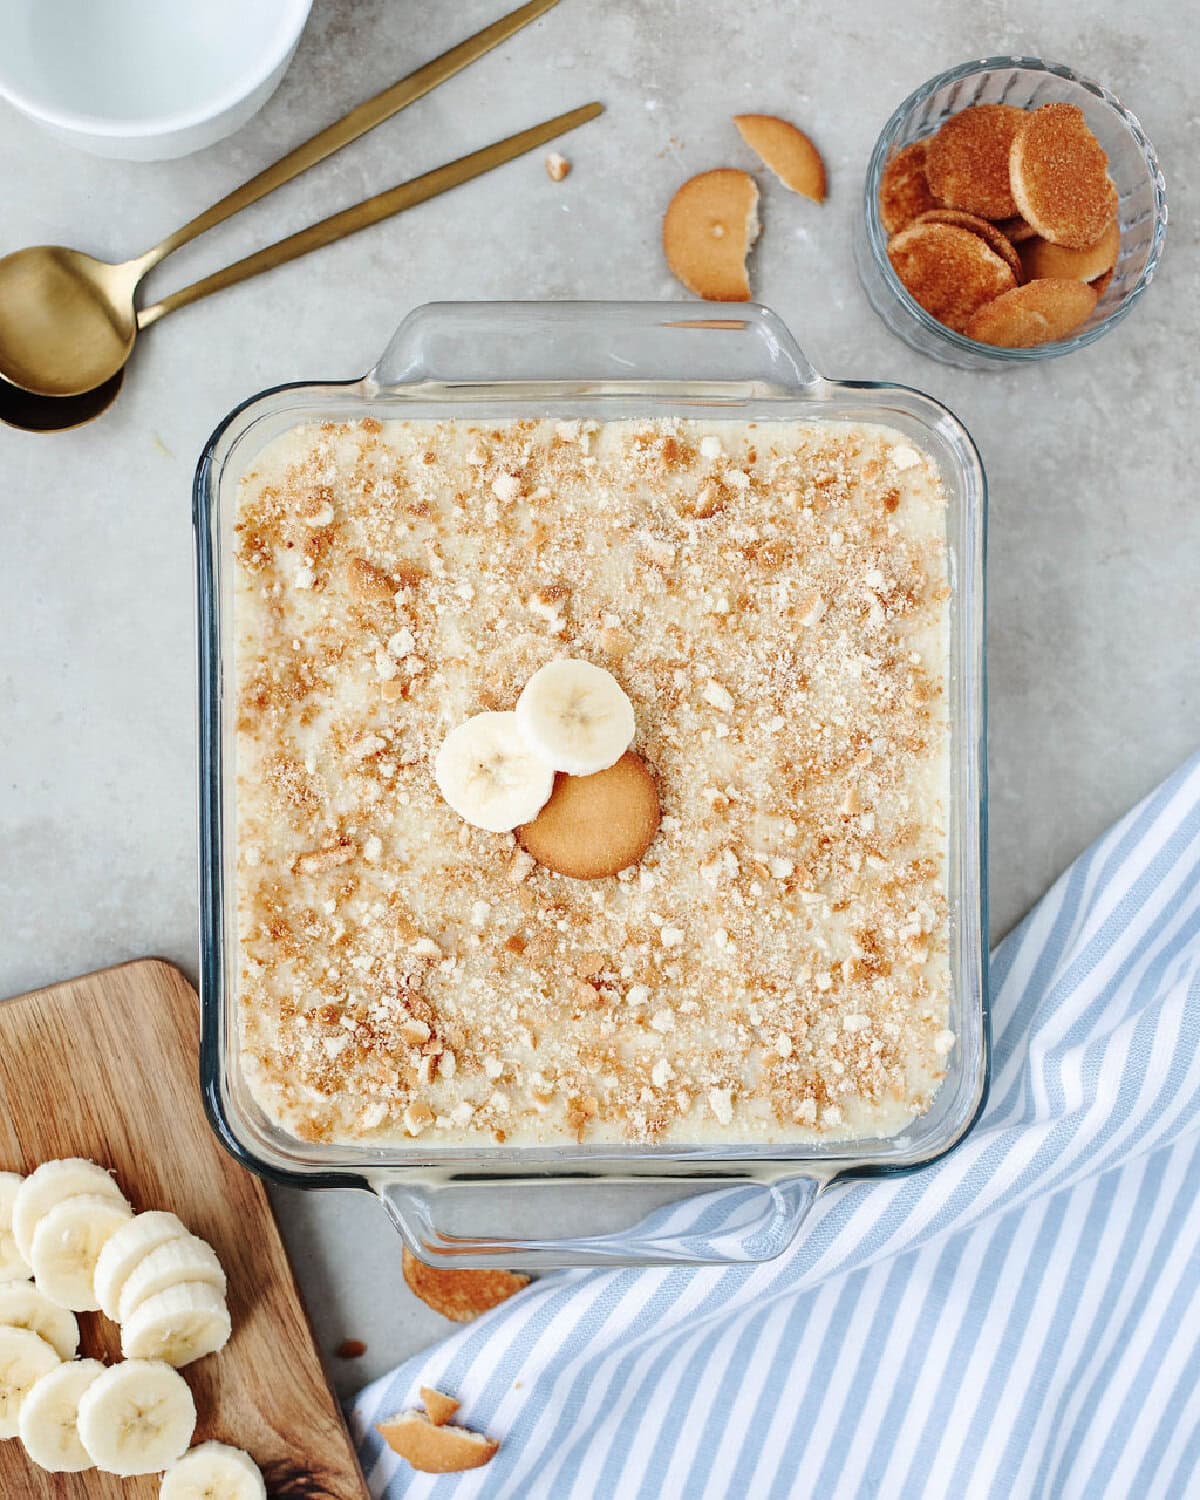
Step 5. Cover the dish with plastic wrap and refrigerate for at least 4 hours, preferably overnight, so the flavors can blend together and the vanilla wafers soften. Just before serving, crush the remaining vanilla wafers on top of the pudding.
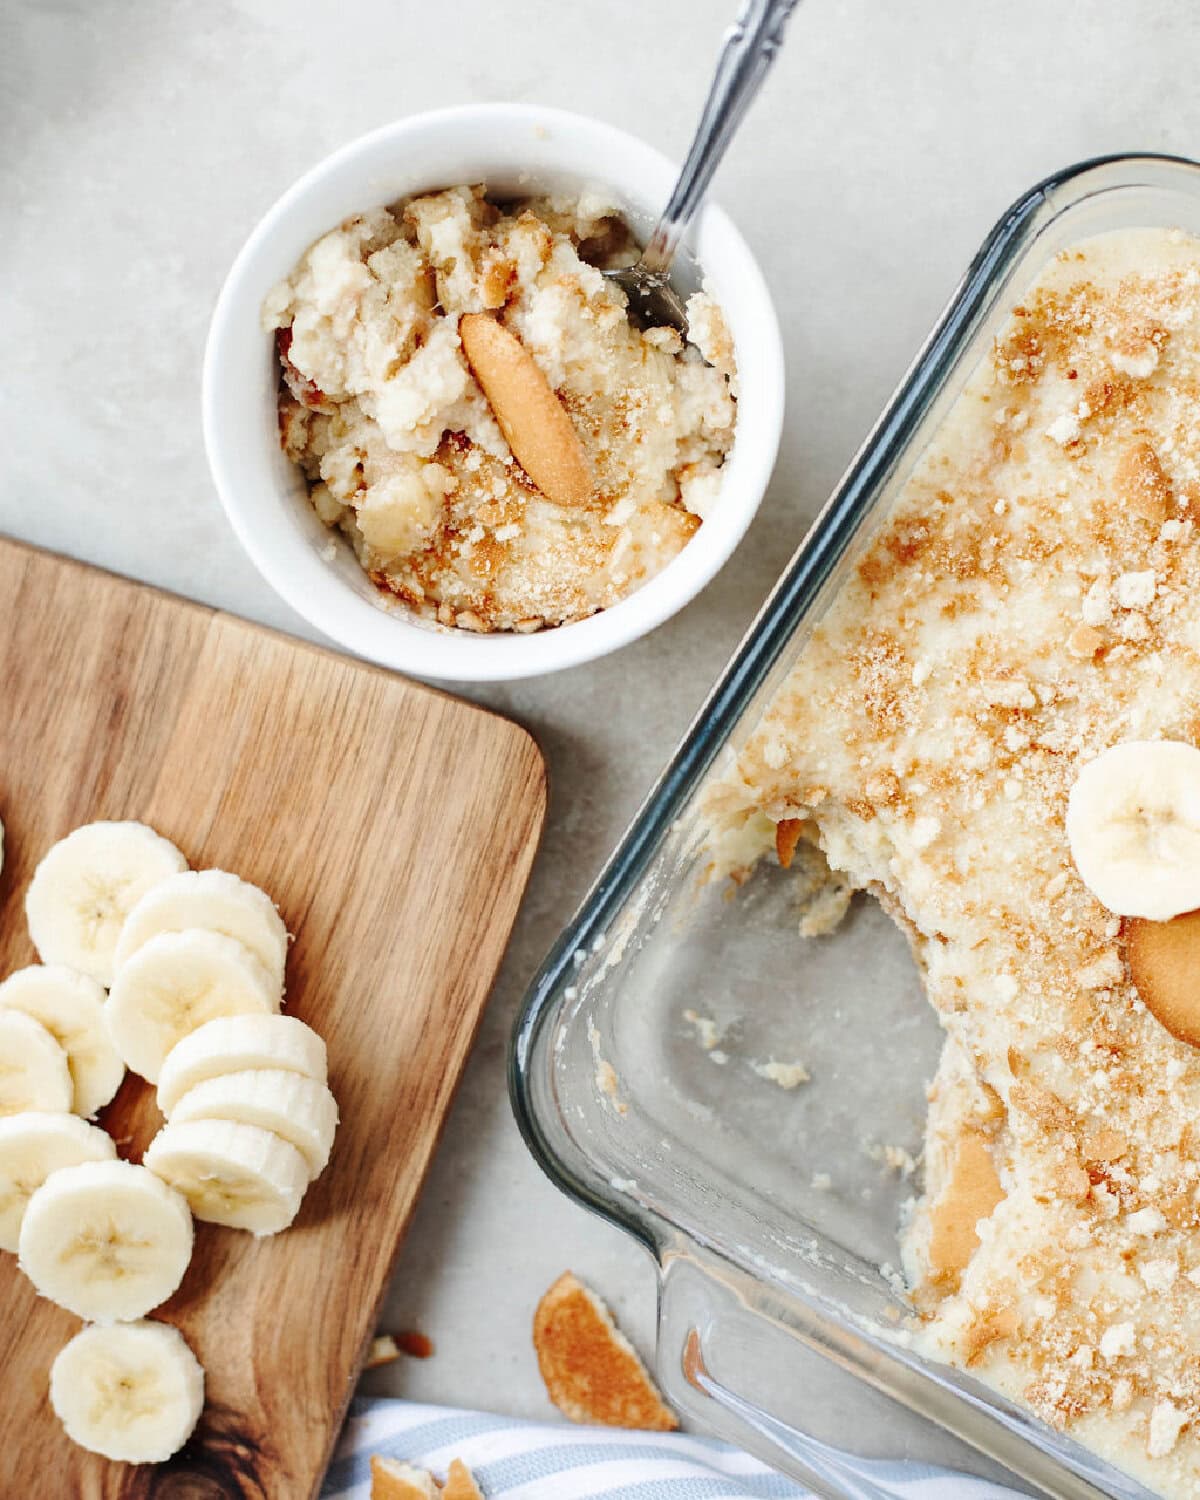
Step 6. Serve cold in bowls and enjoy! Add fresh banana slices or extra crushed vanilla wafers on top just before serving if desired.
Baking Tips
- Use Nilla Wafers: I always come back to classic Nilla Wafers because they soften perfectly and give this banana pudding the best flavor.
- Use ripe bananas: Bananas with a few brown spots will give you the sweetest flavor and best texture.
- Don't rush the pudding: Cook it low and slow so it thickens properly without scorching the milk.
- Temper the eggs slowly: Add a little warm pudding mixture into the eggs first so you don't end up with scrambled eggs in the pudding.
- Chill overnight if possible: The flavors blend together perfectly and the vanilla wafers soften as it chills.
- Add fresh banana slices just before serving: This helps keep the bananas from turning brown.
Storage & Make-Ahead
- Store: Cover the banana pudding tightly with plastic wrap or place in an airtight container and refrigerate for up to 4 days.
- Best Texture: Homemade banana pudding tastes best within the first 1-2 days before the bananas begin to soften too much.
- Make Ahead: This is the perfect make-ahead dessert! Prepare it several hours ahead of time or overnight so the flavors can blend together and the vanilla wafers soften.
- Freezing: I don't recommend freezing banana pudding since the texture can become watery once thawed.
Homemade Banana Pudding Recipe FAQs
Yes! In fact, homemade banana pudding tastes even better after chilling for several hours or overnight because the flavors have time to blend together and the vanilla wafers soften perfectly.
Banana pudding will keep in the refrigerator for up to 4 days when covered tightly. For the best texture and flavor, enjoy it within the first 1-2 days.
Classic Nilla Wafers are my favorite because they soften perfectly and give this old-fashioned banana pudding the best flavor and texture.
I don't recommend freezing banana pudding since the texture can become watery and the bananas can turn mushy once thawed.
More Banana Recipes You’ll Love


If you love classic desserts like this, you'll also enjoy my old-fashioned lazy day cake.
Tried this recipe? Leave a ⭐⭐⭐⭐⭐ rating and let me know what you think in the comments! You can also follow me on Pinterest for even more easy, family-friendly recipes.
Want to save this recipe?
Enter your email & I’ll send it to your inbox. Plus, get great new recipes from me every week!
Old-Fashioned Homemade Banana Pudding
Video
Equipment
Ingredients
- ¾ cup sugar
- ¼ cup flour
- ¼ teaspoon salt
- 3 cups milk
- 3 eggs
- 2 teaspoon vanilla extract
- 1 box vanilla wafers about 8 oz.
- 4 bananas, sliced
Instructions
- In a saucepan, whisk together the sugar, flour, and salt. Slowly whisk in the milk and cook over medium heat until thickened and bubbly. Reduce heat to low and cook an additional 2 minutes before removing from heat.
- In a small bowl, whisk together the eggs. Slowly add a small amount of the hot pudding mixture into the eggs, whisking constantly. Pour the egg mixture back into the saucepan and return to heat. Cook until a gentle boil begins and continue cooking for about 2 minutes.
- Stir in the vanilla extract and remove from heat. Allow the pudding mixture to cool for about 15 minutes, stirring every few minutes.
- In an ungreased 8-inch square pan, layer about 25 vanilla wafers on the bottom, followed by half of the sliced bananas.
- Pour half of the homemade vanilla pudding mixture over the bananas and vanilla wafers. Repeat the layers one more time, ending with the remaining pudding on top.
- Cover the dish with plastic wrap and refrigerate for at least 4 hours, preferably overnight, so the flavors can blend together and the vanilla wafers soften.
- Just before serving, crush the remaining vanilla wafers on top of the pudding. Serve cold and enjoy!
Notes
- Use ripe bananas with a few brown spots for the best flavor.
- Classic Nilla Wafers give this banana pudding the best texture and taste.
- Homemade banana pudding tastes even better after chilling overnight.
- Store covered in the refrigerator for up to 4 days.
- I don't recommend freezing since the texture can become watery once thawed.
Nutrition
Elizabeth says
Hey N- it looks like you owe Kristen an apology! Maybe you should be do as Thumper’s mother once said ” if you can’t say something nice,don’t say it at all”!
And learn some manners. That was incredibly rude of you. How dare you accuse someone that they are lying. Grow up and look in the mirror and find out why you think it is okay to go around and attack someone for sharing “Their” recipe.
Alexis says
Hi! Any suggestions on why my custard did not set (left in the fridge overnight) and what are some ways to adjust next time?
Thanks! 😊
Kristin says
The number one cause of this happening is unfortunately due to not having the pudding mixture cook long enough to fully thicken up. When it goes to be added into the baking dish, it should already have the consistency of pudding and be pretty thick. Hope that helps and hope you enjoy!!
Rashena Conger says
One word: AMAZING! Thank you for sharing!
Kristin says
Yay!! Love hearing this! So glad you enjoyed!
BobbieJo DeBellefeuille says
is there a good substitute for white sugar? maybe, coconut sugar?
Kristin Hayes says
You can substitute white sugar in banana pudding with brown sugar (1:1 ratio), honey (3/4 cup per cup of sugar), or natural and artificial sweeteners like maple syrup, coconut sugar, stevia, or monk fruit. Hope that helps!
Susan says
The picture shows a 9×13 pan, but the recipe calls for an 8X8 pan. Which do I use?
Kristin says
Hi! No, the recipe shows an 8×8 pan, the angle may be making it look larger than it is. 8×8 is perfect unless doubling recipe. Enjoy!
N says
That isn’t correct because you have 6 rows of 4 Nilla Wafers, which would correlate with a rectangular pan. If you used an 8×8 (square) pan, it would be more like 4 rows of 4 wafers. Just be honest with your images and your replies.
Kristin says
I just looked back on the recipe. The recipe itself is an in fact an 8×8 pan, as written. The recipe pictures in the actual recipe card were taken on my iPhone and were of a double batch I made quickly, in a 9×13. If a double batch, you would use a 9×13, if a single batch, its an 8×8
Susan says
Thank you ! Looking forward to trying it!
Leah says
You have entirely too much time on your hands. Did you seriously count and calculate the cookie size?…..but couldn’t calculate the pan size? Or were you just being a Karen? It’s just banana pudding! Throw it in a dish and be done!
Dolly says
Actually , I was glad she asked the question as I found it very confusing. The picture did not match the directions and it was unclear whether this was a single or double batch recipe. I didn’t think she was being a Karen at all.
Sheri says
honestly, I counted too, cause I’ve never made it and wanted it to be right. im glad she asked. sucks she took heat over it, though
Kristin Hayes says
Hope you enjoy the pudding! Keep me posted what you think!!
Harmony says
Have you ever tried this recipe with a non-dairy milk? Thanks!
Kristin says
I haven’t personally tried that, but that should work great too! Keep me posted how it turns out!
Christina says
can I add mashed/pureed banana to the pudding mixture as well?
Kristin says
That should work great too! I haven’t personally tried it, but it sounds like a tasty addition!
Christina says
OH MY. this is by far one of the best banana puddings I’ve ever had. no arficial taste. no boxed pudding mix. I added mashed bananas to the pudding mixture as well just based off our preferences. it’s a definite hit for my southern man! thank you!!
Kristin says
Yay!! Love hearing this! Glad you both enjoyed!!
Jessie says
hello, how many mashed bananas do you put in the pudding?
Kristin Hayes says
You need 4 sliced bananas for the recipe, no bananas get mashed into the pudding!
Ginger Templeton says
Been making a similar recipe for Fifty plus years-I do mine in the microwave now. Make sure you use a microwave safe bowl -whisk well at beginning and microwave 3-4 minutes-whisk-then add egg yolk mixture—whisk in 1-2 minute intervals until thick. No standing and stirring-no scorching-if you get distracted, just whisk and keep going. Take out and add vanilla and I add a half stick of butter. Great with drained sweetened canned pineapple in lieu of bananas and for variety, Chessmen cookies or Biscoff instead of vanilla wafers. I want to try your recipe as mine calls for more sugar, which is probably not needed. Thank you for sharing this recipe!
Kristin says
Oh yum!!! Thanks for sharing these tips!! Enjoy!!
Bing says
The “cooking” time can be reduced significantly if one makes the pudding in a large Pyrex measuring dish and heats in a microwave. Two minutes, then stop and stir. Two more minutes, stop and stir. When it starts to thicken, just take it out and stir again. Add eggs, then heat again about 30 seconds. Perfect every time, and it will never burn. The rest of the directions are the same!
Kristin says
Great tip! Thanks for sharing!!
Amber says
I always have a hard time getting it to thicken up.
Kristin says
Hmmm, they key is the make the roux in beginning which is where the flour comes in. If needed, add a bit more flour or cornstarch until it has thickened up. Enjoy!
Neesy says
Thank you so much! This pudding is so creamy! So delicious! My go to recipe now lol. My whole family devoured it in one night 😂❤
Kristin says
Yay!! Glad you all enjoyed it as much as my family does!!
Neesy says
Does it have to be chilled, or can it be served warm?
Kristin says
It does need to be chilled so that it sets up properly, however, you can take it out of the fridge after a few hours and let it get to room temp if you prefer!
naz khan says
Hi, found your pudding recipe through yummy recipes.. it looks so delicious, I will def be giving it a try, THankyou.. By the way your guy’s kids and familys are adorable:)
Bobbin says
I’m from the UK, and what you call wafers and what we call wafers are nothing the same. I will try this with different biscuits (I think you call them cookies).
Kristin says
A good substitute to vanilla wafers is graham crackers. I have used those before and its a great option too. I sprinkle a bit of cinnamon on top of the graham cracker layer and it’s just as tasty as using vanilla wafers. Enjoy
DARLENE L VASQUEZ says
So is the only banana flavor coming from the sliced bananas?
Kristin Hayes says
Yes! It’s more banana and vanilla flavors!