
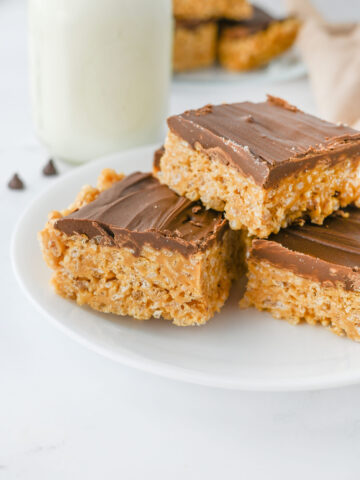
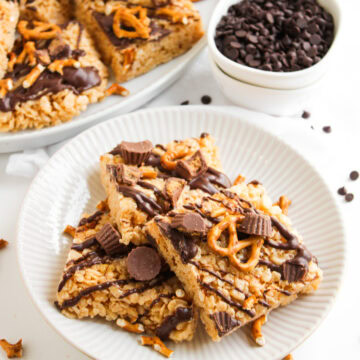
Craving a no-bake dessert packed with chocolate, peanut butter, and crunch? These Chocolate Peanut Butter Rice Krispie Treats are a fun twist on the classic, loaded with gooey marshmallows, pretzels, and mini Reese's for the ultimate sweet and salty combo!
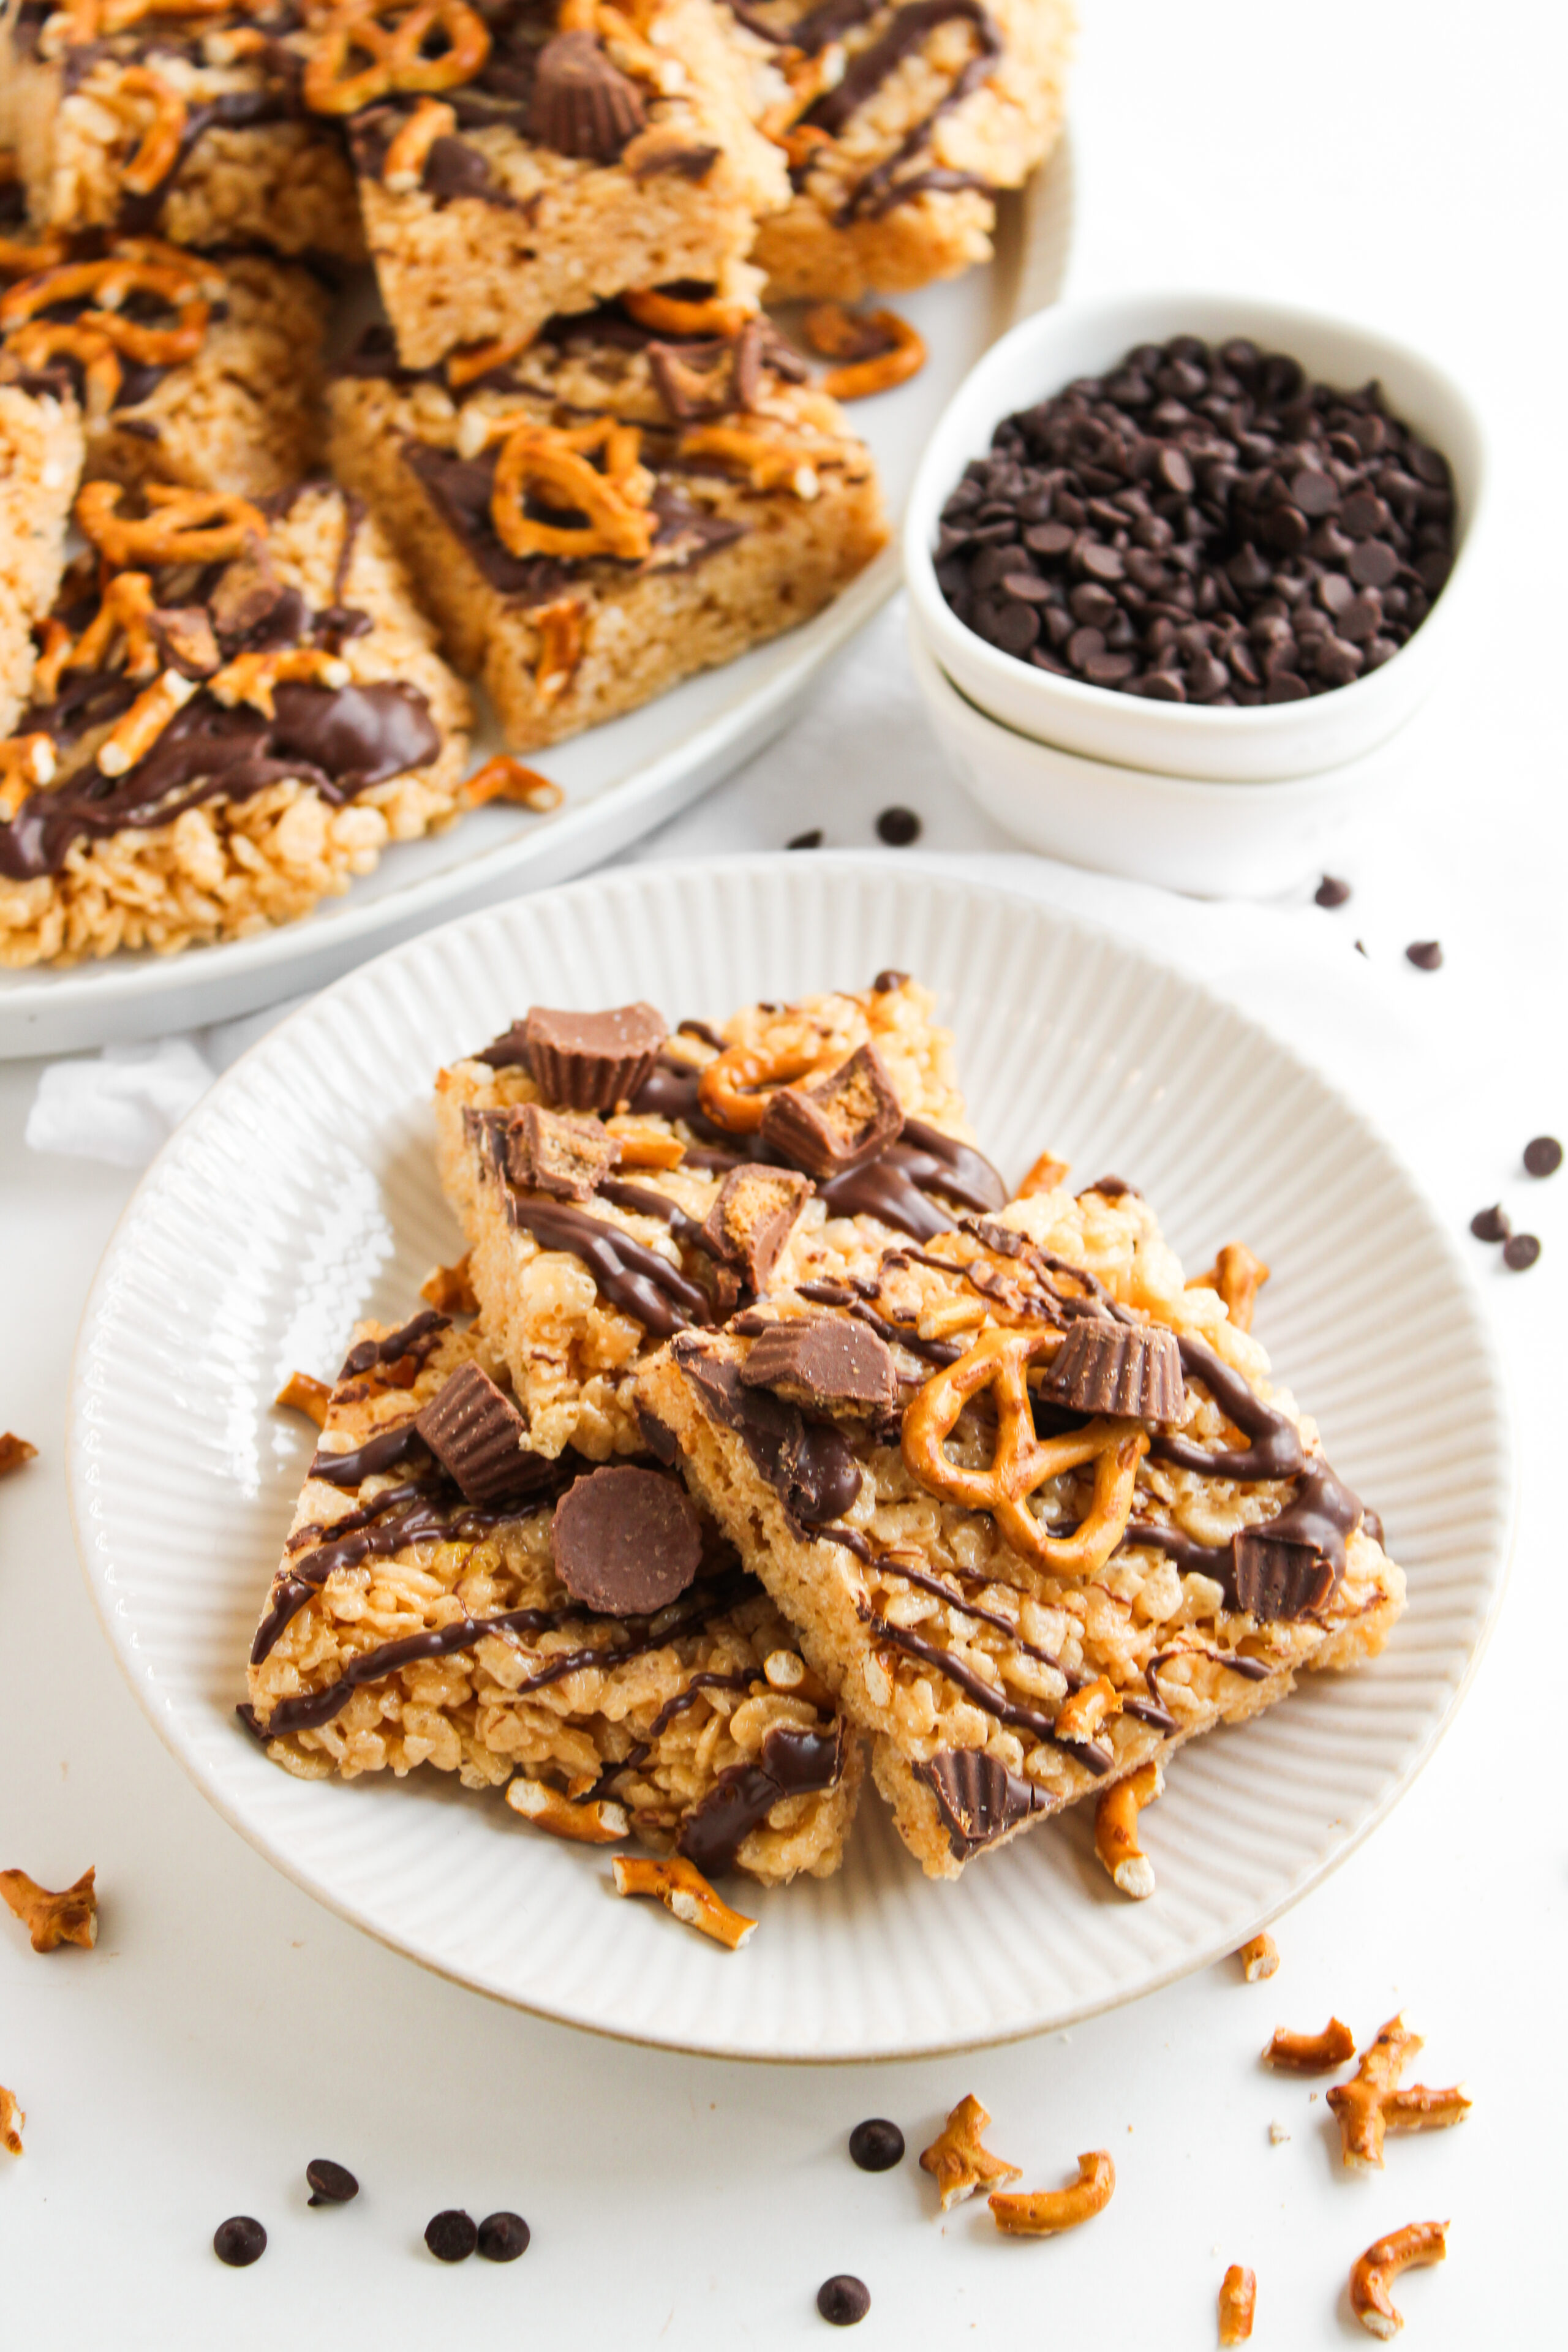
Whether you're making a quick lunchbox snack, a fun after-school treat, or an easy no bake dessert for a party, these peanut butter rice krispie bars are always a crowd-pleaser. And bonus? No oven required!
Love creative twists on classic homemade rice krispie treats? Be sure to check out my Oreo Rice Krispie Treats or Chocolate Peanut Butter Rice Krispie Cups!
Ingredient Notes
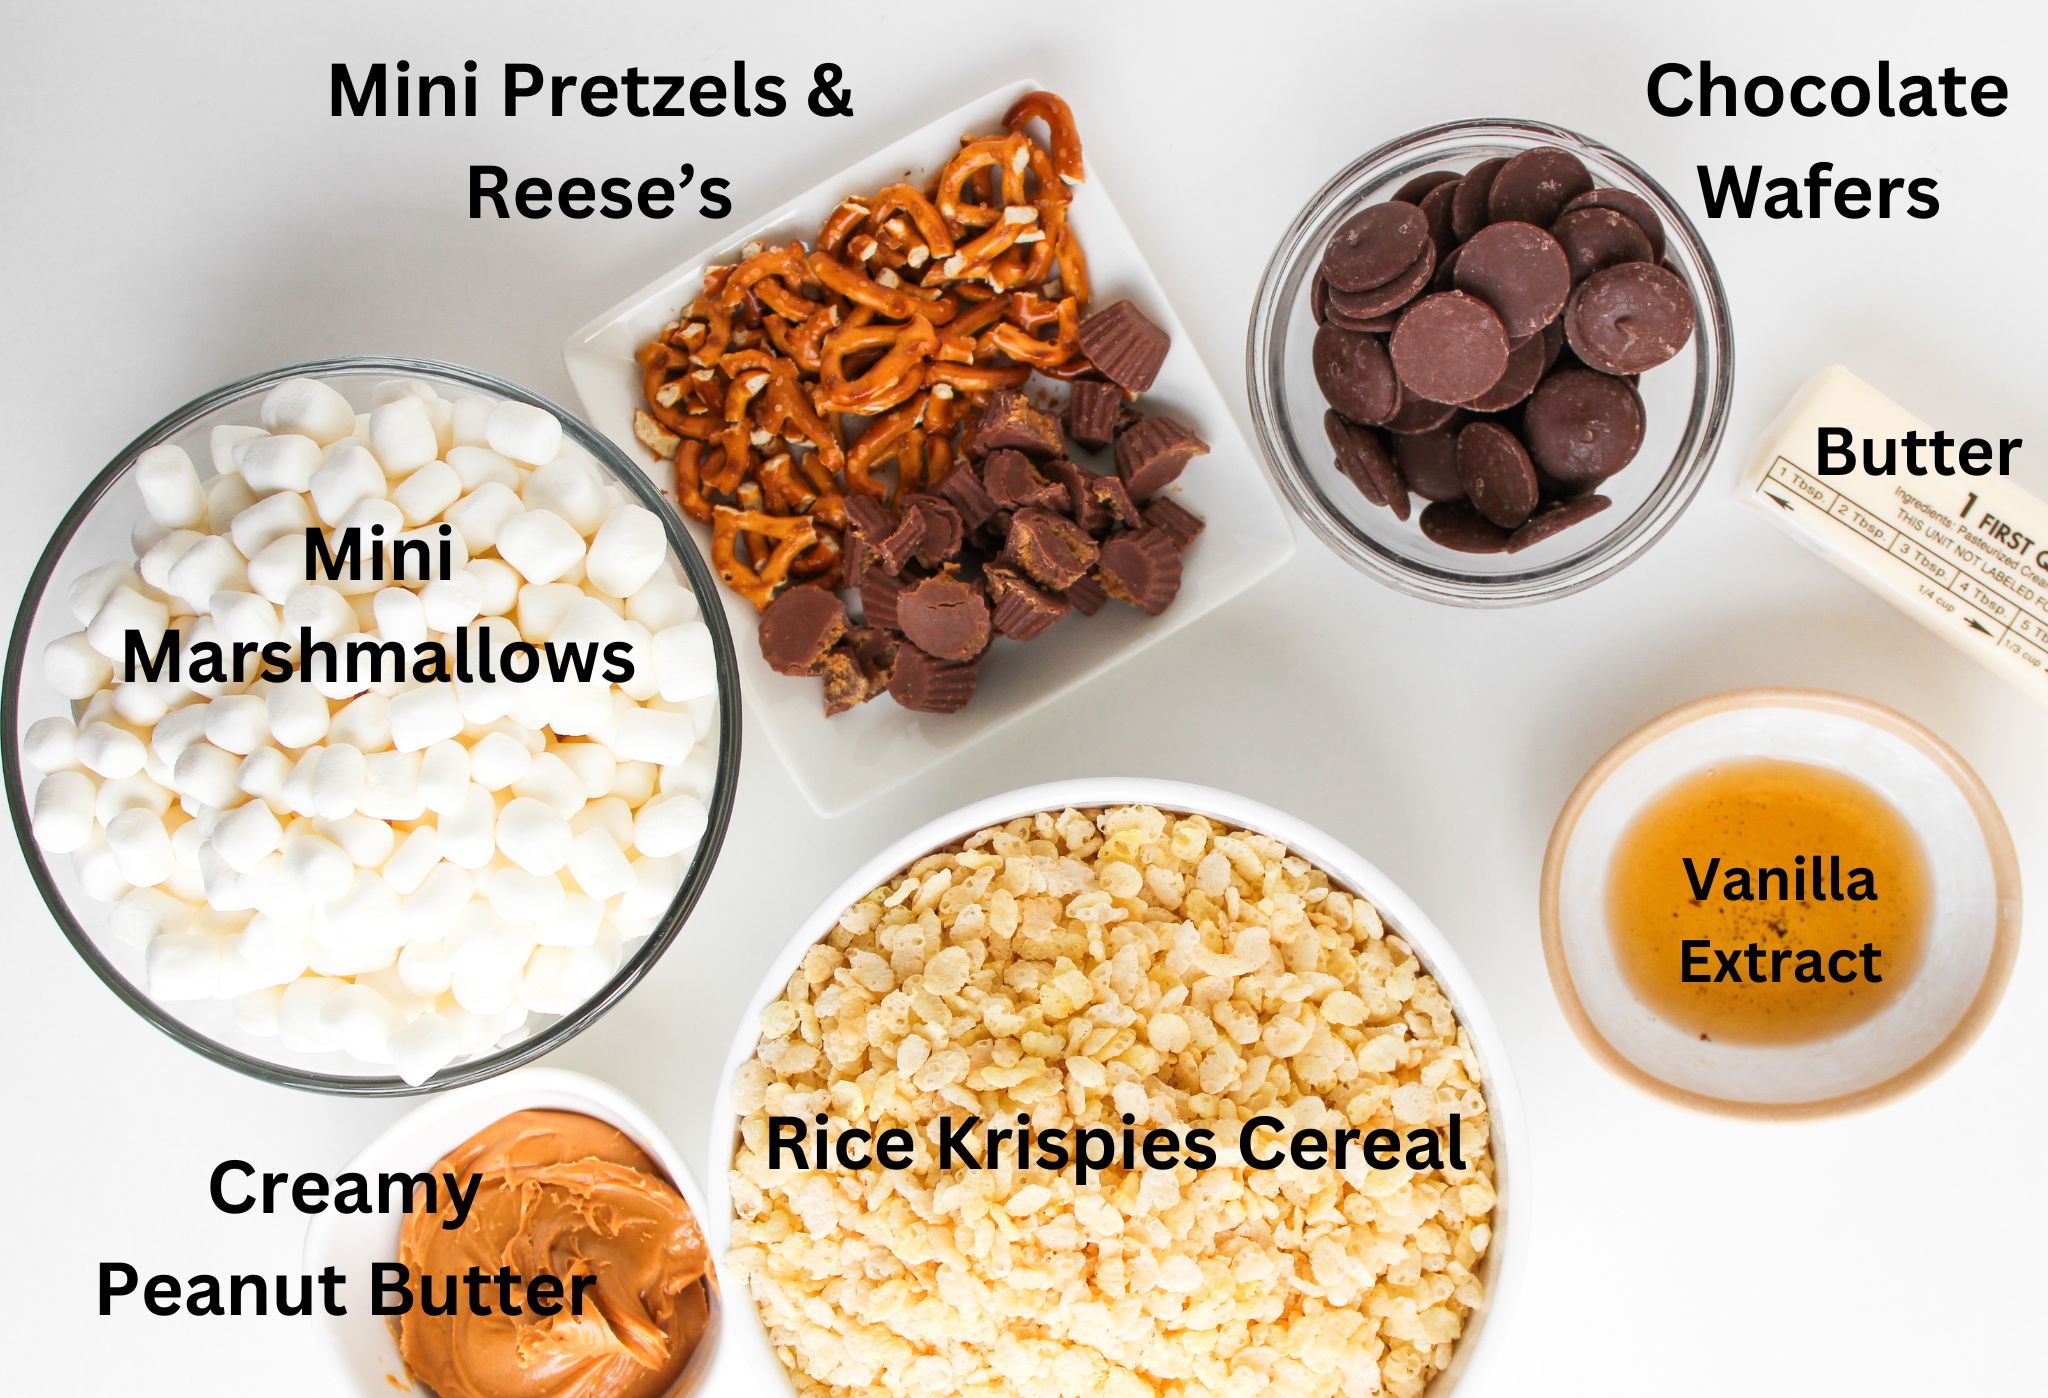
Here's what you'll need to make these chocolate peanut butter rice krispie treats (scroll down for the full printable recipe card):
- Butter– I use unsalted butter, but either will work!
- Mini Marshmallows– These melt more evenly and quickly than regular-sized ones.
- Peanut Butter– Creamy works best, but crunchy adds a fun texture if desired. Avoid natural peanut butter.
- Vanilla Extract– use pure vanilla extract versus imitation for most flavor addition.
- Rice Krispies Cereal– Name brand or store brand both work great. Cocoa Krispies are also a fun option!
- Mini Reese’s– Halved.
- Pretzels– Lightly crushed mini pretzel twists for that salty crunch.
- Chocolate– milk chocolate melting wafers or chocolate chips can be used.
How to make Chocolate Peanut Butter Rice Krispie Treats
Ready in just a few simple steps-these easy rice krispie treats come together quickly and taste like childhood all over again.
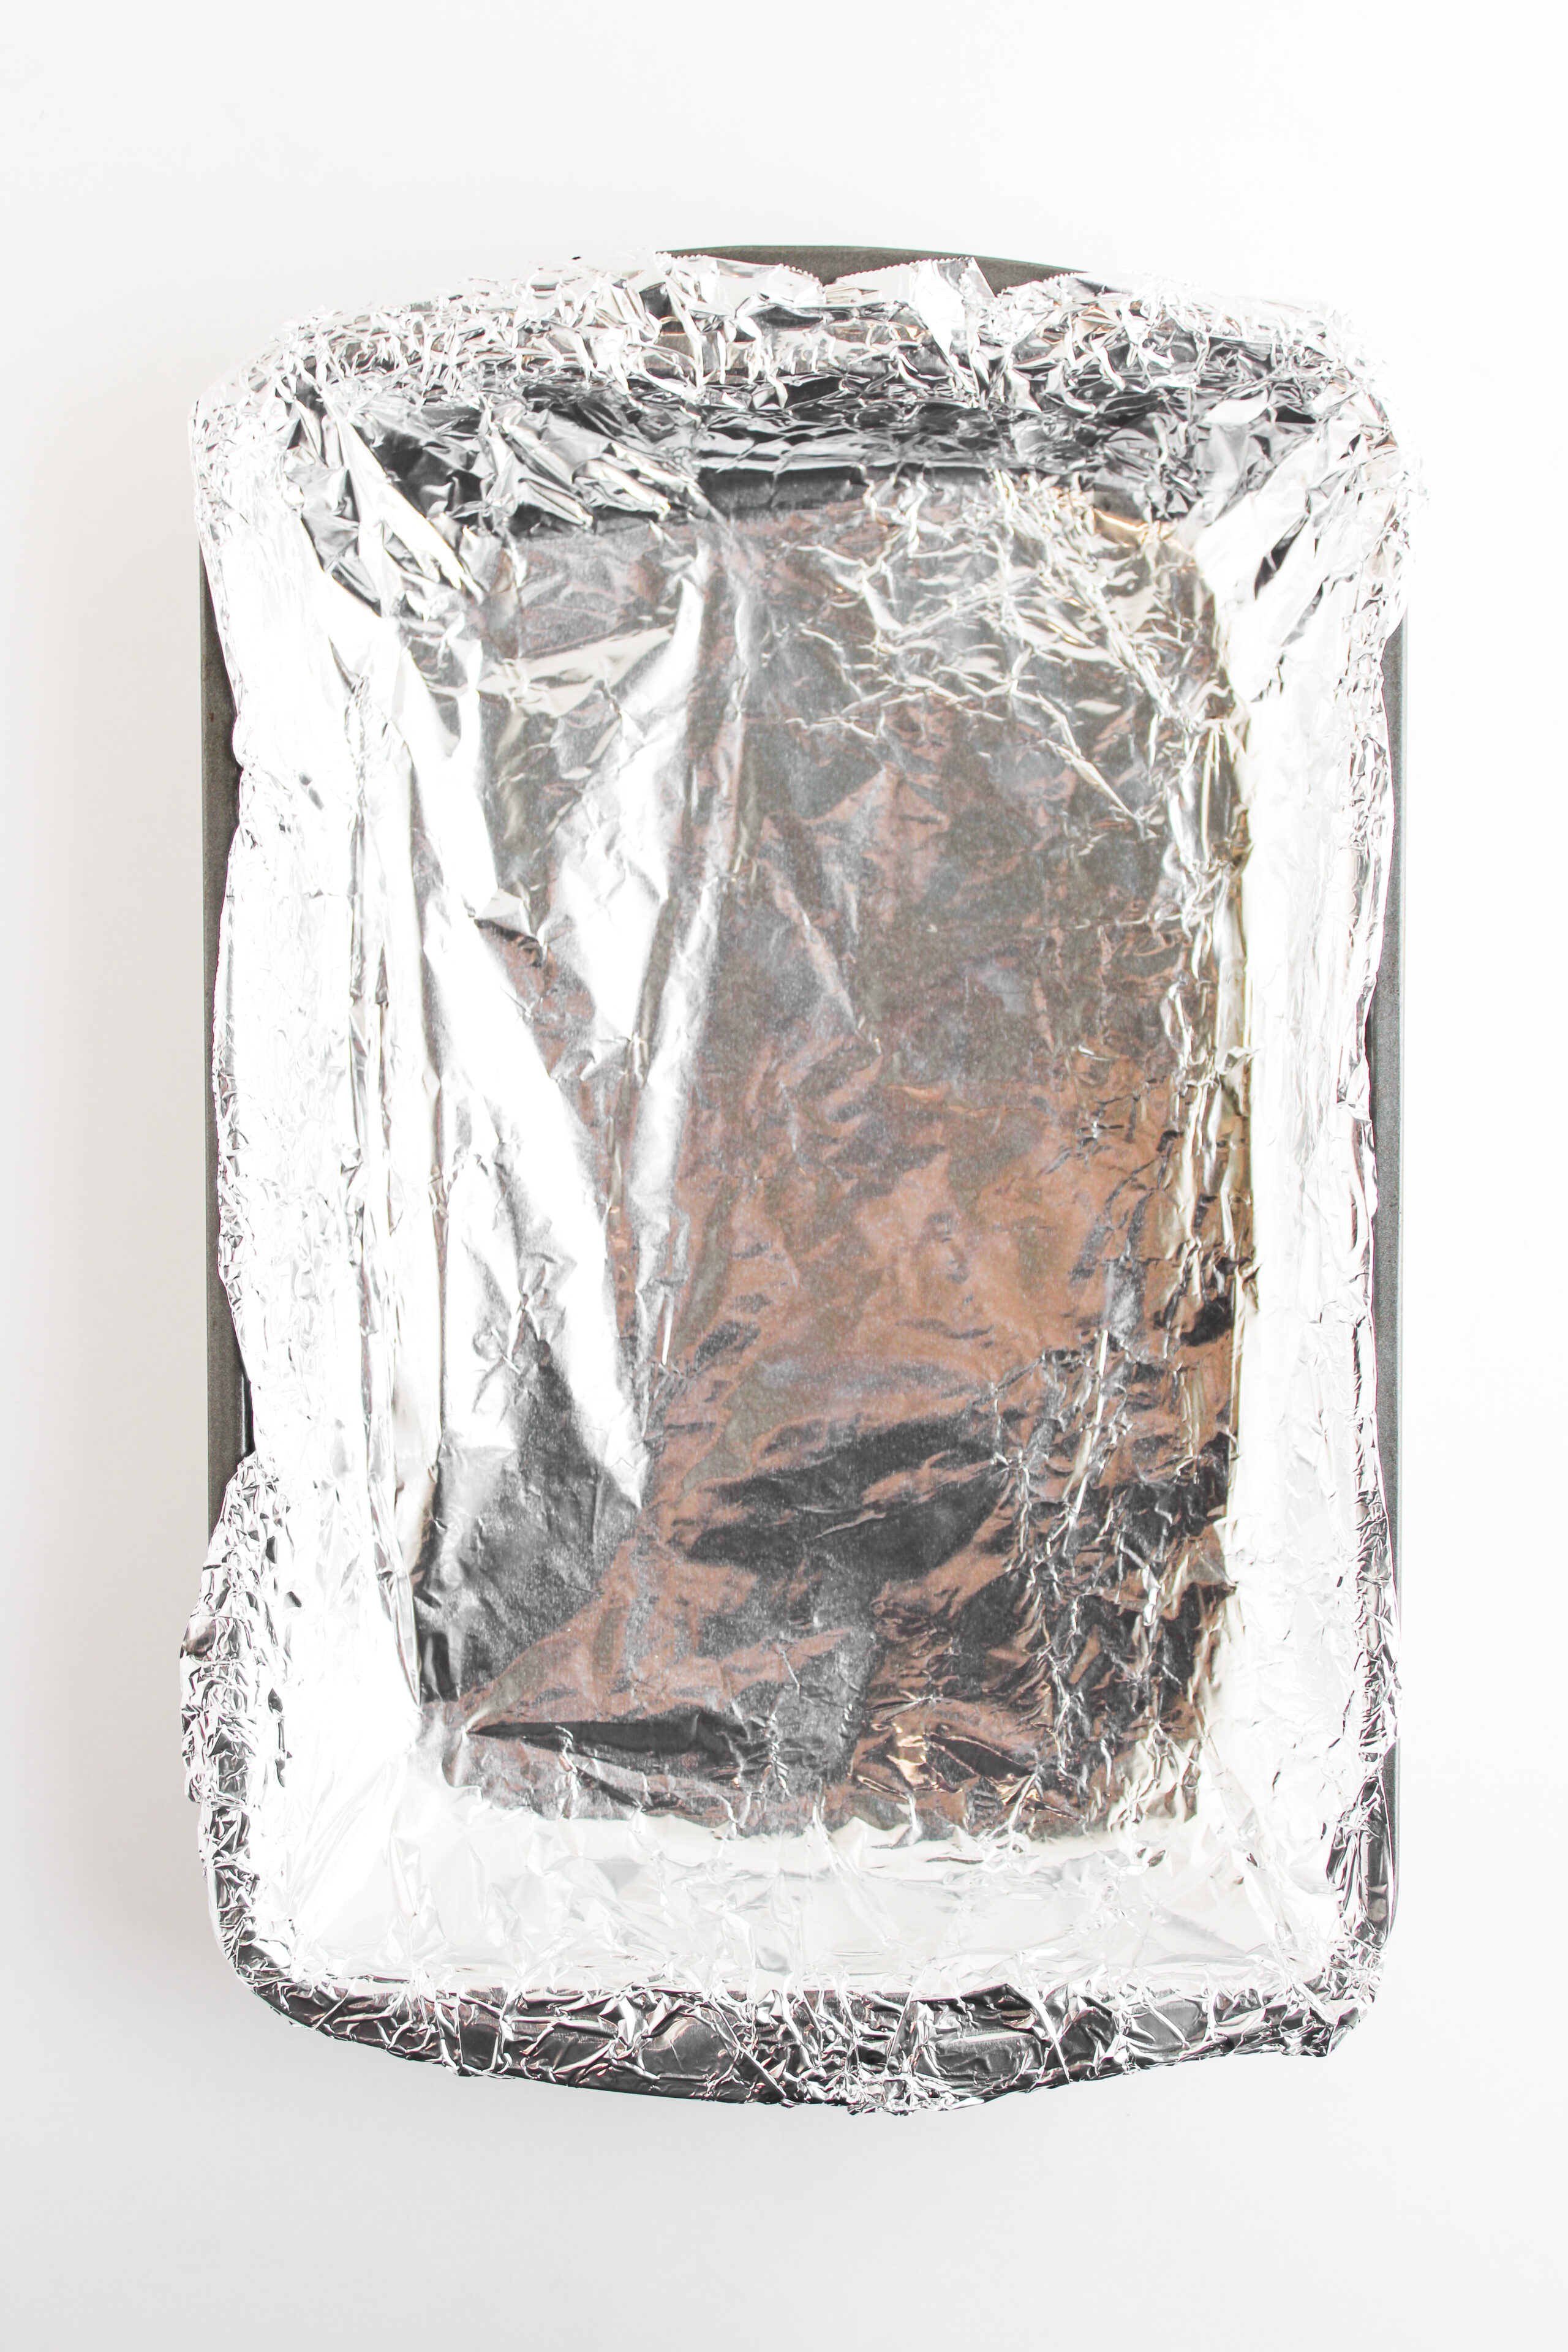
Prep the Pan: Line a 9×13-inch baking dish with parchment or foil and spray with nonstick spray.

Melt & Mix: In a large pot, melt butter over medium heat. Stir in peanut butter and vanilla until smooth. Add marshmallows and stir until melted.
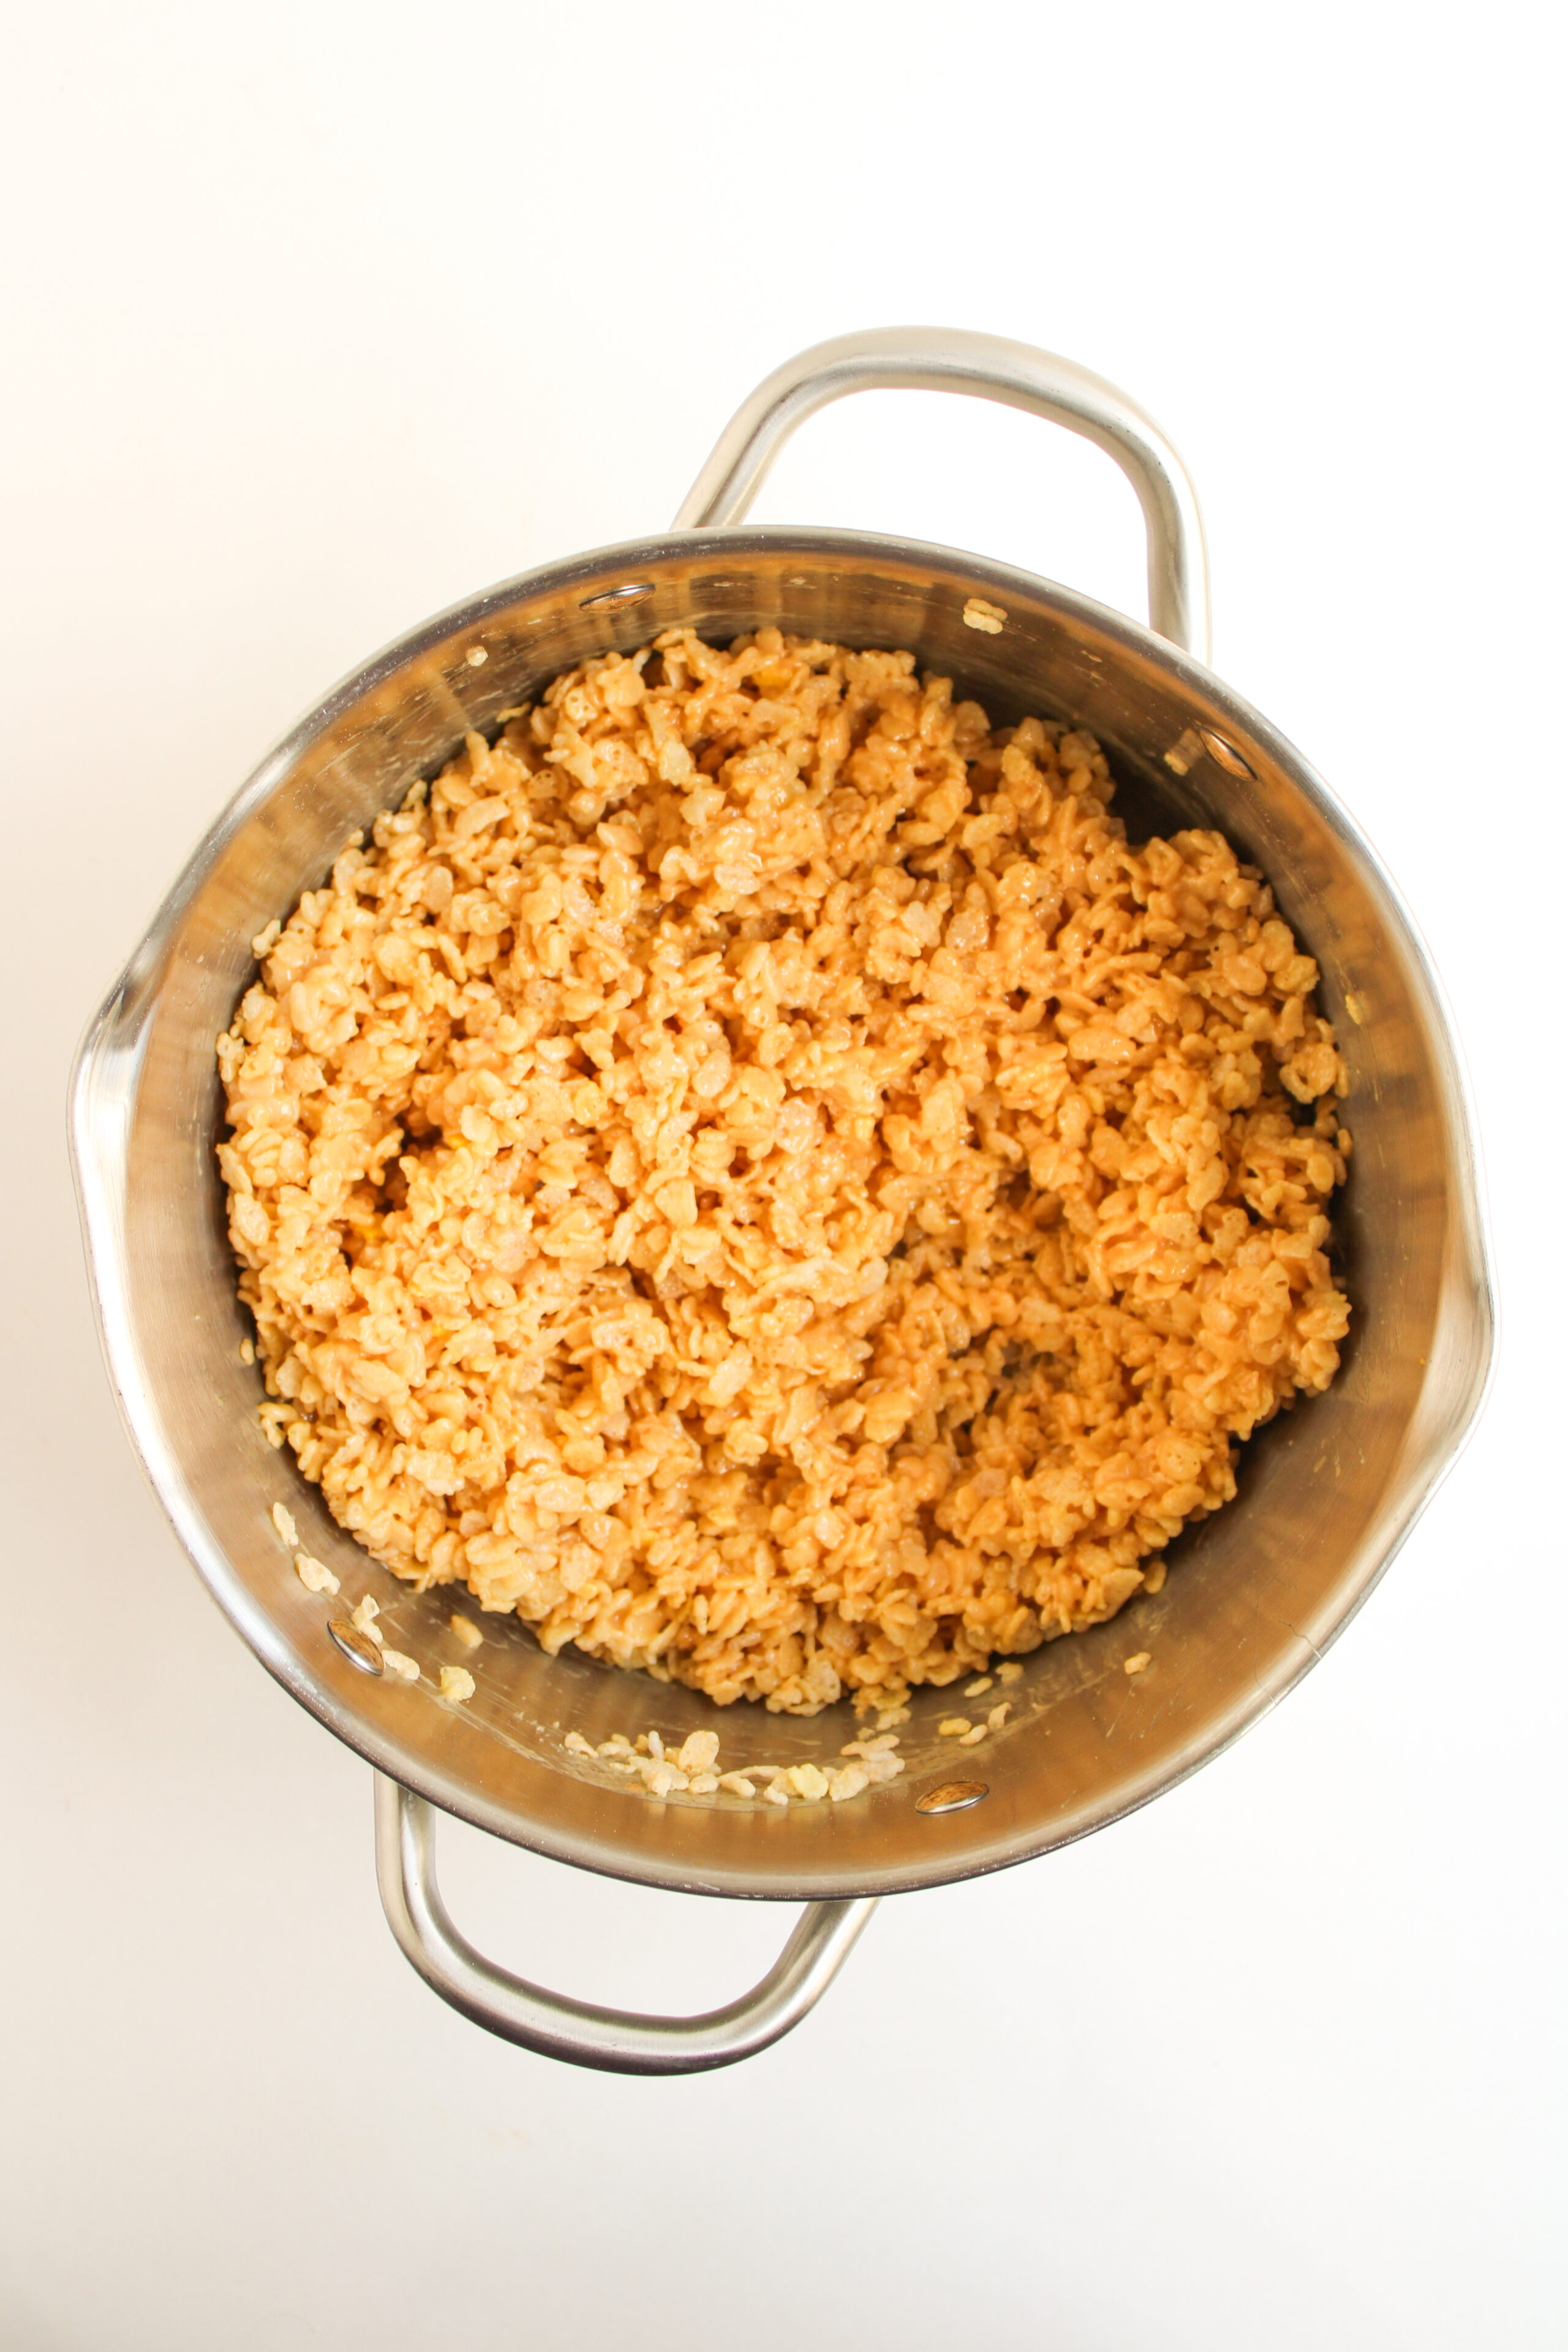
Add the Cereal: Remove from heat and fold in the Rice Krispies until fully coated.
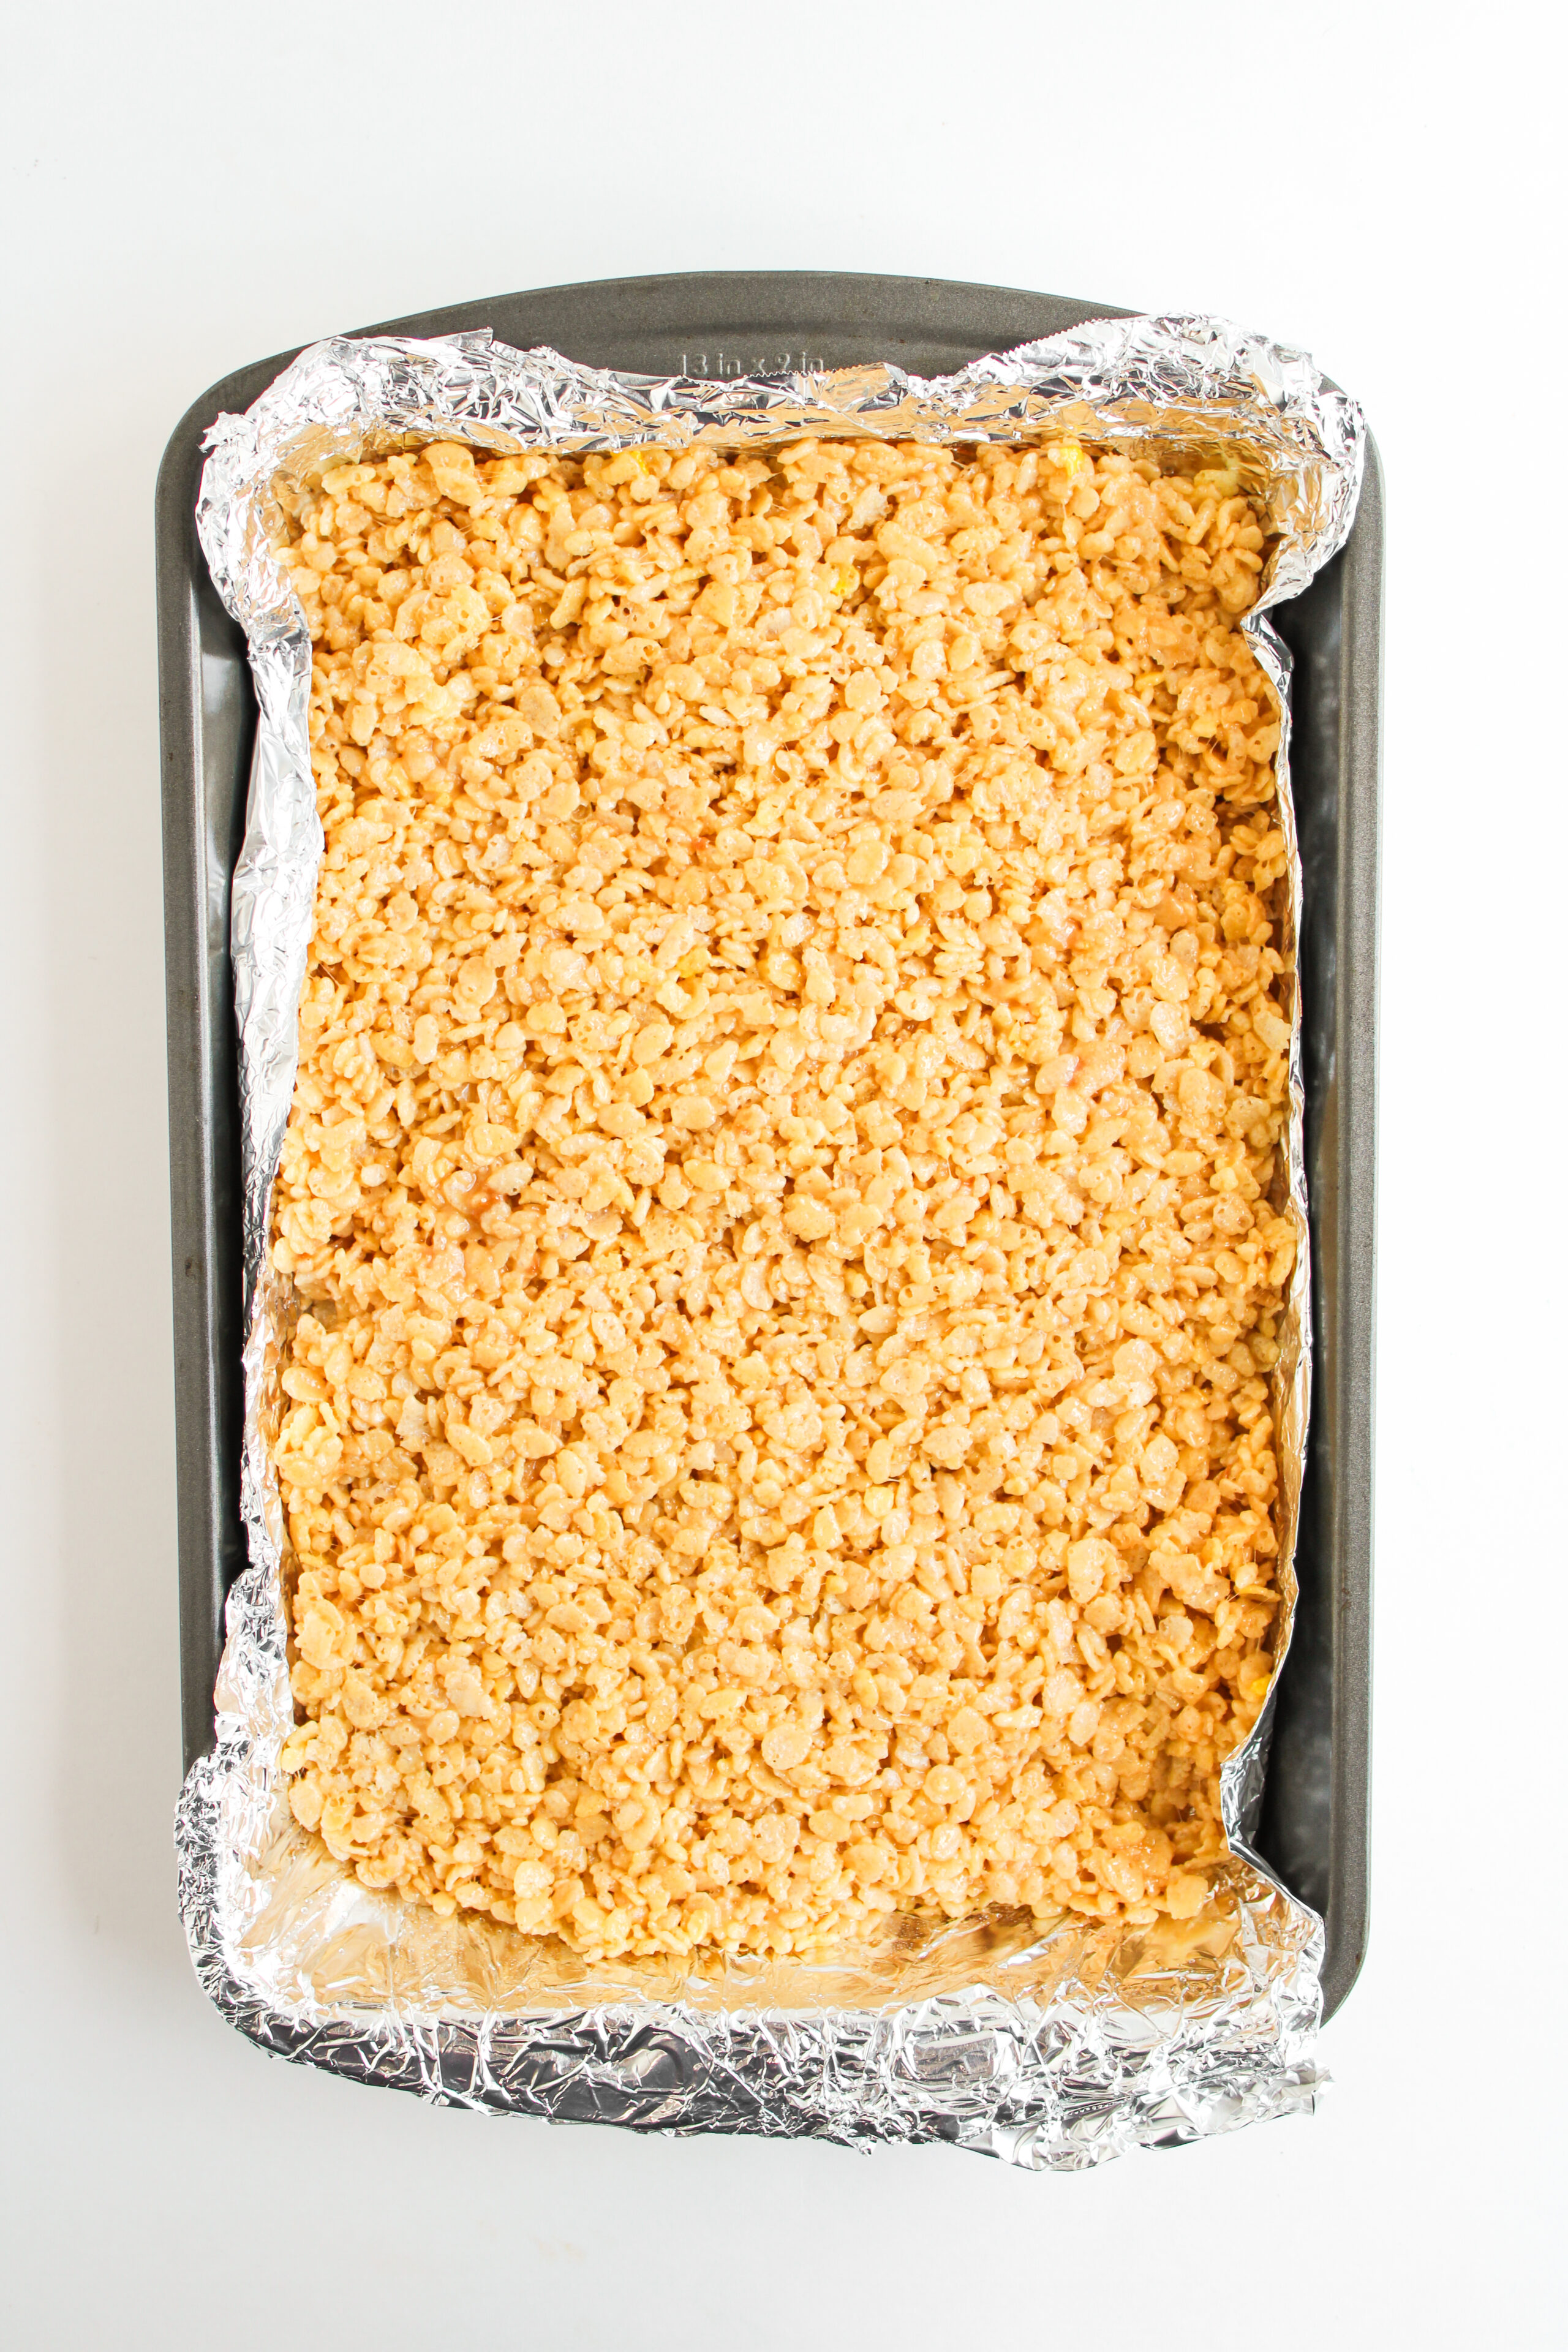
Press into Pan: Gently press mixture into prepared dish using a spatula or greased hands.
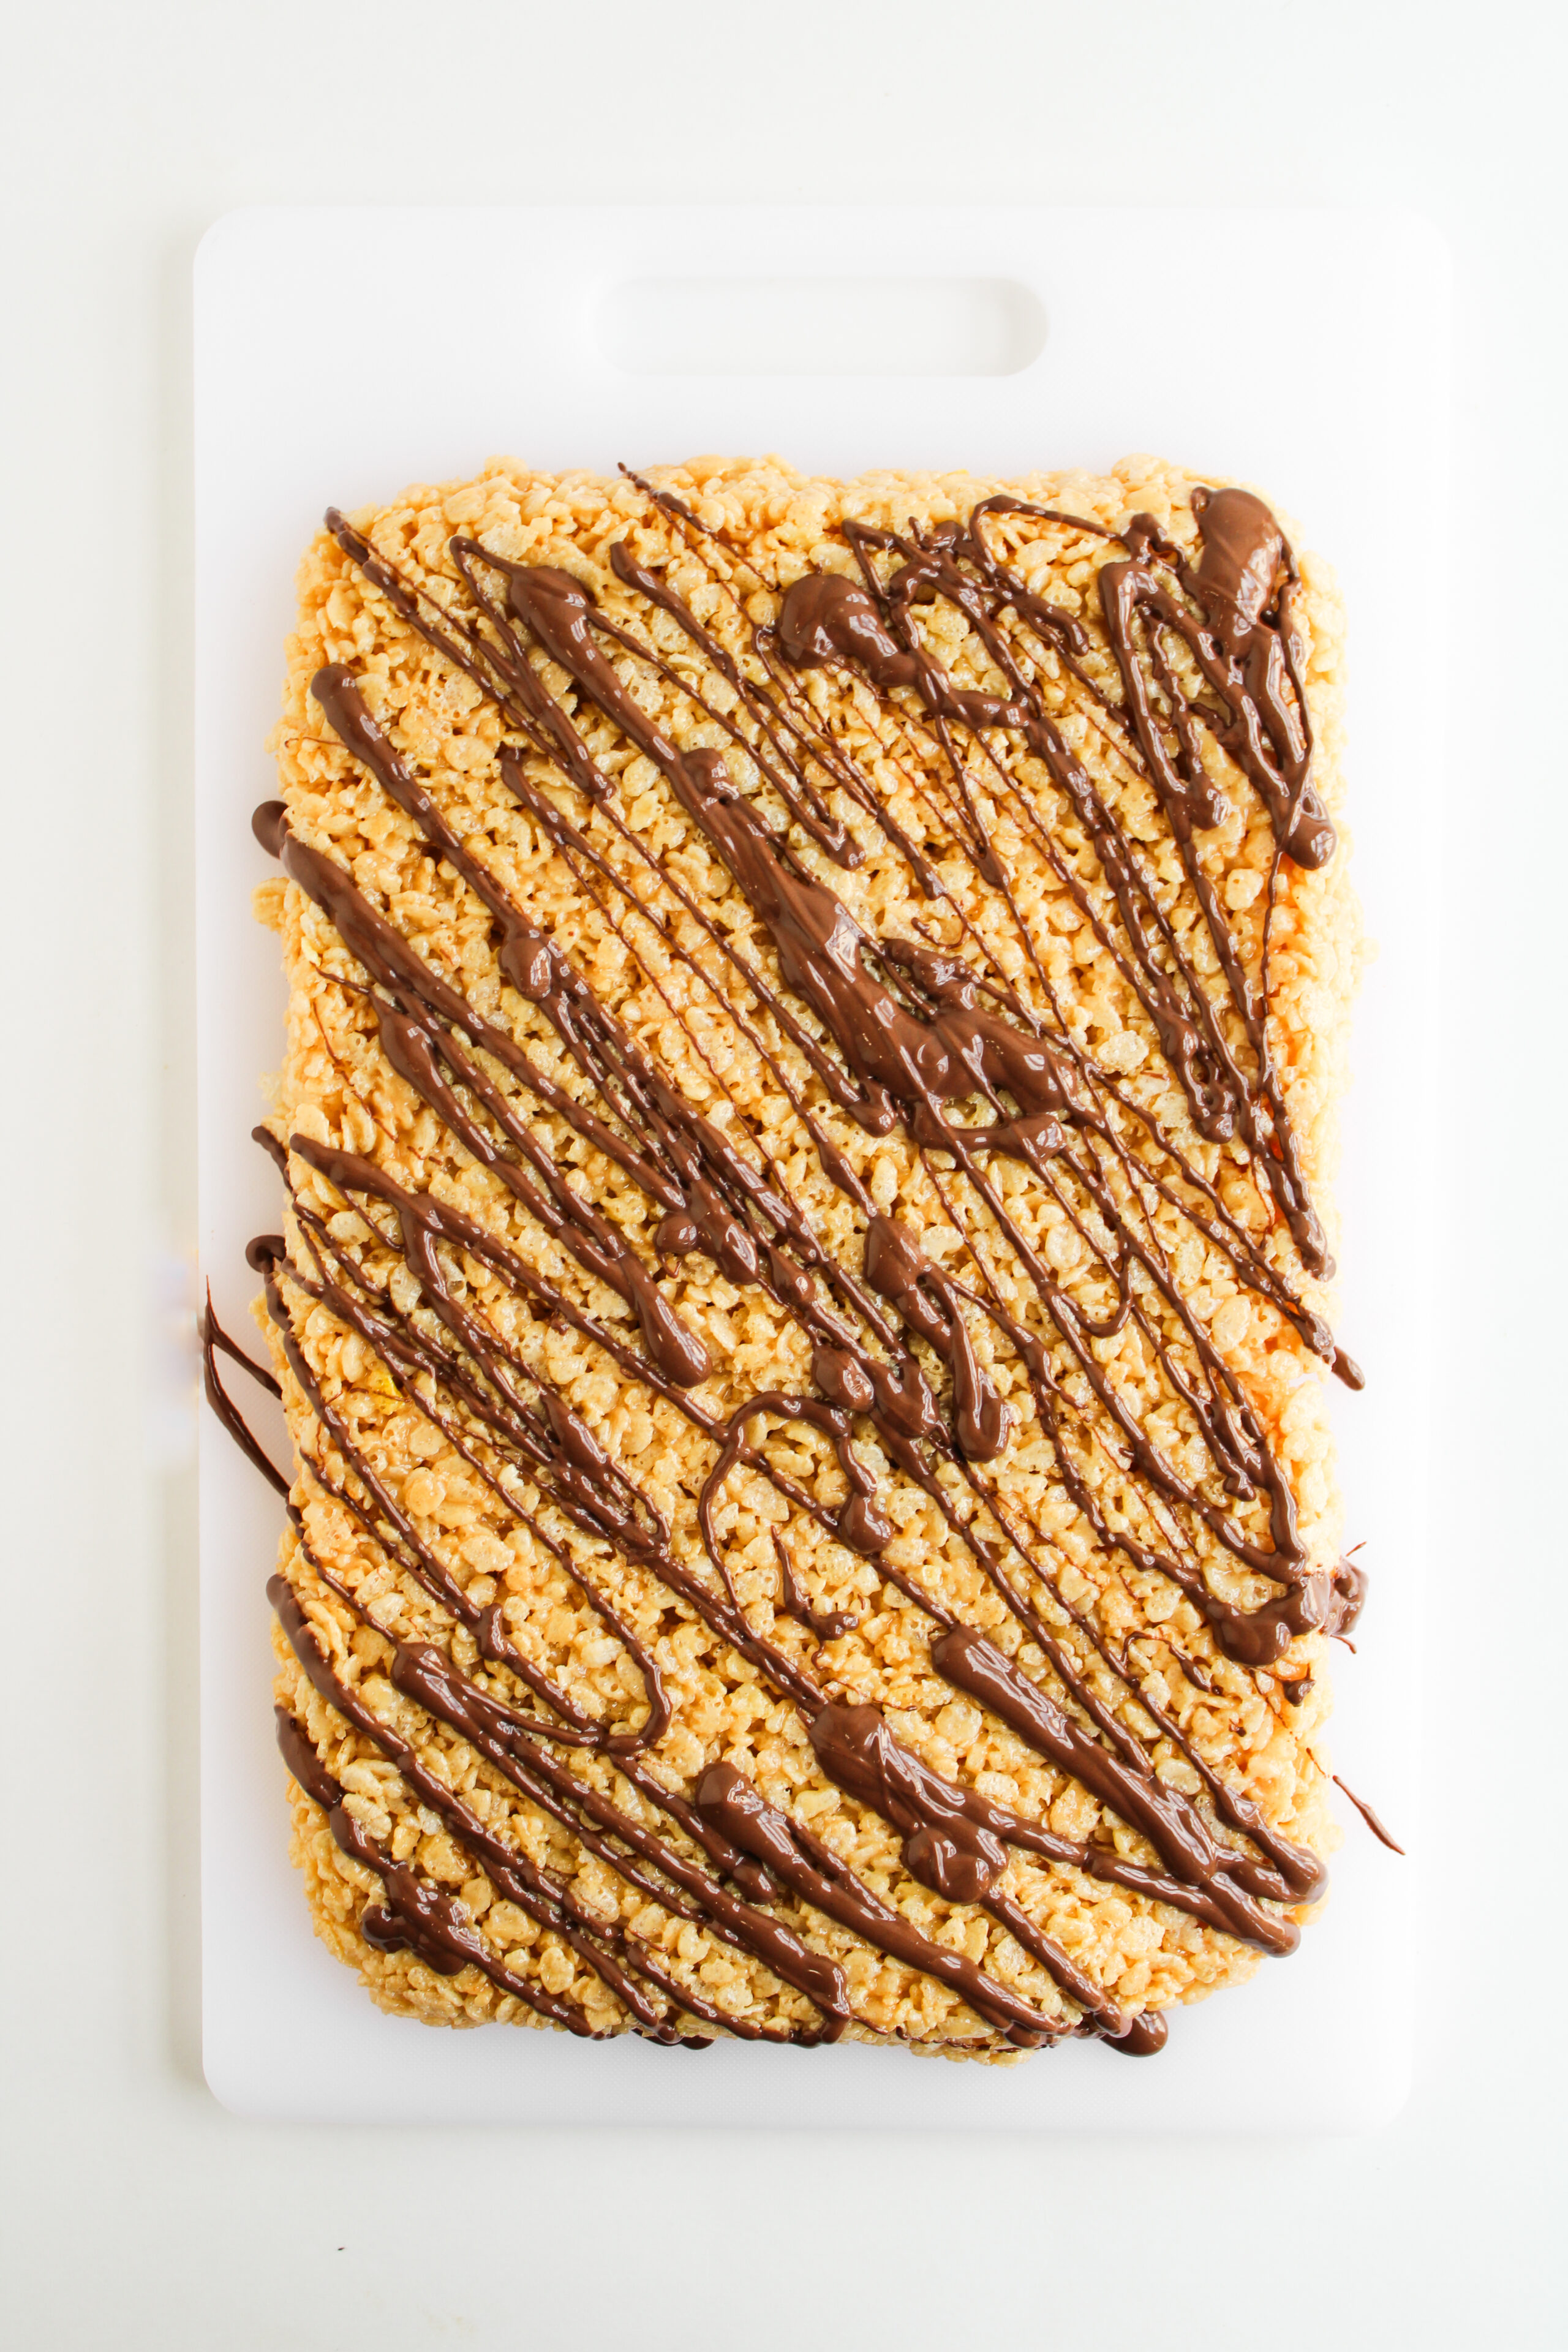
Cool & Top: Let cool for 20-30 minutes. Melt chocolate in 30-second intervals, then drizzle over the bars.

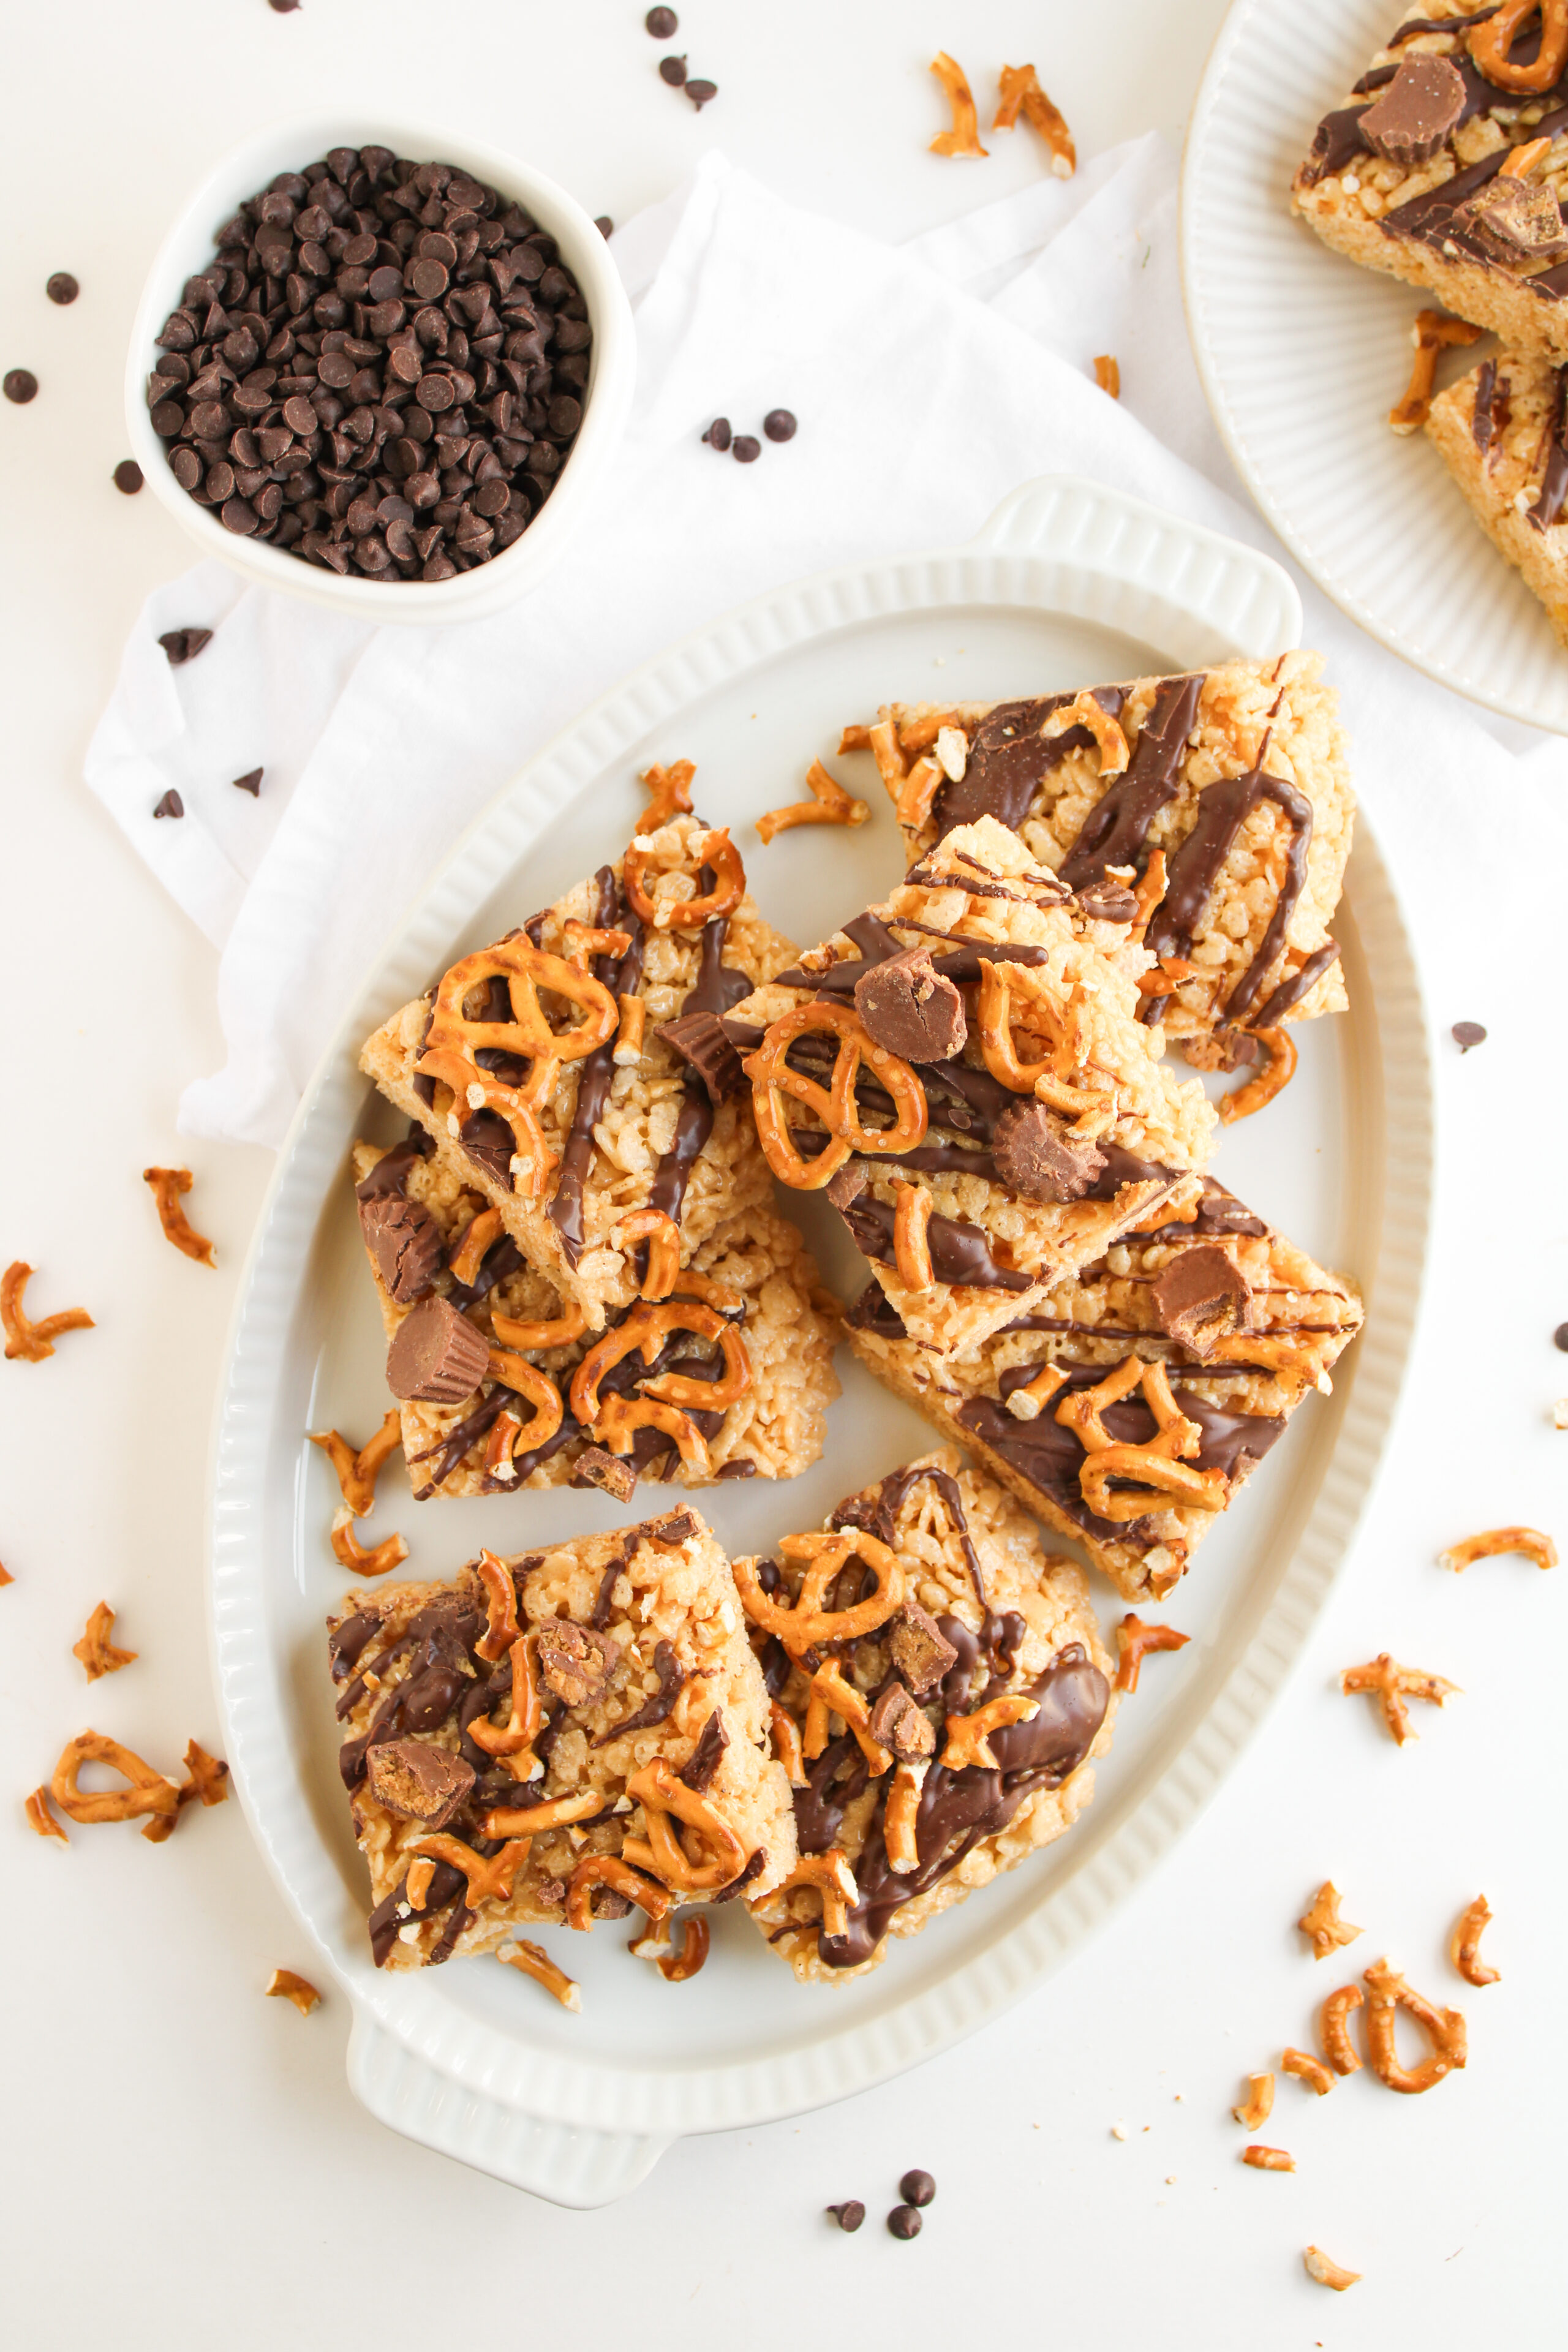
Add Toppings: Sprinkle with halved Reese's and crushed pretzels. Let chocolate set fully before cutting into squares or bars. Enjoy!
Storage
These chocolate peanut butter rice krispie treats keep well for quick snacks or make-ahead desserts. Here's how to store them for best results:
- Room Temperature– Store in an airtight container for up to 1 week. Perfect for a kid-friendly lunchbox snack or grab-and-go treat.
- Freezer– Cut into bars and freeze in a single layer using parchment paper between. Great for meal prepping no bake desserts!
- Avoid the fridge- They’ll harden and lose their chewy texture.

Tips for the best Peanut Butter Rice Krispie Bars
A few mom-approved tricks I've learned over the years:
- For easier cleanup, spray your hands or spatula with cooking spray before pressing the mixture into the pan to avoid sticky fingers.
- Be sure to PRESS SOFTLY when you add the mixture to the pan. The harder you press, the denser and firmer the bars will set.
- Feel free to use a different type of cereal to change it up. Cocoa puffs, cheerios, cocoa pebbles, cocoa krispies, etc. all work great.
- You can swap in dark chocolate or add flaky sea salt on top for a little extra flair.
- Skip natural peanut butter. The oil separation will ruin the texture.
Frequently Asked Questions
This usually happens from overheating the marshmallows or pressing the mixture too firmly into the pan. Melt low and slow, and pat gently for best texture.
Pop them in an airtight container with a slice of bread for a few hours or microwave for 10-15 seconds to soften.
These treats are quite sticky, however, you can minimize this by spraying the baking pan generously with cooking spray before adding in mixture. You can also spray your hands with cooking spray as you are pressing the mixture into the pan.
Rice Krispie Treats are a nostalgic recipe that brings all the childhood memories in every bite. If you’re looking for more options, you can make classic Rice Krispies Treats, Patriotic Rice Krispie Stars, Chocolate Peanut Butter Rice Krispie Cups, or Oreo Rice Krispie Treats!
Yes! Just use certified gluten-free pretzels and cereal.
You sure can! Use about 15 oz of marshmallow fluff in place of the 10 oz mini marshmallows.
More No Bake Dessert Recipes

Tried these Chocolate Peanut Butter Rice Krispie Treats? Comment, rate, pin, and save this easy no bake dessert for next time!
Want to save this recipe?
Enter your email & I’ll send it to your inbox. Plus, get great new recipes from me every week!
Chocolate Peanut Butter Rice Krispie Treats Recipe
Equipment
Ingredients
- 1 cup butter
- 10 oz mini marshmallows
- ¼ cup creamy peanut butter
- 1 teaspoon vanilla extract
- 6 cups Rice Krispies cereal
- 1 cup mini Reese's halved
- 1 cup mini pretzels crushed
- ½ cup milk chocolate chips or melting wafers
Instructions
- Line a 9×13 baking dish with aluminum foil or parchment paper for easy removal. Spray foil with nonstick spray for best results.
- In a large pot over medium heat, melt the butter. Stir in the creamy peanut butter and vanilla extract, stirring until smooth and combined.
- Add in the mini marshmallows and stir frequently until melted. Remove from heat.
- Fold in the rice krispy cereal and stir until combined.
- Scoop the mixture into the prepared pan and press down gently in an even layer. Allow treats to cool at room temperature until set, about 20 minutes.
- Once fully cooled, lift the mixture out of the pan using the foil or parchment paper and transfer to a cutting board.
- Melt the chocolate wafers or chips in a microwave safe bowl in 30-second increments, stirring in between until smooth and melted.
- Drizzle melted chocolate on top of the rice krispie bars, followed by the halved Reese's and crushed pretzels.
- Allow chocolate to set completely before cutting into squares or bars. Serve and enjoy!
Notes
- Room Temperature- Store in an airtight container for up to 1 week. Perfect for a kid-friendly lunchbox snack or grab-and-go treat.
- Freezer- Cut into bars and freeze in a single layer using parchment paper between. Great for meal prepping no bake desserts!
- Avoid the fridge- They'll harden and lose their chewy texture.
- For easier cleanup, spray your hands or spatula with cooking spray before pressing the mixture into the pan to avoid sticky fingers.
- Be sure to PRESS SOFTLY when you add the mixture to the pan. The harder you press, the denser and firmer the bars will set.
- Feel free to use a different type of cereal to change it up. Cocoa puffs, cheerios, cocoa pebbles, cocoa krispies, etc. all work great.
- You can swap in dark chocolate or add flaky sea salt on top for a little extra flair.
- Skip natural peanut butter. The oil separation will ruin the texture.

Angela says
This rice krispie recipe turned out amazing! It was easy to prepare and the family loved it!!
Kristin says
So glad you enjoyed!!
Paula says
I have always thought plain rice krispies were kind of boring, but you solved that! You took them to the next level and made them AMAZING with the addition of chocolate & peanut butter! Loved this recipe!
Kristin says
Yay!! Such a yummy salty sweet combination of flavors!!
Katie Crenshaw says
Rice crispy treats never tasted so good. I love the crunchy texture of the pretzels. Adding chocolate and peanut butter is brilliant.
Kristin says
Soooo yummy!!! Glad you enjoyed!
Azlin says
This was a huge hit with all the kids we had around yesterday. So easy too, thank you!
Kristin says
Love hearing this! Glad you enjoyed!
Kimberly Watkins says
I was looking for a quick sweet treat to make for dessert tonight and realized I had everything already on hand. Made these and they satisfied my sweet tooth perfectly! Thanks!
Kristin says
Yay!! The best sweet treat with that craving hits!
Maria says
I love the combination of sweet and salty flavors here. Great take on a classic!
Kristin says
Isn’t it the best?? Glad you enjoyed too!!
Beth says
By far the best Rice Krispies treat I’ve ever eaten. Base Rice Krispies treats are already great, but adding in all of this? Om nom nom.
Kristin says
Yay! Glad you enjoyed!!